Delphi結合簡易PHP路徑規劃

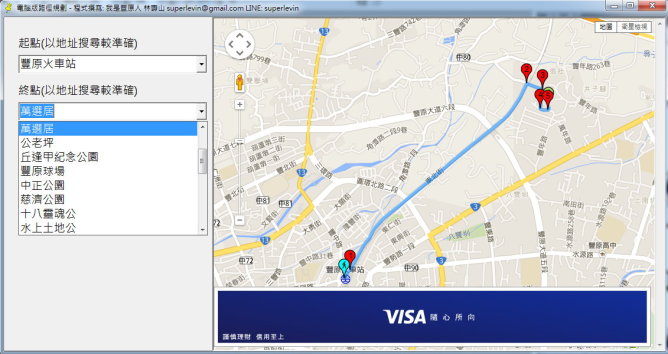
延續上一篇的文章,如何透過Delphi傳遞起訖點就能幫助做路徑規劃呢?透過Delphi的WebBrowser元件搭配遠端的PHP,傳遞參數可以做得到!

PHP的部份,我們主要是要傳遞FROM以及TO二個參數(以下不做解釋XD)
[php]
<!DOCTYPE html>
<html>
<head>
<meta name="viewport" content="initial-scale=1.0, user-scalable=no">
<meta charset="utf-8">
<title>路徑規劃</title>
<style>
html, body, #map-canvas {
height: 100%;
margin: 0px;
padding: 0px
}
</style>
<script src="https://maps.googleapis.com/maps/api/js?v=3.exp"></script>
<script>
var directionsDisplay;
var directionsService = new google.maps.DirectionsService();
var map;
var stepDisplay;
var markerArray = [];

function initialize() {
var rendererOptions = {
map: map,
suppressMarkers : true
}
directionsDisplay = new google.maps.DirectionsRenderer(rendererOptions);
var fengyuan = new google.maps.LatLng(24.253706601916402, 120.72275021093753);
var mapOptions = {
zoom:17,
center: fengyuan
};
map = new google.maps.Map(document.getElementById(‘map-canvas’), mapOptions);
directionsDisplay.setMap(map);
stepDisplay = new google.maps.InfoWindow();
calcRoute();
}

function calcRoute() {
for (i = 0; i < markerArray.length; i++) {
markerArray[i].setMap(null);
}
markerArray = [];
var start = <?php echo ‘"’.($_GET["FROM"]).’"’; ?>;
var end = <?php echo ‘"’.($_GET["TO"]).’"’; ?>;
var request = {
origin:start,
destination:end,
travelMode: google.maps.TravelMode.WALKING
};
directionsService.route(request, function(response, status) {
if (status == google.maps.DirectionsStatus.OK) {
directionsDisplay.setDirections(response);
showSteps(response);
}
});
}
function showSteps(directionResult) {
var myRoute = directionResult.routes[0].legs[0];
for (var i = 0; i < myRoute.steps.length; i++) {
var icon = "https://chart.googleapis.com/chart?chst=d_map_pin_letter&chld=" + i + "|FF0000|000000";
if (i == 0) {
icon = "https://chart.googleapis.com/chart?chst=d_map_xpin_icon&chld=pin|glyphish_walk|00FFFF|FF0000";
}
var marker = new google.maps.Marker({
position: myRoute.steps[i].start_point,
map: map,
icon: icon
});
attachInstructionText(marker,myRoute.steps[i].instructions);
markerArray.push(marker);
}

var marker = new google.maps.Marker({
position: myRoute.steps[i – 1].end_point,
map: map,
icon: "https://chart.googleapis.com/chart?chst=d_map_xpin_icon&chld=pin|glyphish_walk|ADDE63"
});
markerArray.push(marker);
}
function attachInstructionText(marker, text) {
google.maps.event.addListener(marker, ‘click’, function() {
stepDisplay.setContent(text);
stepDisplay.open(map, marker);
});
}
google.maps.event.addDomListener(window, ‘load’, initialize);
</script>
</head>
<body>
<div id="map-canvas"></div>
</body>
</html>
[/php]


DELPHI的部份,因為D7的URLENCODE有問題,所以我們另尋了一個解決的部份(見延伸閱讀)
[pas]
function HTTPEncode(const AStr: String): String;
const
NoConversion = [‘A’..’Z’,’a’..’z’,’*’,’@’,’.’,’_’,’-‘,’0′..’9′,’$’,’!’,””,'(‘,’)’];
var
Sp, Rp: PAnsiChar;
begin
SetLength(Result, Length(AStr) * 3);
Sp:= PAnsiChar(AStr);
Rp:= PAnsiChar(Result);
while Sp^ <> #0 do
begin
if Sp^ in NoConversion then
Rp^ := Sp^
else
if Sp^ = ‘ ‘ then
Rp^ := ‘+’
else
begin
FormatBuf(Rp^, 3, ‘%%%.2x’, 6, [Ord(Sp^)]);
Inc(Rp,2);
end;
Inc(Rp);
Inc(Sp);
end;
SetLength(Result, Rp – PAnsiChar(Result));
end;
function URLEncode(const Url: String): String;
begin
Result:= HttpEncode(UTF8Encode(Url));
end;
[/pas]
最後在畫面上佈置出二個Edit以及一個Button,以及WebBrowser。程式很簡單
[pas]
procedure TForm1.Button1Click(Sender: TObject);
var
str:WideString;
begin
str := ‘http://你的php位置?FROM=’+URLEncode(edit1.text)+’&TO=’+URLEncode(edit2.text);
self.WebBrowser1.Navigate(str);
end;
[/pas]

延伸閱讀:
Delphi URLEncode問題解決
http://alexey-m.ru/articles/urlencode-utf-8-windows1251
Delphi 7 從健保局下載zip檔案順便解壓縮

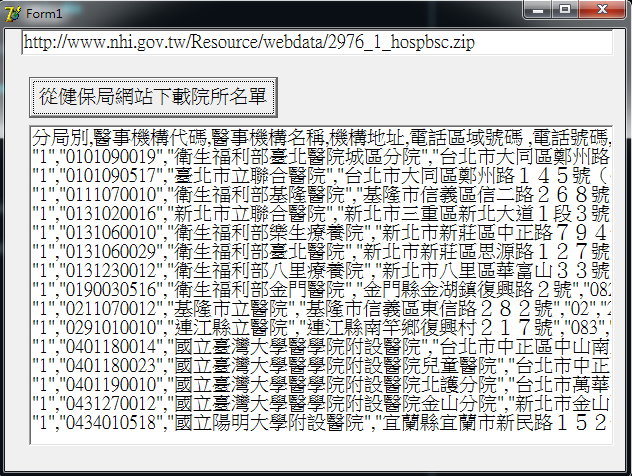
由於學校還使用Delphi 7,為了要教同學從網路上下載檔案加上解壓縮費了不少力氣。順便就記錄一下如何從健保局抓下檔案後,然後一道解壓縮。

1.Delphi7沒有壓縮元件,所以要尋求免費的資源。幸好有Opensource的Delphi 7zip元件
網址:https://code.google.com/p/d7zip/
下載之後解壓縮會有三個檔案
7z.dll
readme.html
sevenzip.pas

2.把7z.dll跟sevenzip.pas放到程式目錄下(散佈程式時記得.exe檔跟7z.dll要一起copy)。
3.回到Delphi7的Project→add to project把sevenzip.pas加進專案
4.File→Use Unit選Sevenzip.pas後就可以開始寫code了
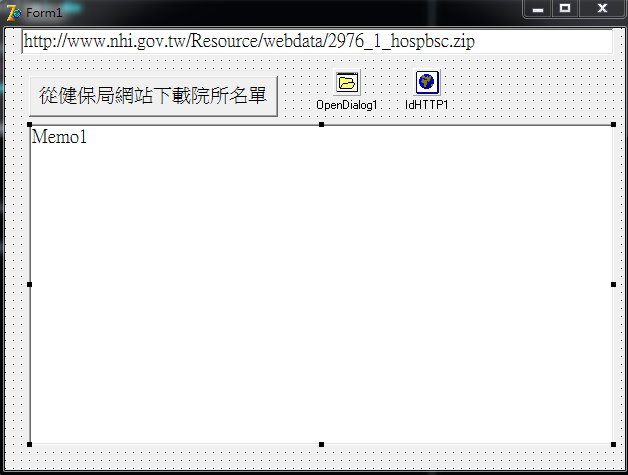
5.畫面上佈置如下圖
(text設為http://www.nhi.gov.tw/Resource/webdata/2976_1_hospbsc.zip)
delphi7zip02
6.ButtonClick程式如下
[pascal]
procedure TForm1.Button1Click(Sender: TObject);
var
ms:TMemoryStream;
i:integer;
tempfile,extname,filename1:String;
begin
ms := Tmemorystream.Create;
ms.Clear;
ms.Position :=0;
try
idhttp1.Get(edit1.text,ms);
ms.SaveToFile(ExtractFilePath(Application.ExeName)+’\test.zip’);
except
end;
if fileexists(ExtractFilePath(Application.ExeName)+’\test.zip’) then
begin
with CreateInArchive(CLSID_CFormatZip) do
begin
OpenFile(ExtractFilePath(Application.ExeName)+’\test.zip’);
for i := 0 to NumberOfItems – 1 do
if not ItemIsFolder[i] then begin
tempfile := ItemPath[i];
extname:=ExtractFileExt(tempfile);
if extname =’.txt’ then
filename1:=tempfile;
end;
ExtractTo(ExtractFilePath(Application.ExeName));
end;
Memo1.Lines.LoadFromFile(Filename1);
end;
end;
[/pascal]
藥品健保藥價資料集
P.S idhttp1.HandleRedirects := True;

為DBGrid加上OnClick事件

很奇怪的在DBGrid竟然沒有OnClick事件~不過還是可以用方式讓Click事件重見天日

[pascal]
private
{ Private declarations }
procedure dbgrid1Click(Sender:Tobject);
[/pascal]

[pascal]
procedure TForm1.FormCreate(Sender: TObject);
begin
dbgrid1.ControlStyle := dbgrid1.ControlStyle + [csClickevents];
TForm(dbgrid1).OnClick := dbgrid1click;
end;
[/pascal]

[pascal]
procedure TForm1.dbgrid1Click(Sender: Tobject);
begin
// Click事件
end;
[/pascal]

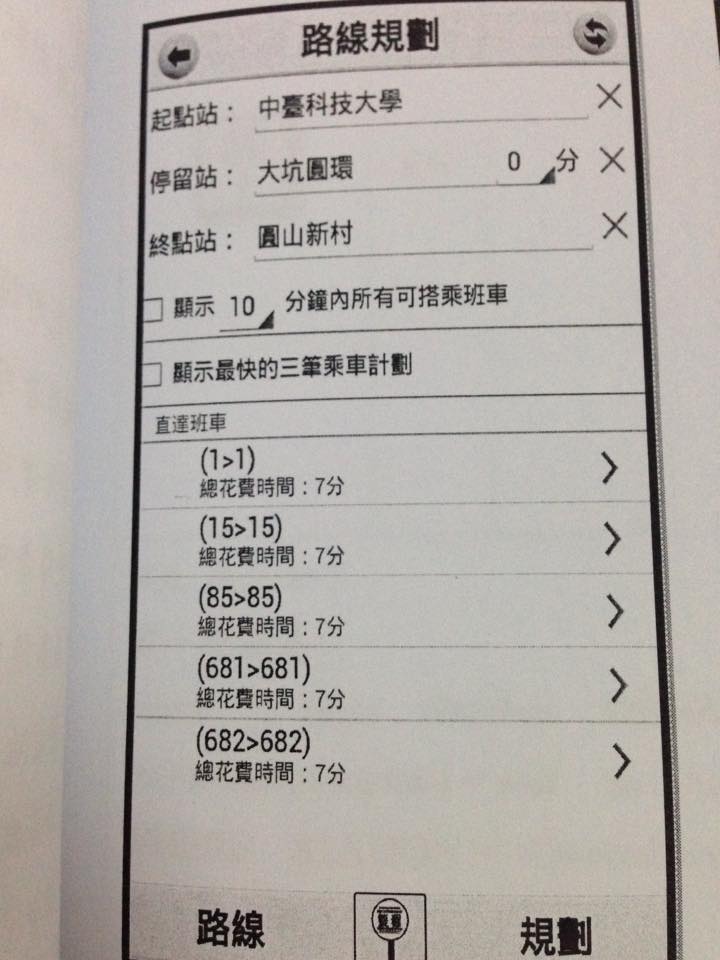
中台科技大學使用Delphi XE6開發成果

10846058_10152391825376541_6729644901142507463_n
有幸成為中台科技大學畢業專題研究的考試委員,要感謝中台資管系裡一直致力於推廣Delphi的李桂春老師,以及幾位老師排除許多意見讓Delphi這門課仍在學校中延續。
這次的二組學生共開發了六支程式
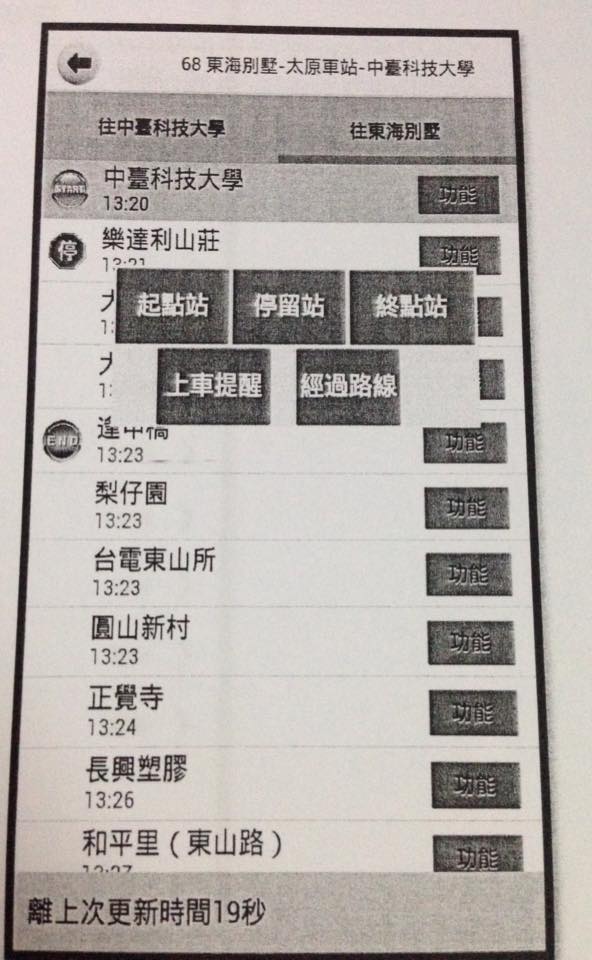
一、Smile BUS
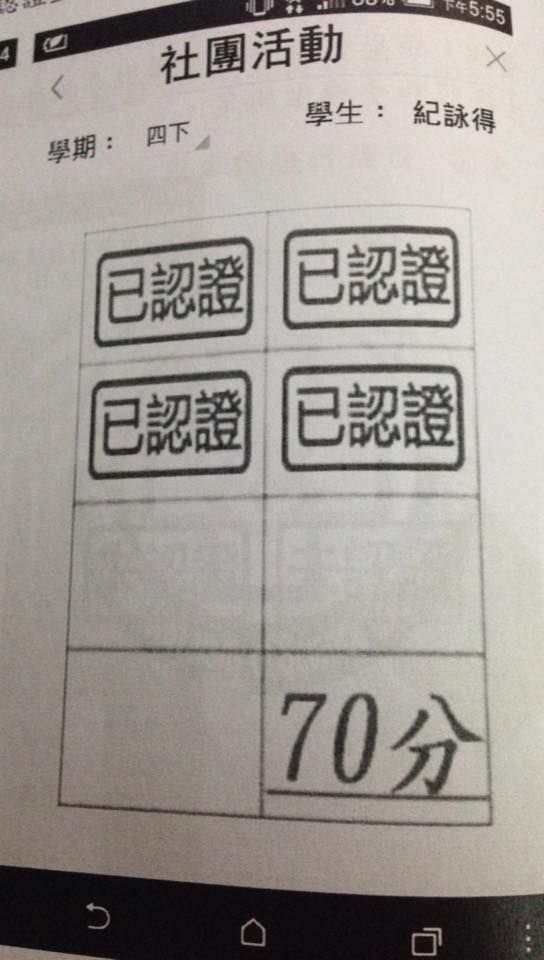
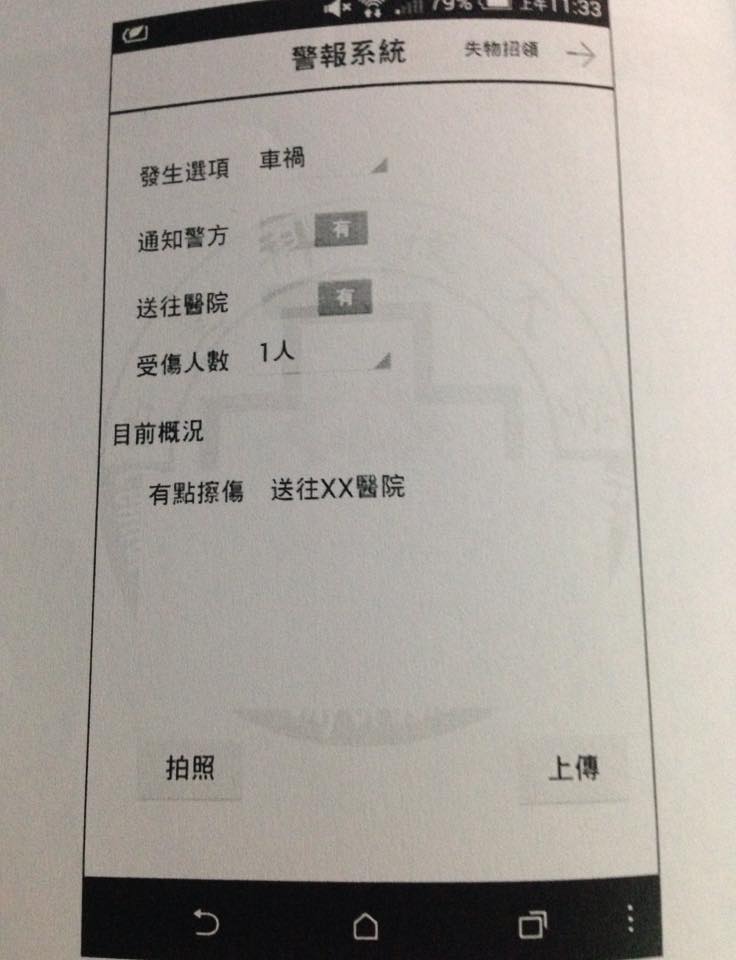
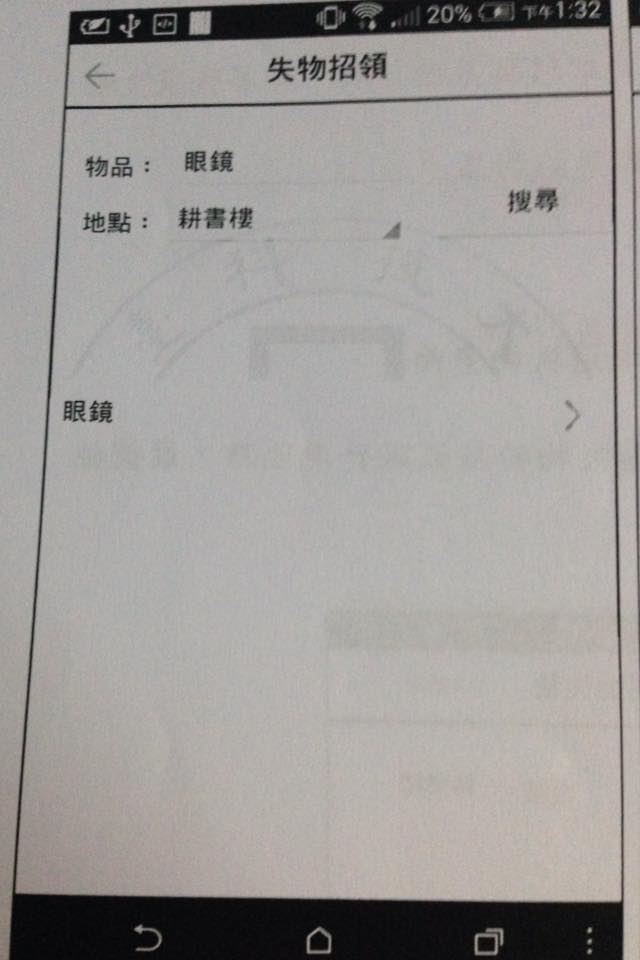
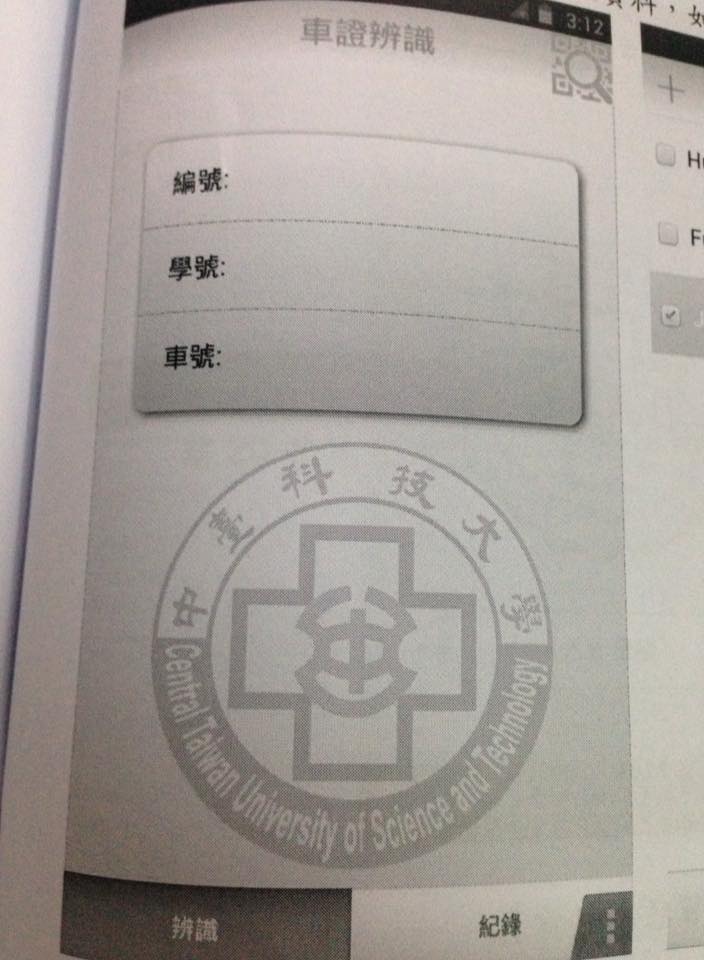
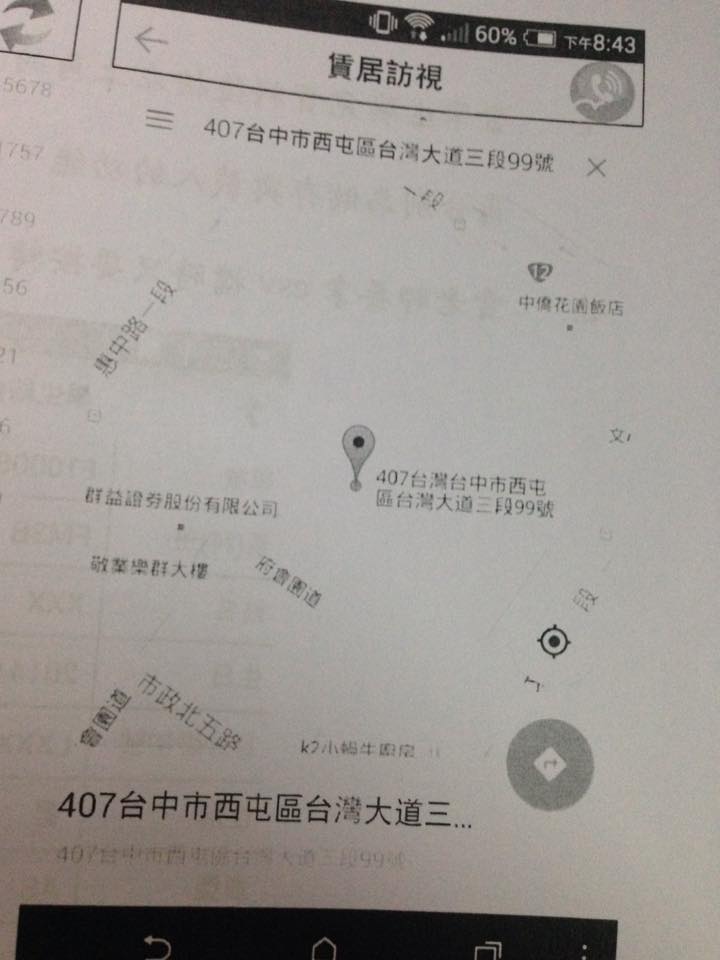
二、學務小幫手 – 學生護照、失物招領、車號辨識、賃居訪視、校安警報系統
系統內應用了Google Map、GPS、上傳、拍照、QRCode…..等技術,完成度相當的高!
10846309_10152396576211541_8581711142382981368_n

10565285_10152396576181541_5511641369811730287_n

10414380_10152396576136541_2027245156865070595_n

10360343_10152396576086541_9016676841456869558_n

1012968_10152396575891541_8956913892727382166_n

10175956_10152396575801541_6156401098272297629_n

10559764_10152396575726541_7185801609891298930_n

Delphi Indy TCPClient/TCPServer元件傳檔

Indy這套免費又強大的網路元件相信對Delphi開發者不陌生,不過常常被問如何透過Indy傳送檔案。
寫了個簡單的範例給大家。

一、伺服端
只需要在表單放上一個IdTCPServer元件,接著在FormOnCreate以及IdTCPServer1OnExecute寫上
[pascal]
procedure TForm1.FormCreate(Sender: TObject);
begin
idtcpserver1.DefaultPort := 1234; // 可自行更改Port號,但Client/Server要一致
idtcpserver1.Active:=true;
end;

procedure TForm1.IdTCPServer1Execute(AContext: TIdContext);
var
ms:Tfilestream;
fn:String;
begin
fn := ExtractFileName(acontext.Connection.IOHandler.ReadLn()); // 從Client接收檔名
ms := Tfilestream.Create(‘c:\’+fn, fmCreate);
ms.Position :=0;
acontext.Connection.IOHandler.ReadStream(ms,0,true);
ms.Free;
end;
[/pascal]

二、客戶端
畫面上放上IdTCPClient外,再放上三個Edit(分別是EdtHost、EdtPort、EdtFileName)以及四個Button(分別是BtnConnect、BtnDisConnect、BtnChooseFile、BtnSend)以及一個OpenDialog
[pascal]
procedure TForm1.BtnConnectClick(Sender: TObject);
begin
// 連接到伺服器
if IdTCPClient1.Connected then
IdTCPClient1.Disconnect;
IdTCPClient1.Host := EdtHost.Text;
IdTCPClient1.Port := StrToInt(EdtPort.Text);
IdTCPClient1.Connect;
end;

procedure TForm1.BtnDisconnectClick(Sender: TObject);
begin
// 斷開連線
IdTCPClient1.Disconnect;
end;

procedure TForm1.BtnChooseFileClick(Sender: TObject);
begin
// 選擇檔案
if opendialog1.Execute then begin
EdtFileName.Text :=opendialog1.FileName;
end;
end;

procedure TForm1.BtnSendClick(Sender: TObject);
var
ms : tmemorystream;
begin
// 傳送檔案
BtnConnect.Click;
ms := Tmemorystream.Create;
ms.Clear;
ms.LoadFromFile(EdtFileName.Text);
ms.Position :=0;
IdTCPClient1.IOHandler.LargeStream := true;
idtcpclient1.IOHandler.WriteLn(ExtractFileName(EdtFileName.Text)); // 告知檔名
idtcpclient1.IOHandler.Write(ms);
idtcpclient1.IOHandler.Close; // 很重要的一行,不然傳送完,無法開啟會出現檔案使用中
ms.Free;
end;
[/pascal]

Delphi偵測按鍵輸入

1. Form -> keyprivew = True
2.
procedure TForm1.FormKeyDown(Sender: TObject; var Key: Word;
Shift: TShiftState);
begin
if (key = vk_down) or (key = 13) then begin // 如果按向下鍵或Enter
//key:=vk_tab;
Caption :=ActiveControl.Name;
SendMessage(getparentform(self).Handle,WM_NEXTDLGCTL,0,0);
end else if (key = vk_up) then begin // 如果按向上鍵
Caption :=ActiveControl.Name;
SendMessage(getparentform(self).Handle,WM_NEXTDLGCTL,1,0);
end;
if ssctrl in shift then
if key = vk_f11 then showmessage(‘按下Ctrl+F11’);
end;

台灣捷康與Delphi&C++ Builder User互動

最近忙著手邊的案子,好少分享相關的技術(雖然一直使用這些技術)
不過台灣捷康透過FB一直與User做互動,裡面有幾位怪獸級高手(ex:縹緲、廖啟甫)大哥都在裡頭
https://www.facebook.com/groups/qcomtw/

Delphi控制TSC Printer

[pascal]
procedure openport(PrinterName:pchar);stdcall;far; external ‘tsclib.dll’;
procedure closeport; external ‘tsclib.dll’;
procedure sendcommand(Command:pchar);stdcall;far;external ‘tsclib.dll’;
procedure setup(LabelWidth, LabelHeight, Speed, Density, Sensor, Vertical,
Offset:pchar);tsdcall; far; external ‘tsclib.dll’;
procedure downloadpcx(Filename,ImageName:pchar);stdcall;far;
external ‘tsclib.dll’;
procedure barcode(X, Y, CodeType, Height, Readable, Rotation, Narrow,
Wide, Code :pchar); stdcall; far; external ‘tsclib.dll’;
procedure printerfont(X, Y, FontName, Rotation, Xmul, Ymul, Content:pchar);
stdcall;far; external ‘tsclib.dll’;
procedure clearbuffer; external ‘tsclib.dll’;
procedure printlabel(NumberOfSet, NumberOfCopoy:pchar);stdcall; far;
external ‘tsclib.dll’;
procedure formfeed;external ‘tsclib.dll’;
procedure nobackfeed; external ‘tsclib.dll’
procedure windowsfont (X, Y, FontHeight, Rotation, FontStyle,
FontUnderline : integer; FaceName,
TextContect:pchar);stdcall;far;external ‘tsclib.dll’;
[/pascal]

1. openport(a)
說明: 指定電腦端的輸出埠
參數:
a: 字串型別
(1) 單機列印時,請指定印表機驅動程式名稱
例如: TSC CLEVER TTP-243
(2) 若連接印表機伺服器,請指定伺服器路徑及共用印表機名稱
例如: \\SERVER\TTP243
(3) 直接指定平行傳輸介面,請指定輸出埠名稱為 LPT1 到 LPT4
(4) 直接指定 USB 傳輸介面,請指定輸出埠名稱為 USB
2. closeport()
說明: 關閉指定的電腦端輸出埠
參數: 無
3. setup(a,b,c,d,e,f,g)
說明: 設定標籤的寬度、高度、列印速度、列印濃度、感應器類別、gap/black mark
垂直間距、gap/black mark 偏移距離)
參數:
a: 字串型別,設定標籤寬度,單位 mm
b: 字串型別,設定標籤高度,單位 mm
c: 字串型別,設定列印速度,(列印速度隨機型不同而有不同的選項)
1.0: 每秒 1.0 吋列印速度
1.5: 每秒 1.5 吋列印速度
2.0: 每秒 2.0 吋列印速度
3.0: 每秒 3.0 吋列印速度
4.0: 每秒 4.0 吋列印速度
6.0: 每秒 6.0 吋列印速度
8.0: 每秒 8.0 吋列印速度
10.0: 每秒 10.0 吋列印速度
d: 字串型別,設定列印濃度
0~15,數字愈大列印結果愈黑
e: 字串型別,設定使用感應器類別
0 表示使用垂直間距感測器(gap sensor)
1 表示使用黑標感測器(black mark sensor)
f: 字串型別,設定 gap/black mark 垂直間距高度,單位: mm
g: 字串型別,設定 gap/black mark 偏移距離,單位: mm,此參數若使用一
般標籤時均設為 0
4. clearbuffer()
說明: 清除
參數: 無
5. barcode(a,b,c,d,e,f,g,h,I)
說明: 使用條碼機內建條碼列印
參數:
a: 字串型別,條碼 X 方向起始點,以點(point)表示。
(200 DPI,1 點=1/8 mm, 300 DPI,1 點=1/12 mm)
b: 字串型別,條碼 Y 方向起始點,以點(point)表示。
(200 DPI,1 點=1/8 mm, 300 DPI,1 點=1/12 mm)
c: 字串型別
128 Code 128, switching code subset A, B, C
automatically
128M Code 128, switching code subset A, B, C
manually.
EAN128 Code 128, switching code subset A, B, C
automatically
25 Interleaved 2 of 5
25C Interleaved 2 of 5 with check digits
39 Code 39
39C Code 39 with check digits
93 Code 93
EAN13 EAN 13
EAN13+2 EAN 13 with 2 digits add-on
EAN13+5 EAN 13 with 5 digits add-on
EAN8 EAN 8
EAN8+2 EAN 8 with 2 digits add-on
EAN8+5 EAN 8 with 5 digits add-on
CODA Codabar
POST Postnet
UPCA UPC-A
UPCA+2 UPC-A with 2 digits add-on
UPCA+5 UPC-A with 5 digits add-on
UPCE UPC-E
UPCE+2 UPC-E with 2 digits add-on
UPCE+5 UPC-E with 5 digits add-on
d: 字串型別,設定條碼高度,高度以點來表示
e: 字串型別,設定是否列印條碼碼文
0: 不列印碼文
1: 列印碼文
f: 字串型別,設定條碼旋轉角度
0: 旋轉 0 度
90: 旋轉 90 度
180: 旋轉 180 度
270: 旋轉 270 度
g: 字串型別,設定條碼窄 bar 比例因子,請參考 TSPL 使用手冊
h: 字串型別,設定條碼窄 bar 比例因子,請參考 TSPL 使用手冊
I: 字串型別,條碼內容
6. printerfont(a,b,c,d,e,f,g)
說明: 使用條碼機內建文字列印
參數:
a: 字串型別,文字 X 方向起始點,以點(point)表示。
(200 DPI,1 點=1/8 mm, 300 DPI,1 點=1/12 mm)
b: 字串型別,文字 Y 方向起始點,以點(point)表示。
(200 DPI,1 點=1/8 mm, 300 DPI,1 點=1/12 mm)
c: 字串型別,內建字型名稱,共 12 種。
1: 8*/12 dots
2: 12*20 dots
3: 16*24 dots
4: 24*32 dots
5: 32*48 dots
TST24.BF2: 繁體中文 24*24
TST16.BF2: 繁體中文 16*16
TTT24.BF2: 繁體中文 24*24 (電信碼)
TSS24.BF2: 簡體中文 24*24
TSS16.BF2: 簡體中文 16*16
K: 韓文 24*24
L: 韓文 16*16
d: 字串型別,設定文字旋轉角度
0: 旋轉 0 度
90: 旋轉 90 度
180: 旋轉 180 度
270: 旋轉 270 度
e: 字串型別,設定文字 X 方向放大倍率,1~8
f: 字串型別,設定文字 X 方向放大倍率,1~8
g: 字串型別,列印文字內容
7. sendcommand(command)
說明: 送內建指令到條碼印表機
參數: 詳細指令請參考 TSPL
8. printlabel(a,b)
說明: 列印標籤內容
參數:
a: 字串型別,設定列印標籤式數(set)
b: 字串型別,設定列印標籤份數(copy)
9. downloadpcx(a,b)
說明:下載單色 PCX 格式圖檔至印表機
參數:
a: 字串型別,檔案名(可包含路徑)
b: 字串型別,下載至印表機記憶體內之檔名(請使用大寫檔名)
10. formfeed()
說明: 跳頁,該函式需在 setup 後使用
參數: 無
11. nobackfeed()
說明: 設定紙張不回吐
參數: 無
12. windowsfont(a,b,c,d,e,f,g,h)
說明: 使用 Windows TTF 字型列印文字
參數: a: 整數型別,文字 X 方向起始點,以點(point)表示
b: 整數型別,文字 Y 方向起始點,以點(point)表示。
c: 整數型別,字體高度,以點(point)表示。
d: 整數型別,旋轉角度,逆時鐘方向旋轉
0 -> 0 degree
90-> 90 degree
180-> 180 degree
270-> 270 degree
e: 整數型別,字體外形
0-> 標準(Normal)
1-> 斜體(Italic)
2-> 粗體(Bold)
3-> 粗斜體(Bold and Italic)
f: 整數型別, 底線
0-> 無底線
1-> 加底線
g: 字串型別,字體名稱。如: Arial, Times new Roman, 細名體, 標楷體
h: 字串型別,列印文字內容。
13. about()
說明: 顯示 DLL 版本號碼
參數: 無

Delphi 將字型樣式轉成字串

[pascal]
// 字串轉成字型樣式
Function StringToStyle(s:String):TFontStyles;
var ft:TFontStyles;
begin
if pos(‘B’,s) >0 then
ft := ft + [fsBold];
if pos(‘I’,s) >0 then
ft := ft + [fsItalic];
if pos(‘U’,s) >0 then
ft := ft + [fsUnderline];
if pos(‘S’,s) >0 then
ft := ft + [fsStrikeOut];
Result := ft;
end;

// 字型樣式轉成文字
Function StyleToString(ft:TFontStyles):String;
var s:String;
begin
s:= ”;
if fsBold in ft then
s := s + ‘B’;
if fsItalic in ft then
s := s + ‘I’;
if fsUnderline in ft then
s := s + ‘U’;
if fsStrikeOut in ft then
s := s + ‘S’;
Result := s;
end
[/pascal]