procedure TForm1.FormCreate(Sender: TObject);
begin
WindowsMediaplayer1.uiMode := ‘none’; //不顯示按鈕
end;
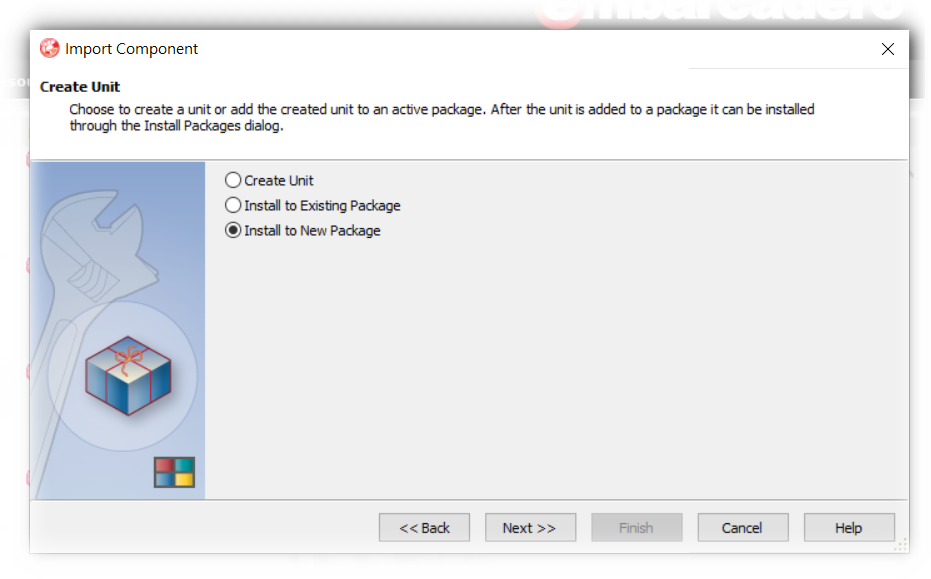
二、
procedure TForm1.FormCloseQuery(Sender: TObject; var CanClose: Boolean);
begin
WindowsMediaPlayer1.controls.stop;
end;
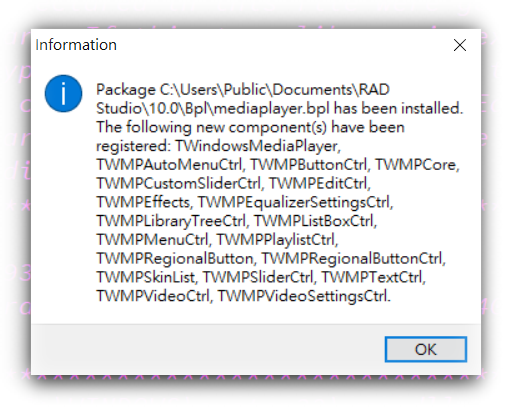
三、
procedure TForm1.Button1Click(Sender: TObject);
begin
if opendialog1.Execute then begin
WindowsMediaPlayer1.URL := ‘file://’+opendialog1.FileName;
WindowsMediaplayer1.uiMode := ‘none’;
WindowsMediaPlayer1.controls.play;
end;
end;
四、
procedure TForm1.WindowsMediaPlayer1PlayStateChange(ASender: TObject;
NewState: Integer);
begin
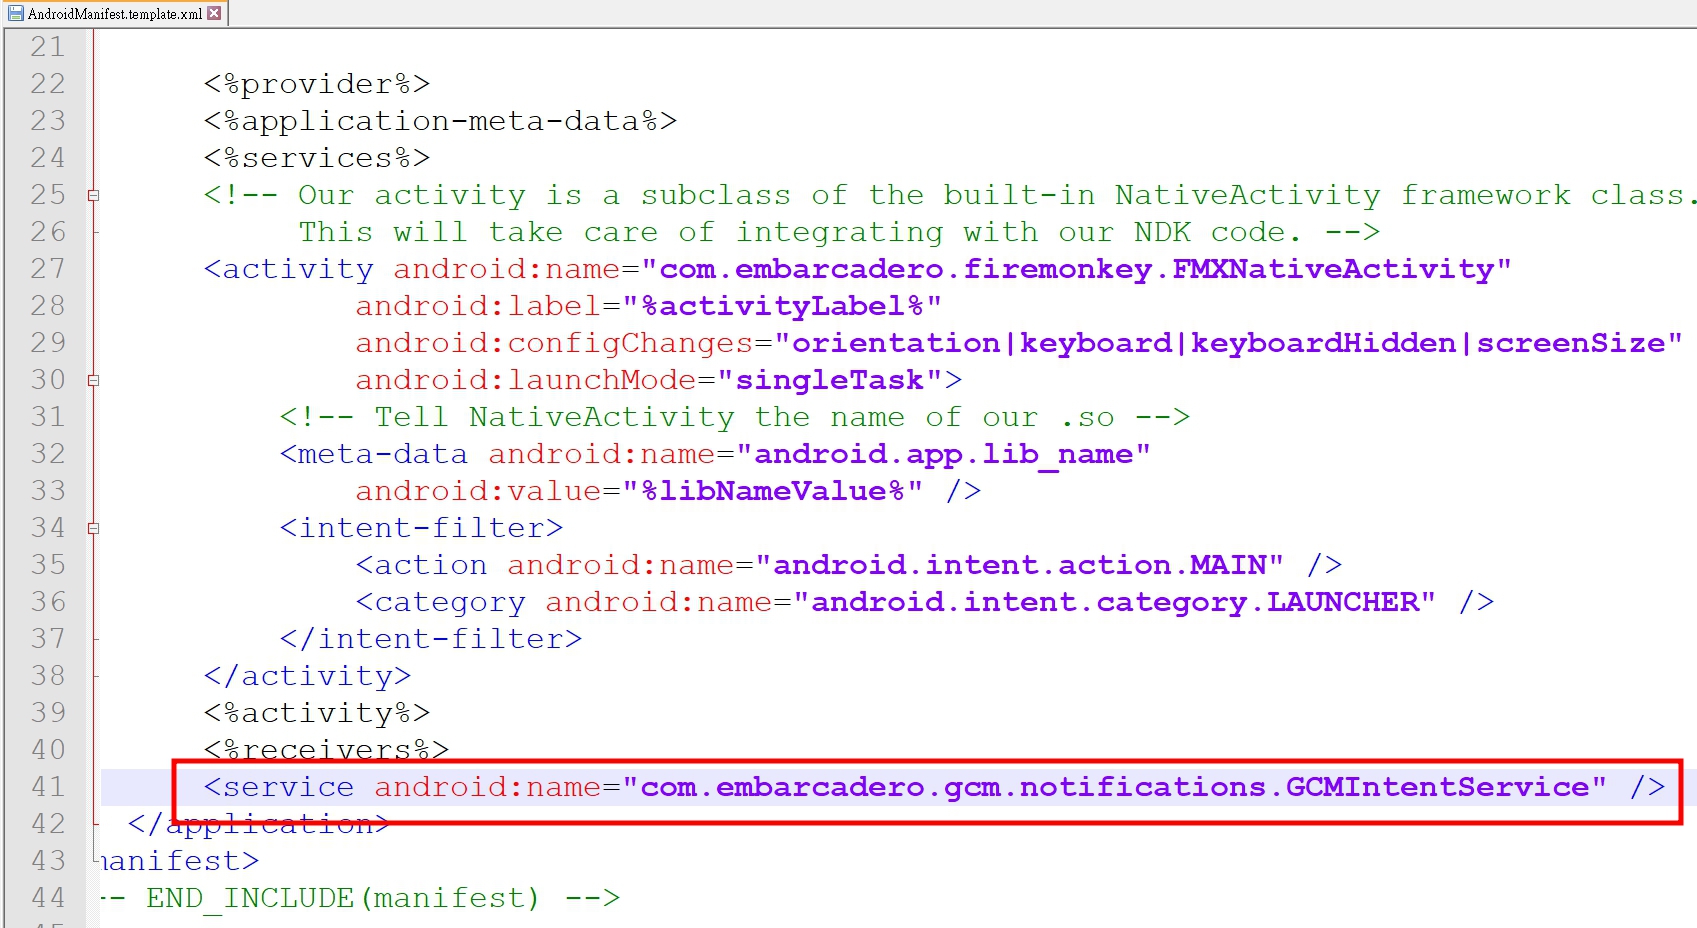
case NewState of
wmppsPlaying: begin
Timer1.Enabled := True;
end;
wmppsStopped,
wmppsPaused: begin
Timer1.Enabled := False;
end;
end;
end;
五、
procedure TForm1.Timer1Timer(Sender: TObject);
var
Duration: double;
Position: double;
begin
Form1.Caption := WindowsMediaPlayer1.controls.currentPositionString
+ ‘ of ‘
+ WindowsMediaPlayer1.currentMedia.durationString;