分類: 生活雜感
.Net 7 開發增進效能的小撇步
預計在2022年11月發布的.net7目前進入RC2的版本。來談談.net7 做了那些效能上的改進~
LINQ部份
1針對max/min最佳化
2針對Average/sum
3新增order/orderDescending 取代orderby/orderbydescending
4 System.IO的改善 WriteAllText改ReadAllText
5 針對Jsonserializer NoCachedOptions提昇
6Guid的 GuidEquals提昇
7ParseBigInt提昇
8ParseBool
9 Stopwatch中的getprocessbyname與getcurrentprocessname
10 在stopwatch加上getelapsedtime取得時間戳
教學影片錄製相關-麥克風
九成新手都用錯! 小蜜蜂的領夾型麥克風怎麼夾? 怎麼黏? 別麥克風教學
無線領夾式麥克風怎麼接才能讓線上和實體的學生都聽得到完美的聲音
Lavalier GO / Skier / Sennheiser 領夾式麥克風 mini mic 效果實測
ZOOM LiveTrak L-8 L8 廣播 混音機 混音器高階技巧應用
Countryman Headset Mic Placement
How to choose the right headset mic for any situation
Learn how to mount and adjust 4066/4088 Headset Microphones properly
VS2002 Preview4
Laravel 8.58 rele
https://laravel-news.com/laravel-8-58-0
增加了updateOrFail()、exclude的排除驗證方式、http retry、whereRelation等這功
伴我21個年頭的Delphi
2000年從商業經營科系轉至勤益的資訊管理科二專部後,就開始接觸Delphi5這門程式語言,記得當初使用QB/VB都覺得不到位,遇到Delphi後覺得這開發工具真的很強大,於是努力學習精進。
這門語言,也讓我得到了在國泰電腦的第一份軟體業工讀生工作後,甚至讓我進入海軍陸戰隊服役時,因為對資料庫程式的特別專長,也參與了兵棋、陸戰隊進銷存等專案開發。退伍後,也陸續進入公司開發過中醫醫療軟體、檢驗儀器系統連線、會計、人事薪資、票據、餐飲POS等系統,客戶也從中醫診所、檢驗室、檢驗所到流通業、百貨業甚至超市業。
毫無疑問的,Delphi是近25年來我覺得唯一也是擁有絕對地位的Windows資料庫應用程式開發工具王者,從幹掉VB、Powerbuilder的工具來看,近幾年也著重在APP的開發上,但也許因為有不少開源的開發語言(如:Cordova、Xamarin、NativeScript、React Native、Electron、Flutter) 導致優勢不再。連近期公司的走向也是主要以雲端開發為主了!
雖然還不致於正式跟它Say Goodbye~不過使用它的頻率真的減少許多就是
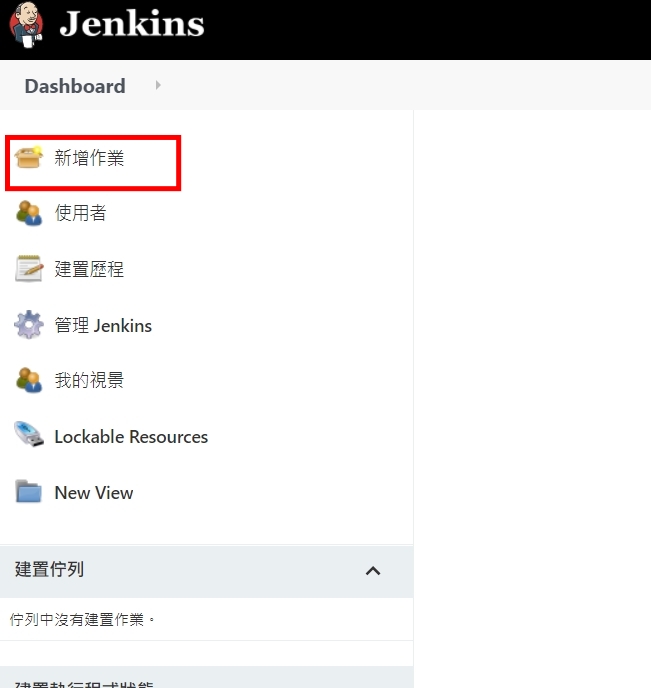
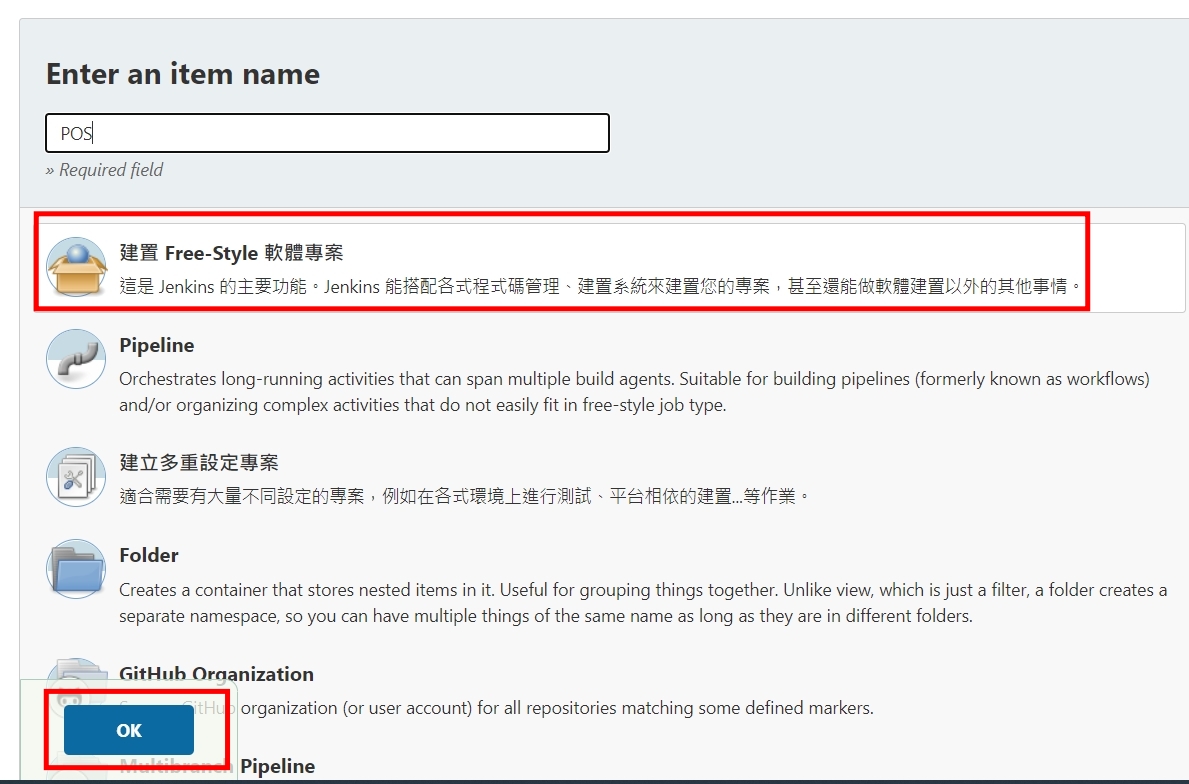
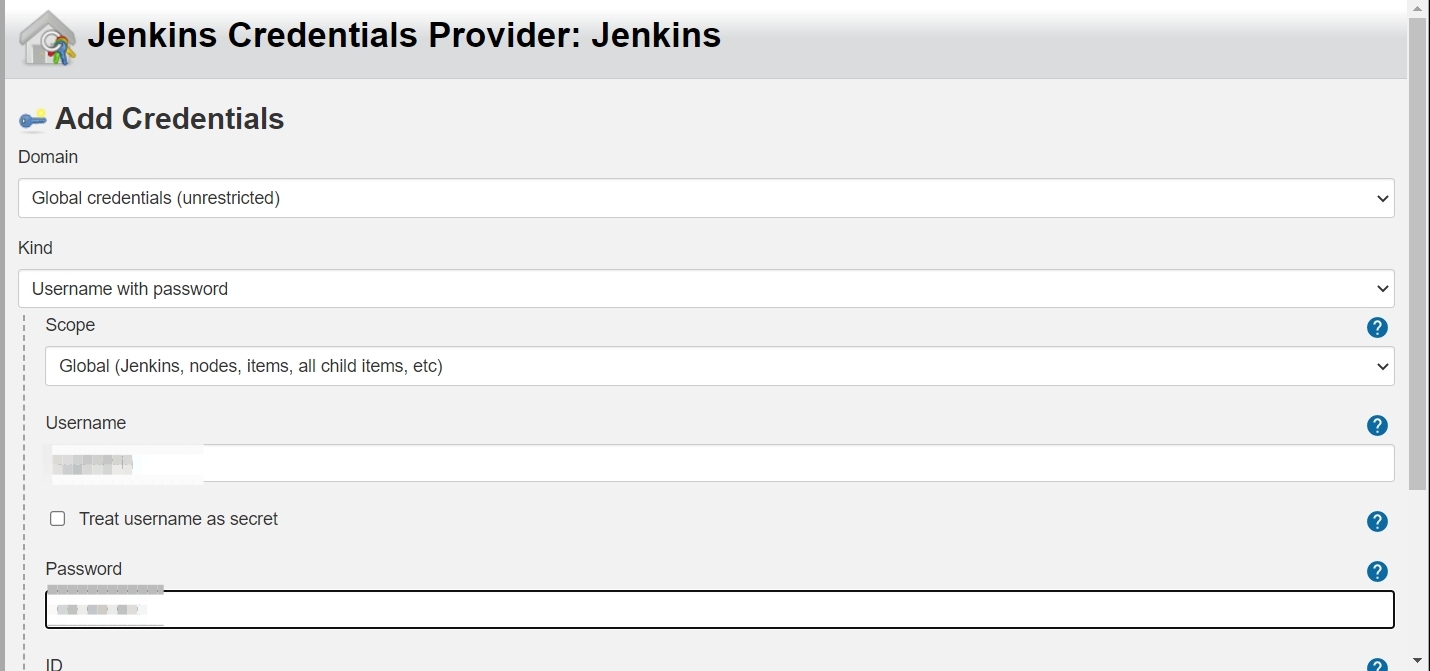
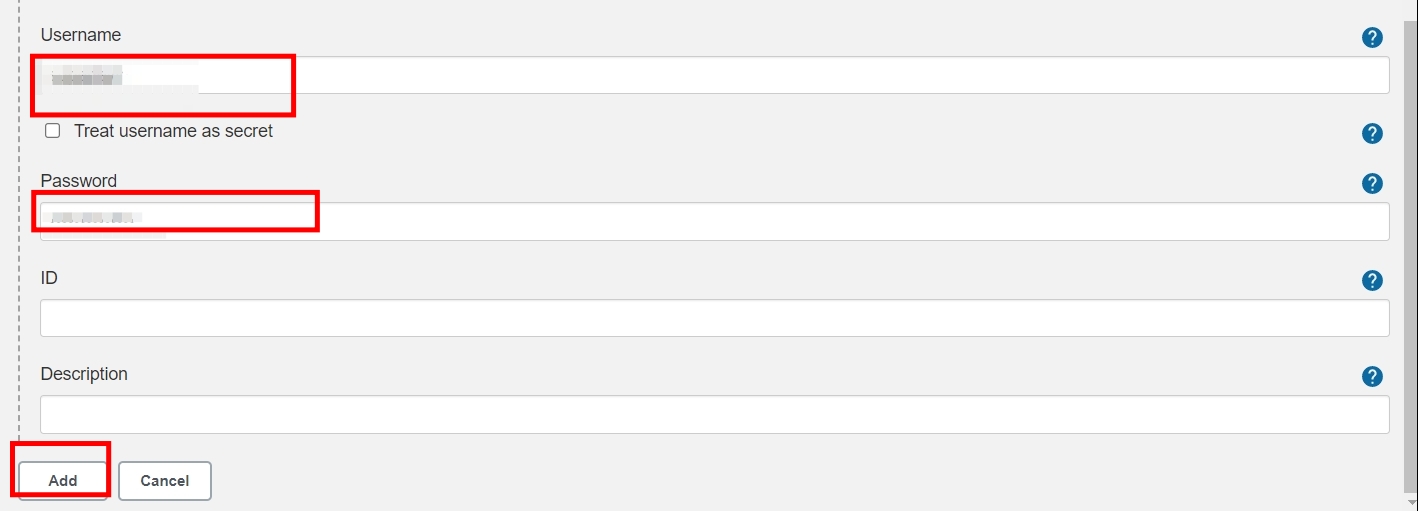
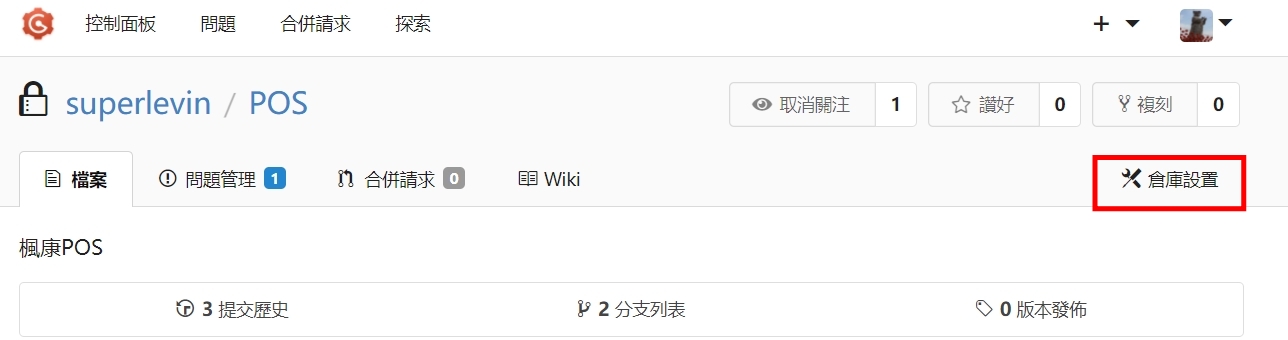
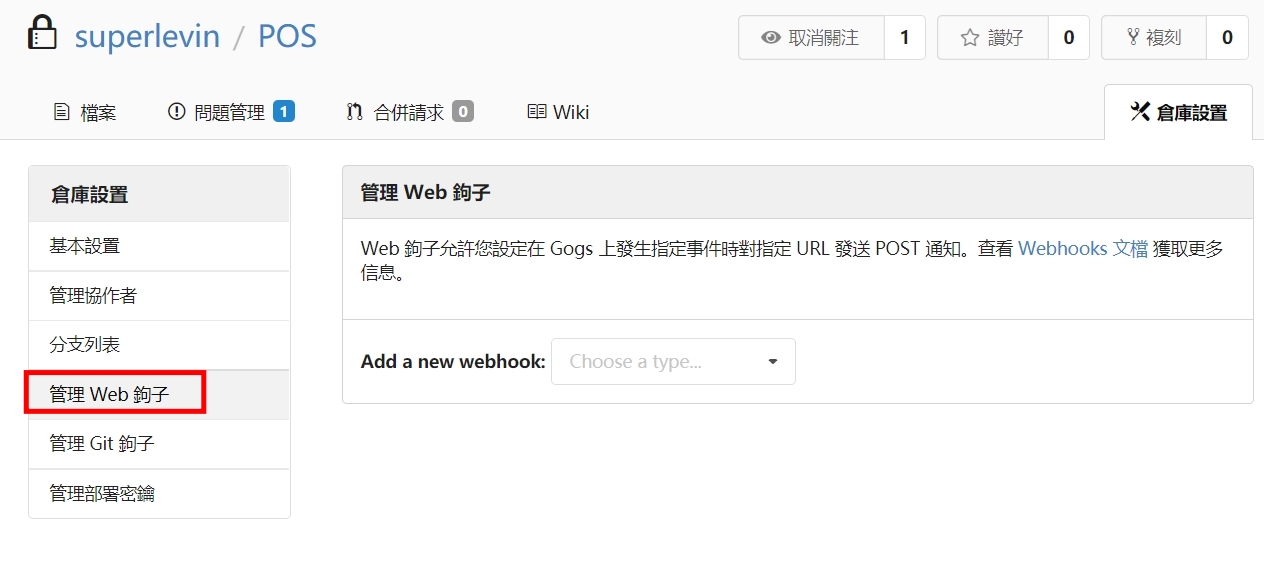
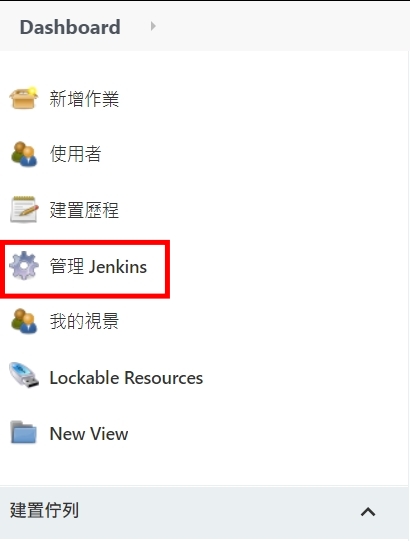
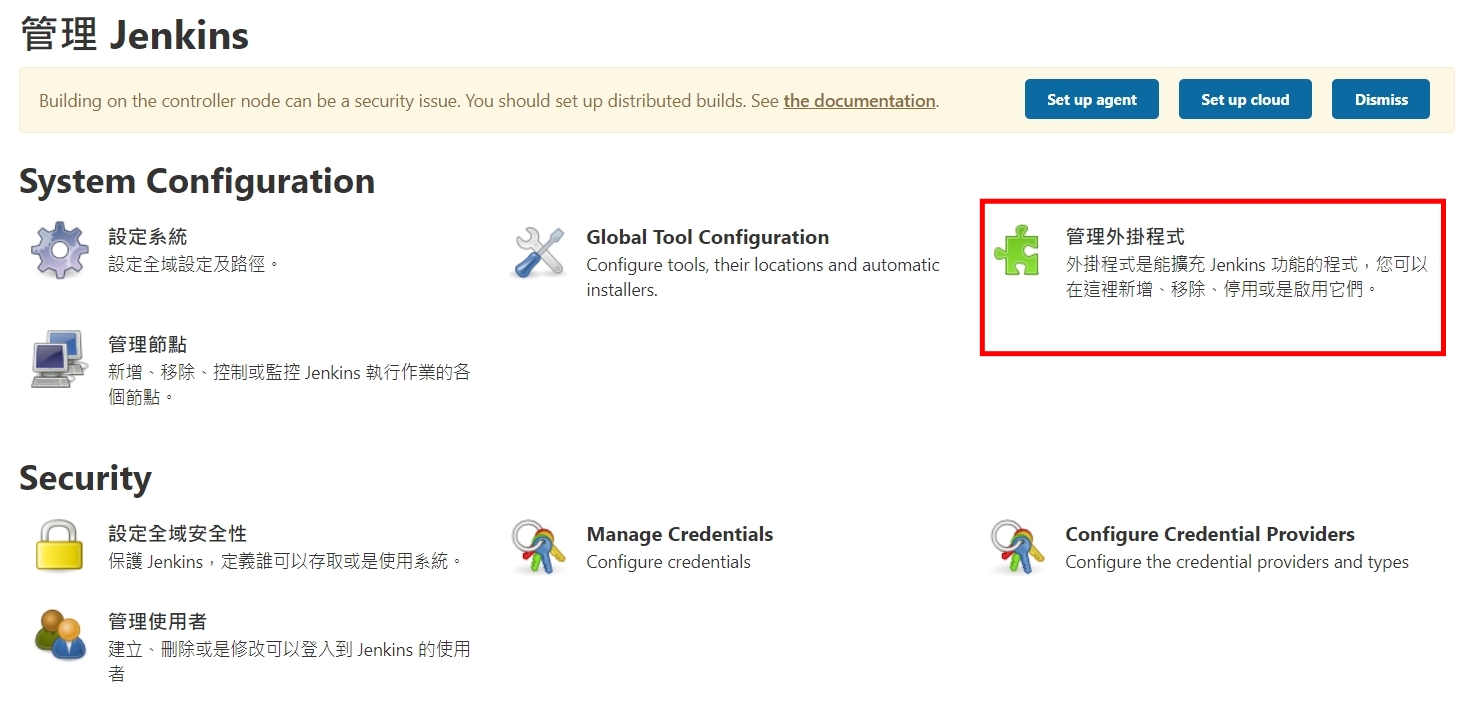
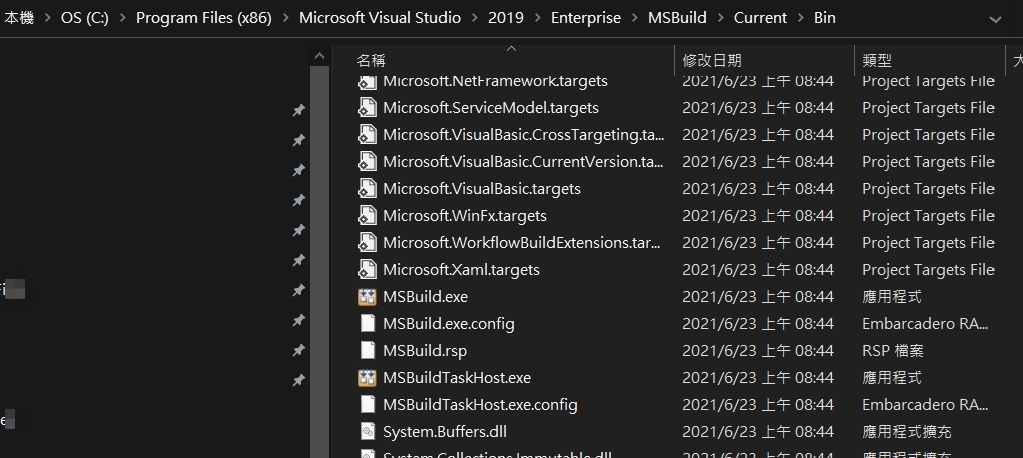
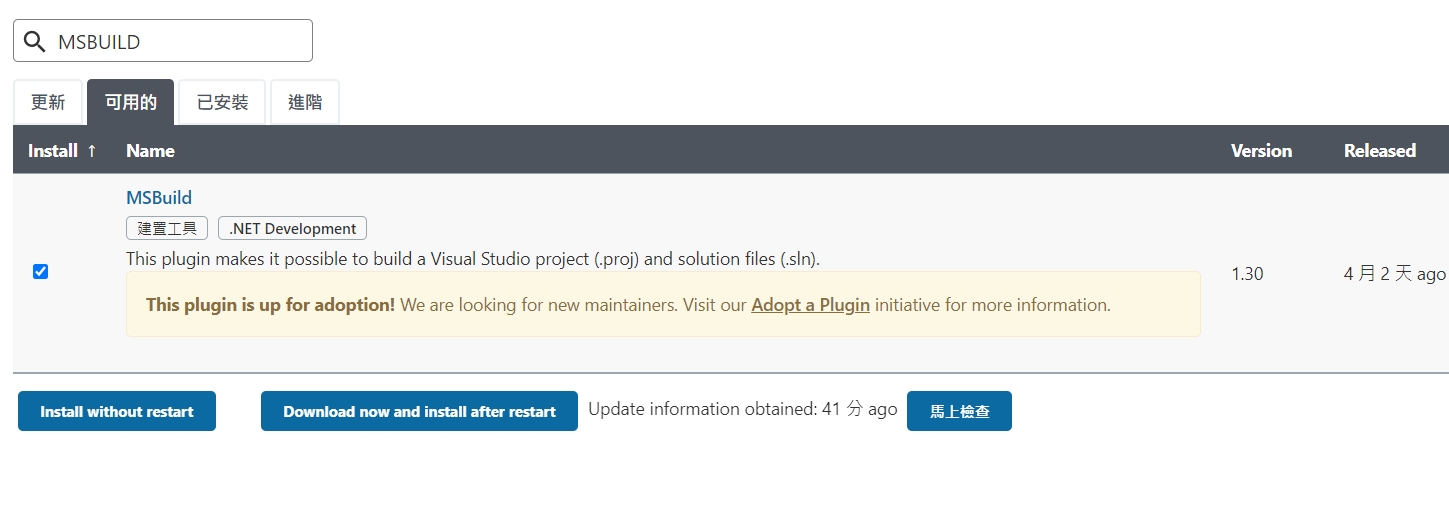
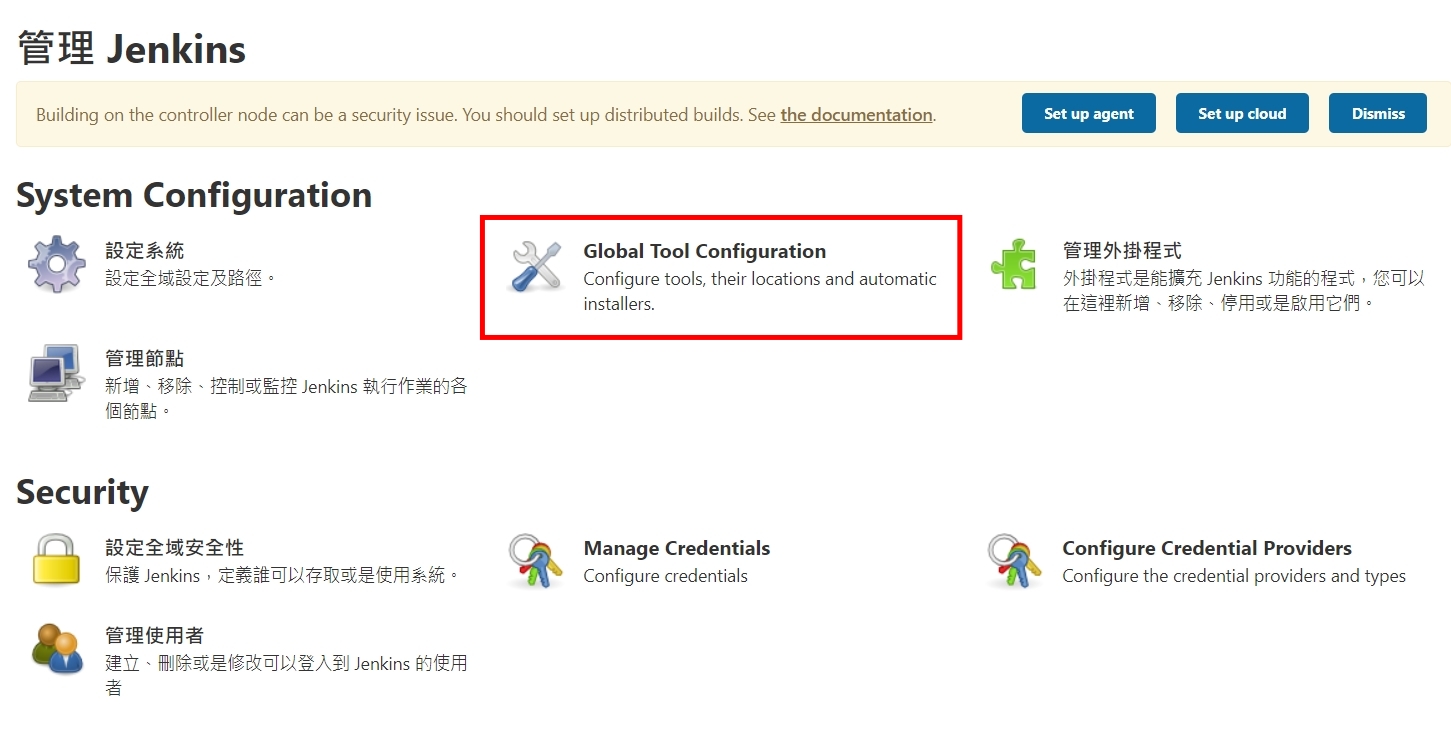
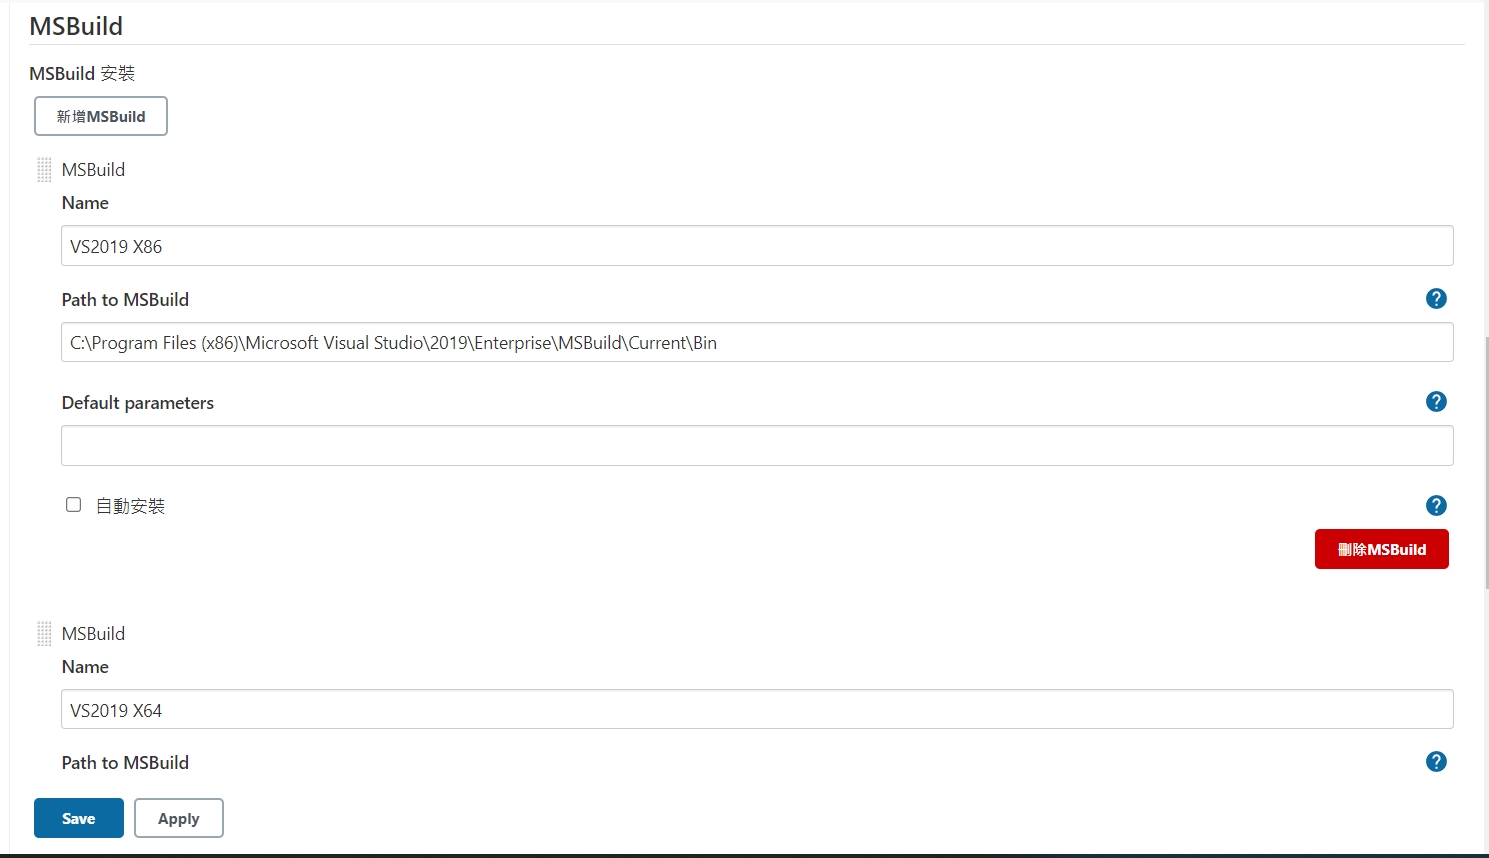
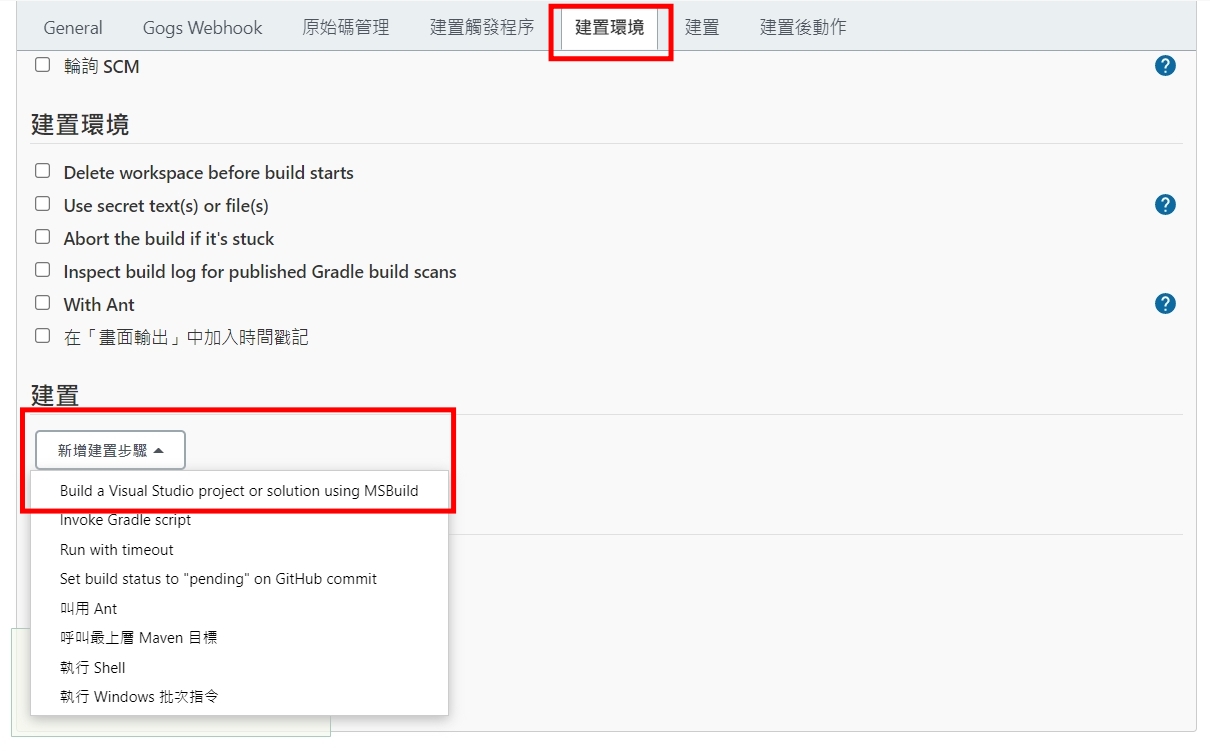
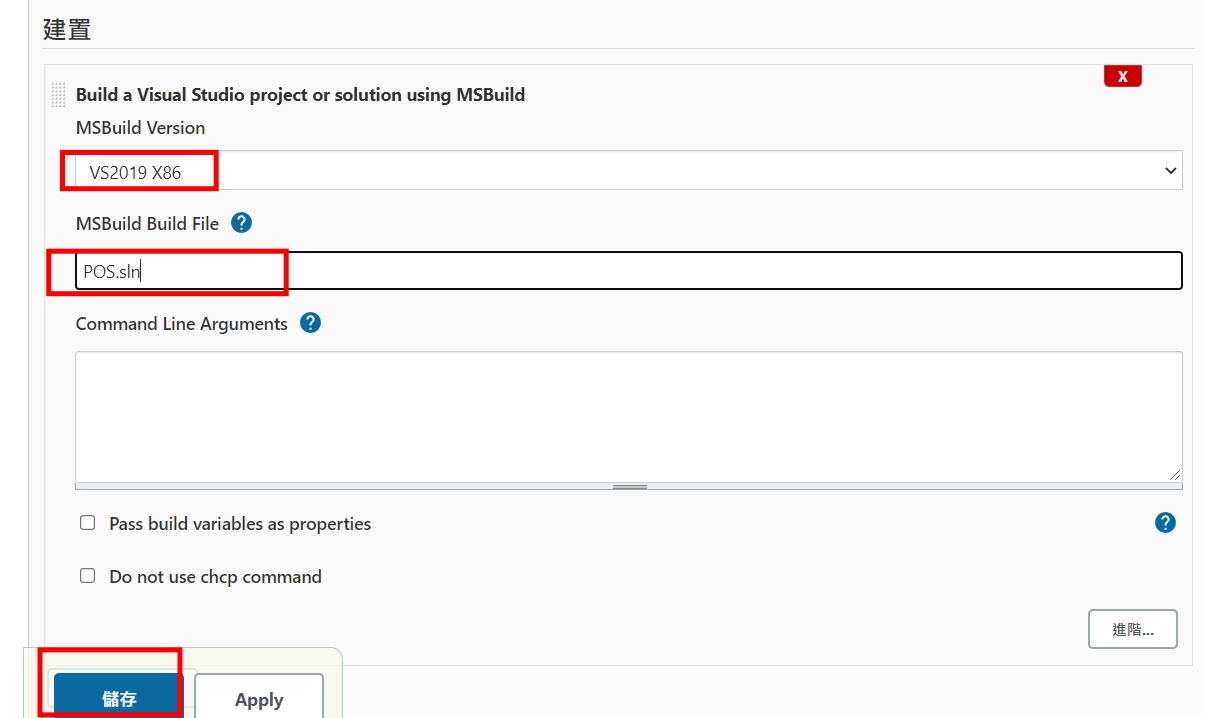
C#/ASP.net 自動建置透過Jenkins
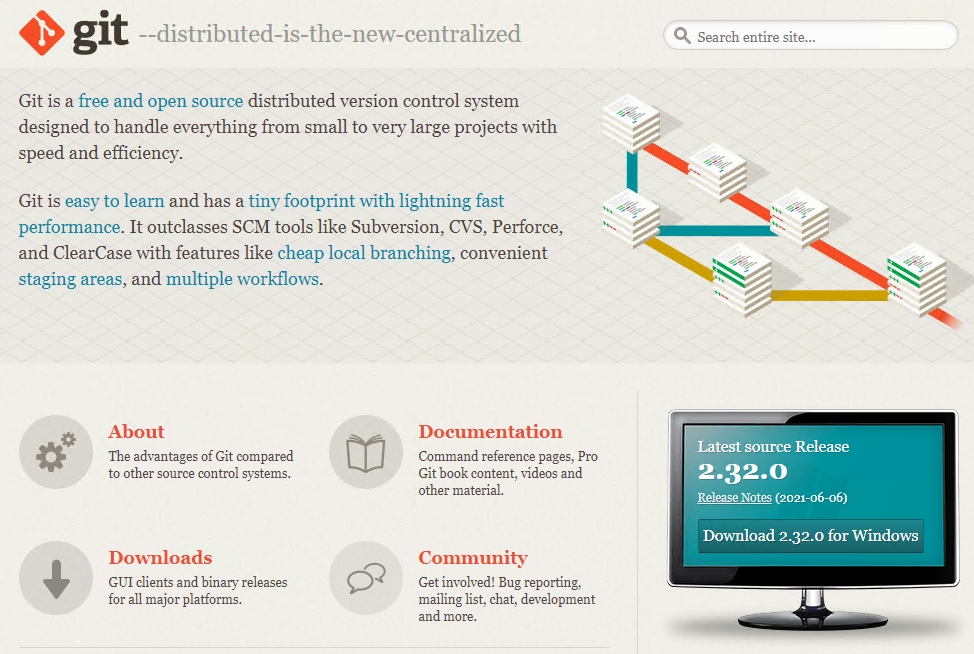
一、安裝Git
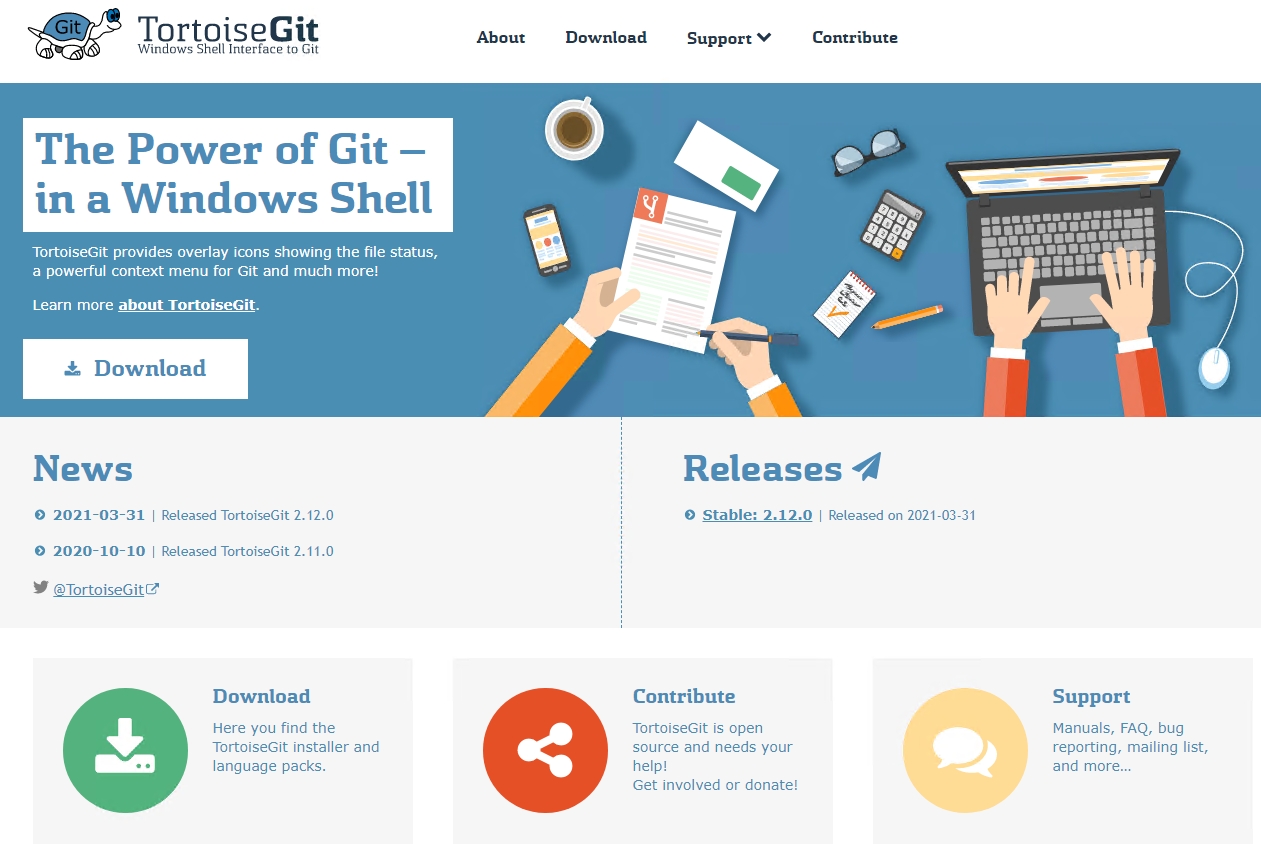
二、安裝 T
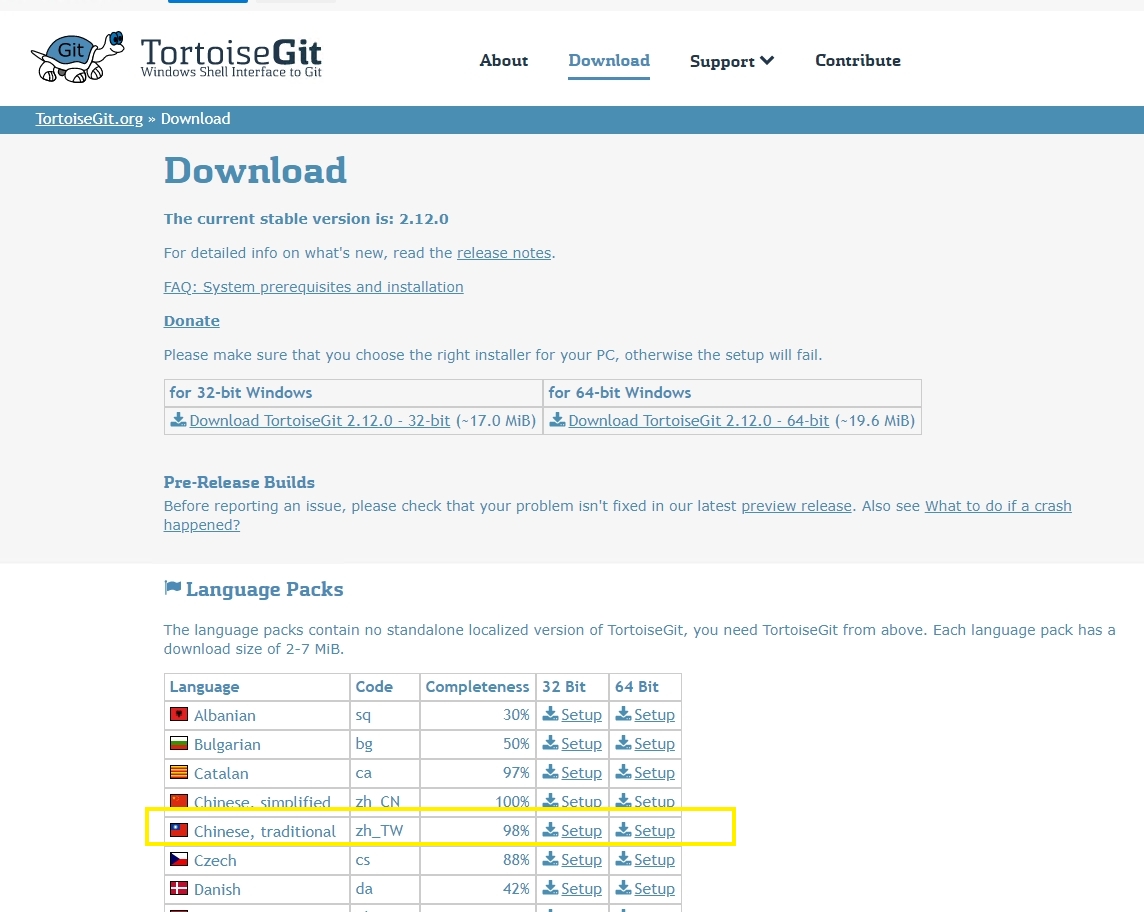
三、記得有繁體中文的語系包,可以一起安裝上
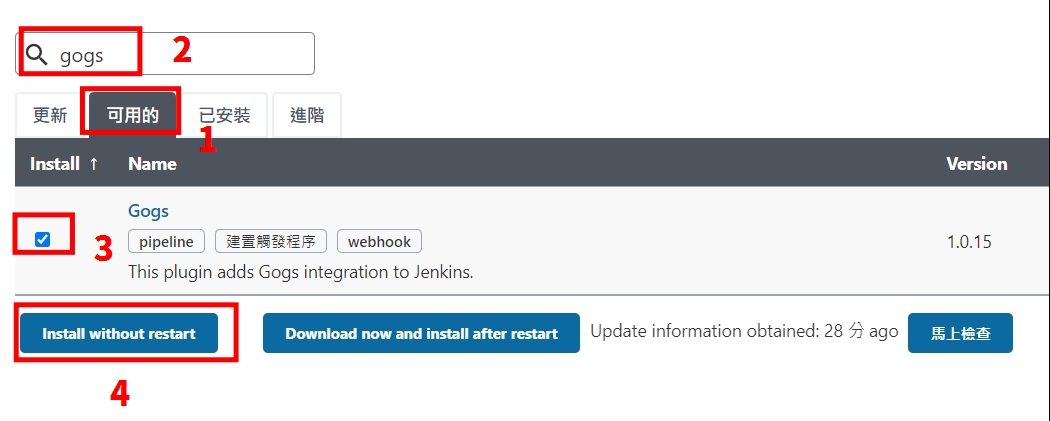
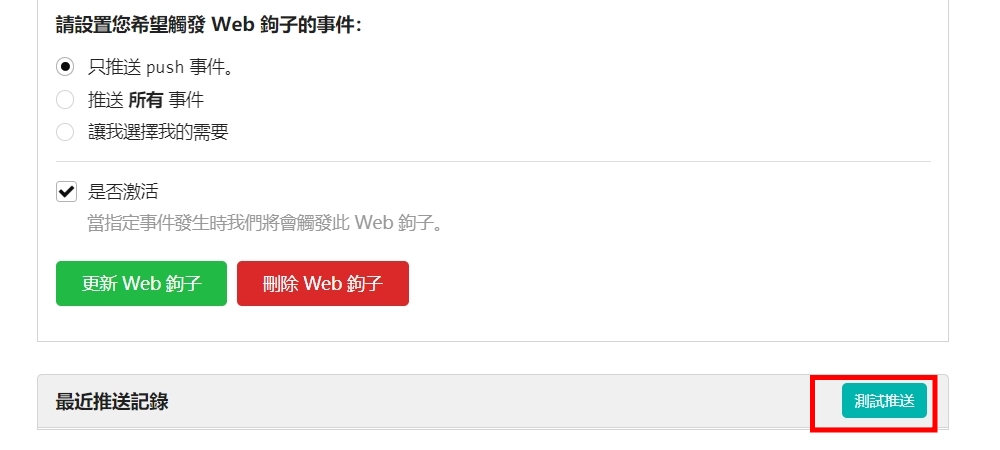
四、安裝Gogs
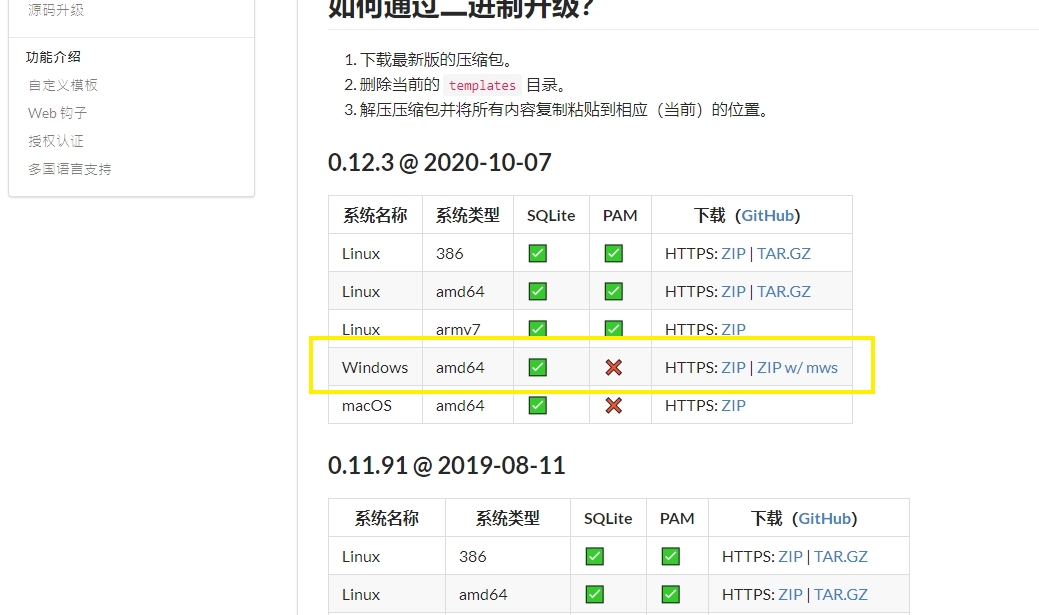
五、下載透過二進制即可,切到目錄 gogs web
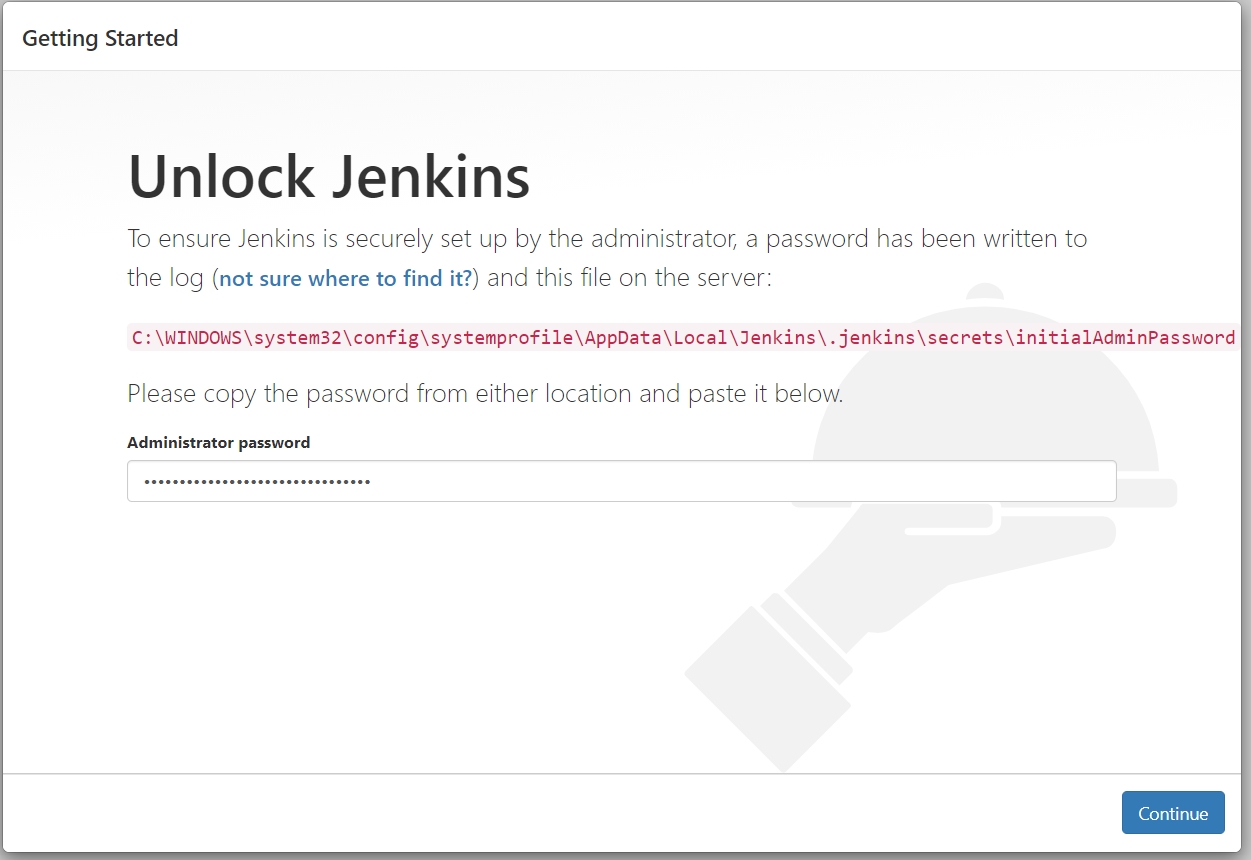
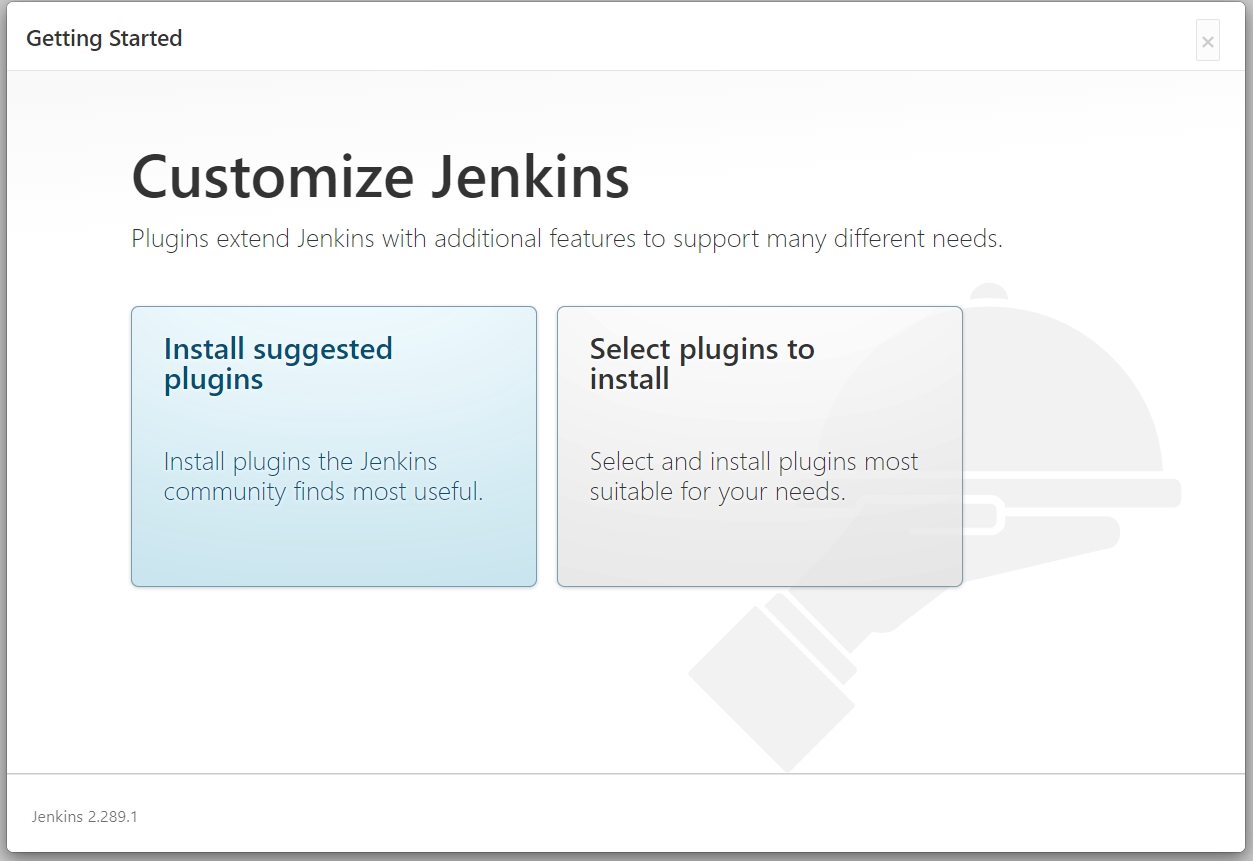
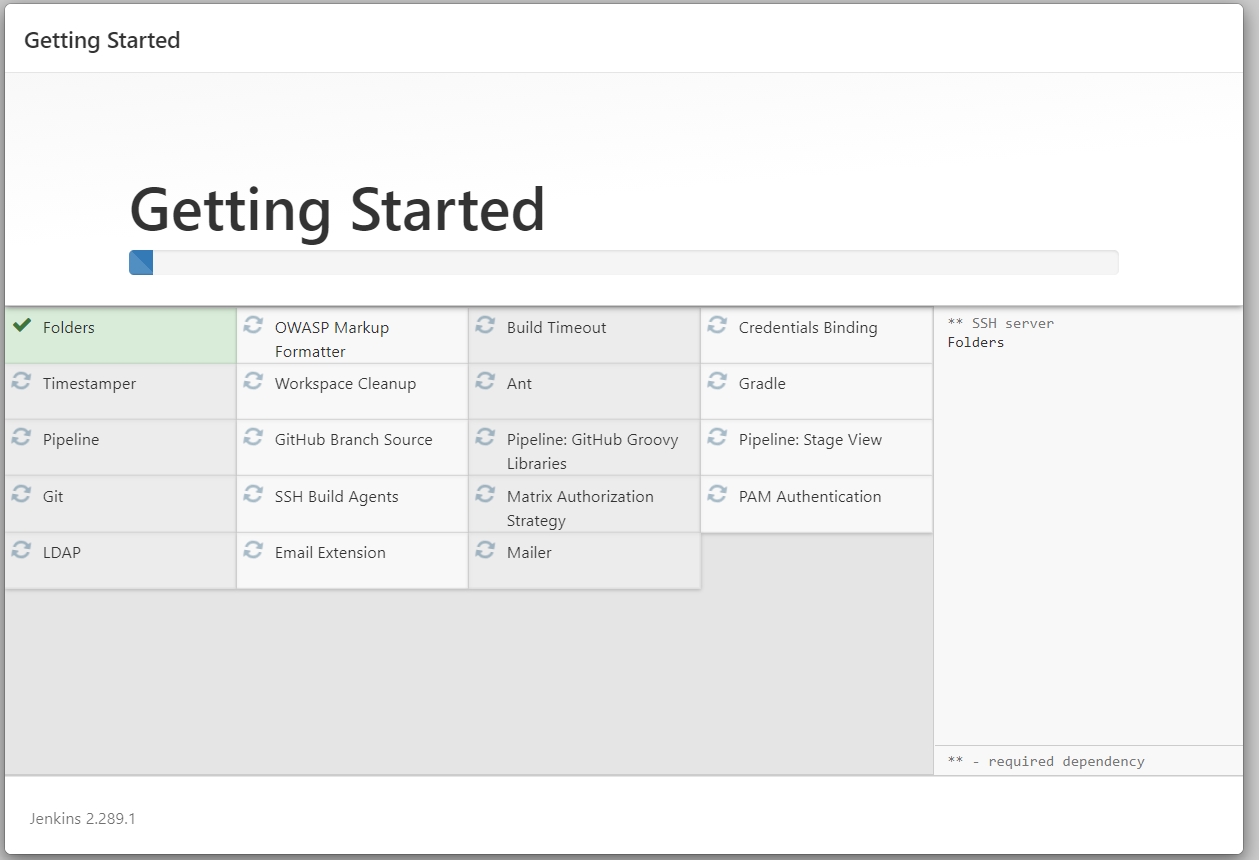
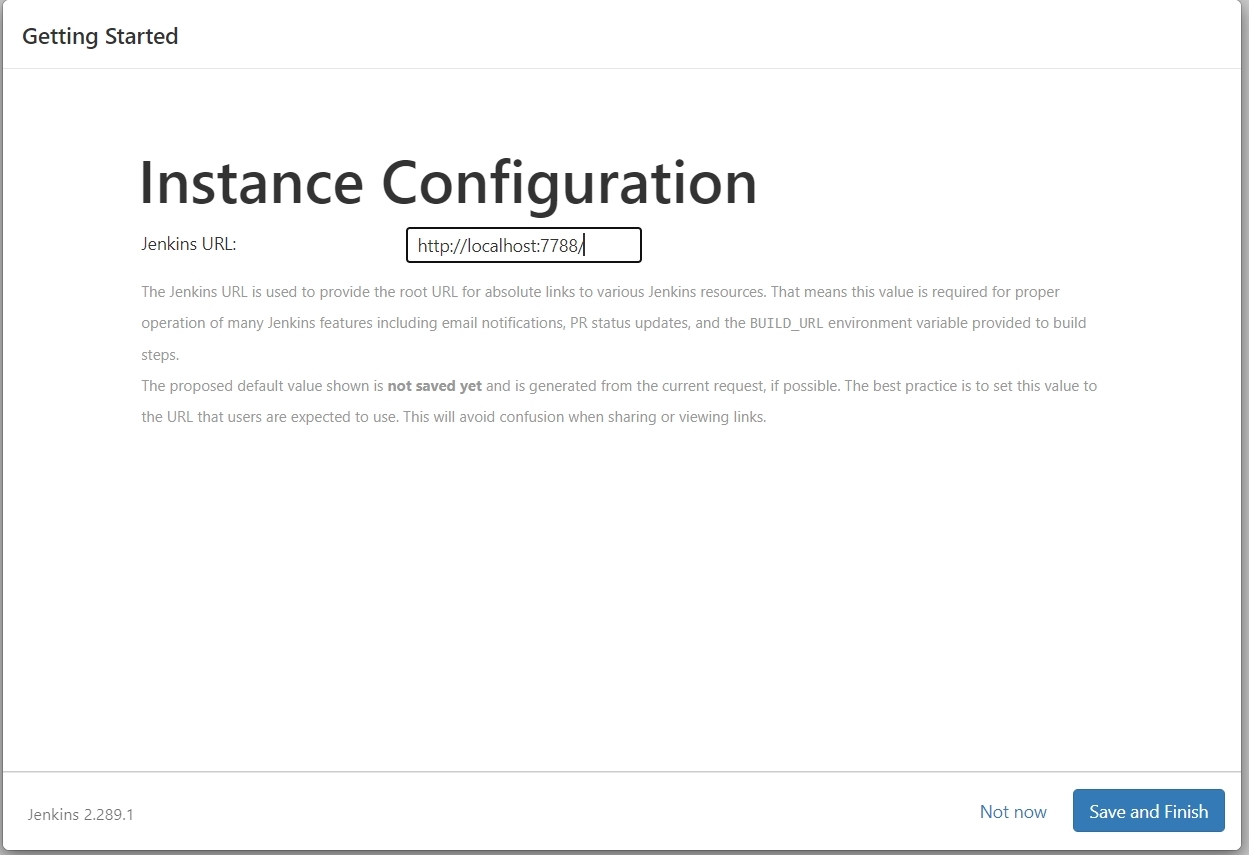
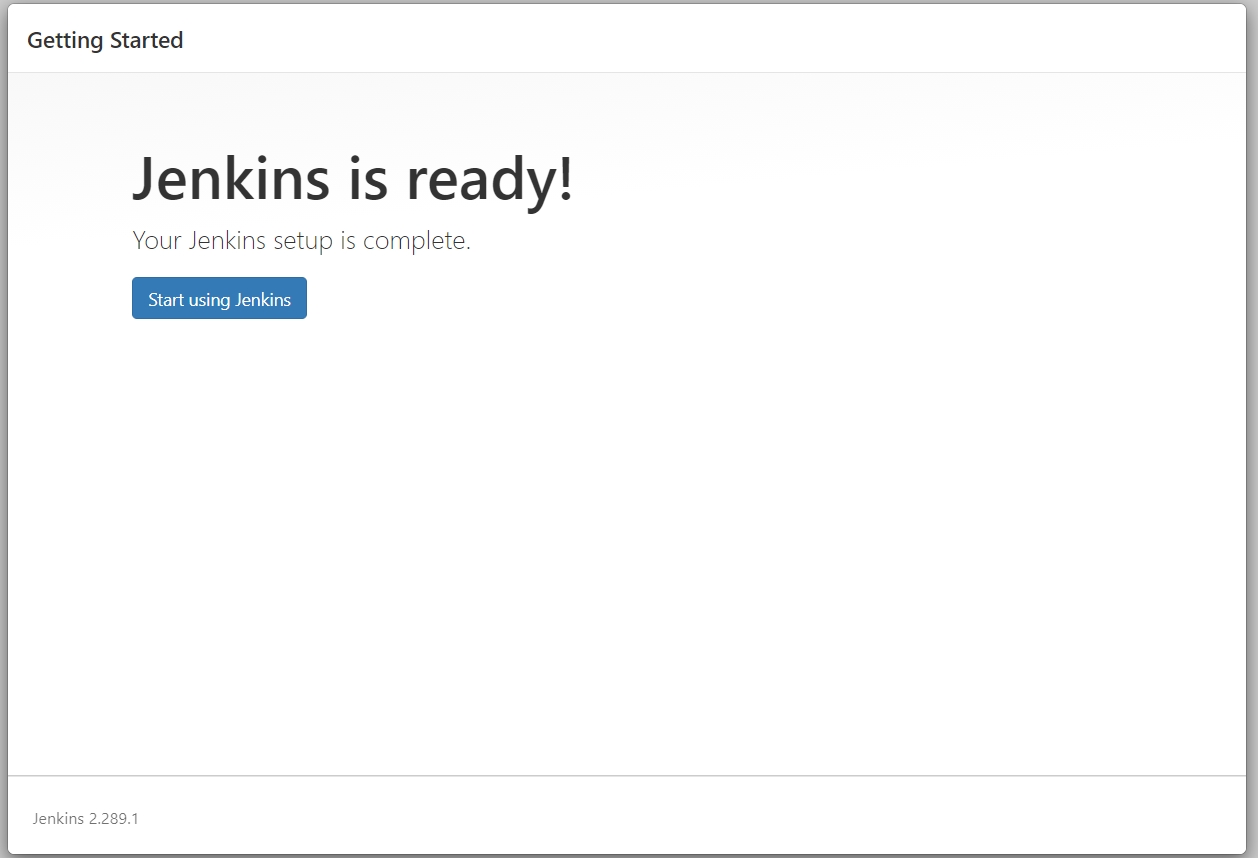
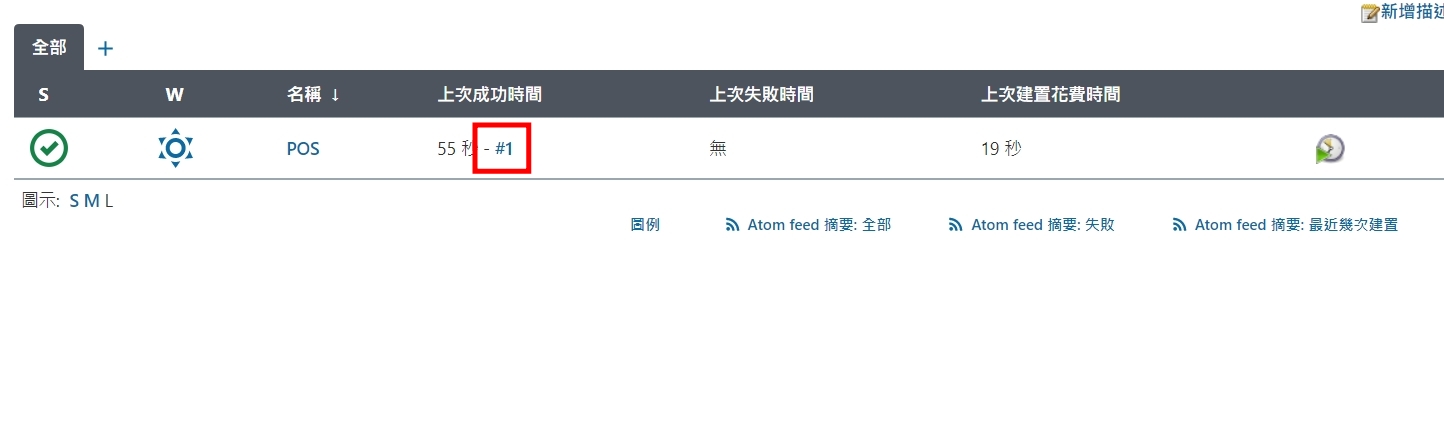
六、下載Jenkins安裝


讓WIN10 HOME版也能裝HYPER-V以及CONTAINTER
一、install Hyper-V.bat
pushd "%~dp0"
dir /b %SystemRoot%\servicing\Packages*Hyper-V*.mum >hyper-v.txt
for /f %%i in ('findstr /i . hyper-v.txt 2^>nul') do dism /online /norestart /add-package:"%SystemRoot%\servicing\Packages\%%i"
del hyper-v.txt
Dism /online /enable-feature /featurename:Microsoft-Hyper-V -All /LimitAccess /ALL
pause
二、安裝containers
pushd "%~dp0"
dir /b %SystemRoot%\servicing\Packages*containers*.mum >containers.txt
for /f %%i in ('findstr /i . containers.txt 2^>nul') do dism /online /norestart /add-package:"%SystemRoot%\servicing\Packages\%%i"
del containers.txt
dism /online /enable-feature /featurename:Containers -All /LimitAccess /ALL
pause
三、註冊為非HOME版(專業版)REG ADD "HKEY_LOCAL_MACHINE\software\Microsoft\Windows NT\CurrentVersion" /v EditionId /T REG_EXPAND_SZ /d Professional /F
四、安裝Docker執行DESKTOP後出現錯誤訊息,下載更新就好
來源文章 https://docs.microsoft.com/en-us/windows/wsl/install-win10#step-4—download-the-linux-kernel-update-package
https://wslstorestorage.blob.core.windows.net/wslblob/wsl_update_x64.msi
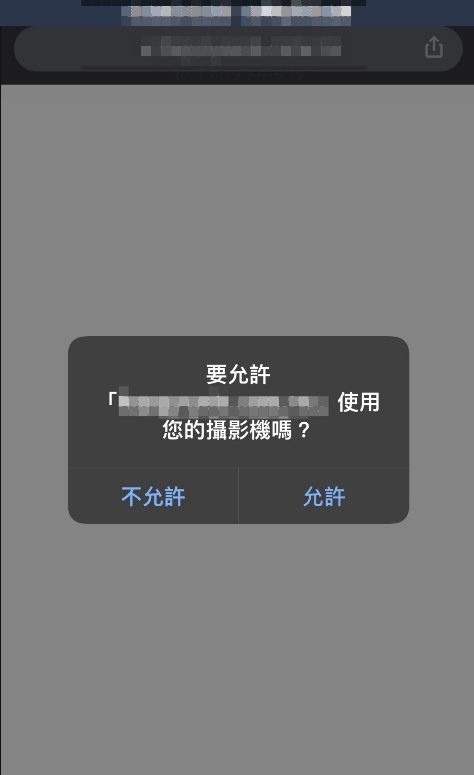
LINE LIFF 1922簡訊實聯制掃碼發送簡訊HOW TO
在疾管家的簡訊實聯制中,主要看到是透過LIFF功能,去掃QR CODE後,然後發送簡訊。所以技術有
1 LINE LIFF 功能
2 掃條碼功能(透過HTML5-QRCODE) 注意:網站要https才能有權限開啟鏡頭
3 SMS
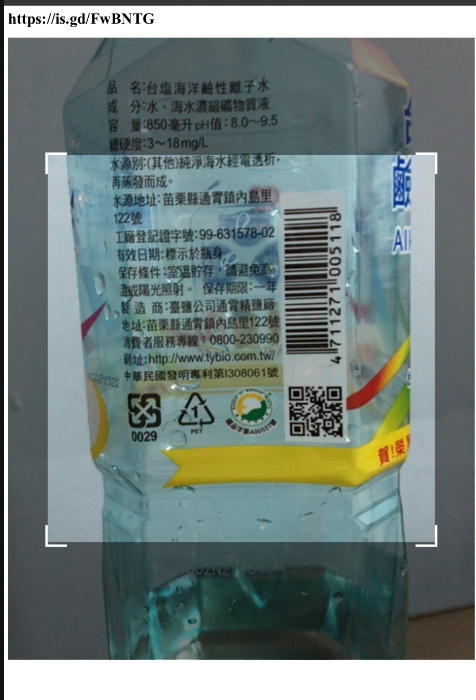
以下稍微實作一下,如何像疾管家一樣自動直接開啟後鏡頭
然後在掃描確認到開頭是SMSTO:1922後,透過SMS協定自動調到簡訊畫面
不過android/ios的簡訊中串body不同(ios是& android是 ? )
這樣就可以實現出像唐鳳政委與幕後功臣們所做出的功能了!
<html>
<head>
    <meta charset="utf-8">
    <title>壽山掃條碼測試</title>
</head>
<body>
    <!-- 條碼顯示的內容顯示在 qr-reader-results -->
    <div id="qr-reader-results"><h1 id="qrtext"></h1></div>
	<!-- 掃描用 -->
    <div id="qr-reader" style="width:100%"></div>
</body>
<script src="https://cdnjs.cloudflare.com/ajax/libs/html5-qrcode/2.0.3/html5-qrcode.min.js"></script>
<script>
    <!-- 呼叫 html5qrcode 代入qr-reader -->
	const html5QrCode = new Html5Qrcode("qr-reader");
	const qrCodeSuccessCallback = (decodedText, decodedResult) => {
          /* 處理成功掃描 */
		  document.getElementById("qrtext").innerHTML = decodedText;
	      if (decodedText.toUpperCase().startsWith("SMSTO:1922:")) {
              var t = decodedText.split(":", 3),
              r= t[1],
              a= t[2],
		      o = "sms:" + r + "&body=" + a; // to-do 如果是android 要將&改為?
			  window.location.href = o;
		  }
          html5QrCode.clear();
     };
     const config = { fps: 10, qrbox: 800 };
	// 直接開啟後面鏡頭
	<!-- 開啟前置鏡頭 -->
	<!-- html5QrCode.start({ facingMode: "user" }, config, qrCodeSuccessCallback); -->
	html5QrCode.start({
	  facingMode: "environment" },
	  config, qrCodeSuccessCallback);
</script>
</head>
</html>
初探 ASP.net Core 打造 LINE BOT
程式下載: https://drive.google.com/file/d/1rmz910QWqQxLa8XOMWrFG1fjSTPoTLFd/view?usp=sharing
本篇學會
– LOG的撰寫以及追蹤
– ngrok 讓本機可以debug webhook
– JSON 的基本運用
– LINE BOT初步瞭解(回應訊息)
準備篇
– Visual Studio
– ngrok(localhost 對應到https public domain的服務)
下載連結:
https://ngrok.com/download
– LINE Developers 帳號(免費)
https://developers.line.biz/en/ “https://developers.line.biz/en/
開發步驟
– 新增asp.net Core web應用程式後按下一步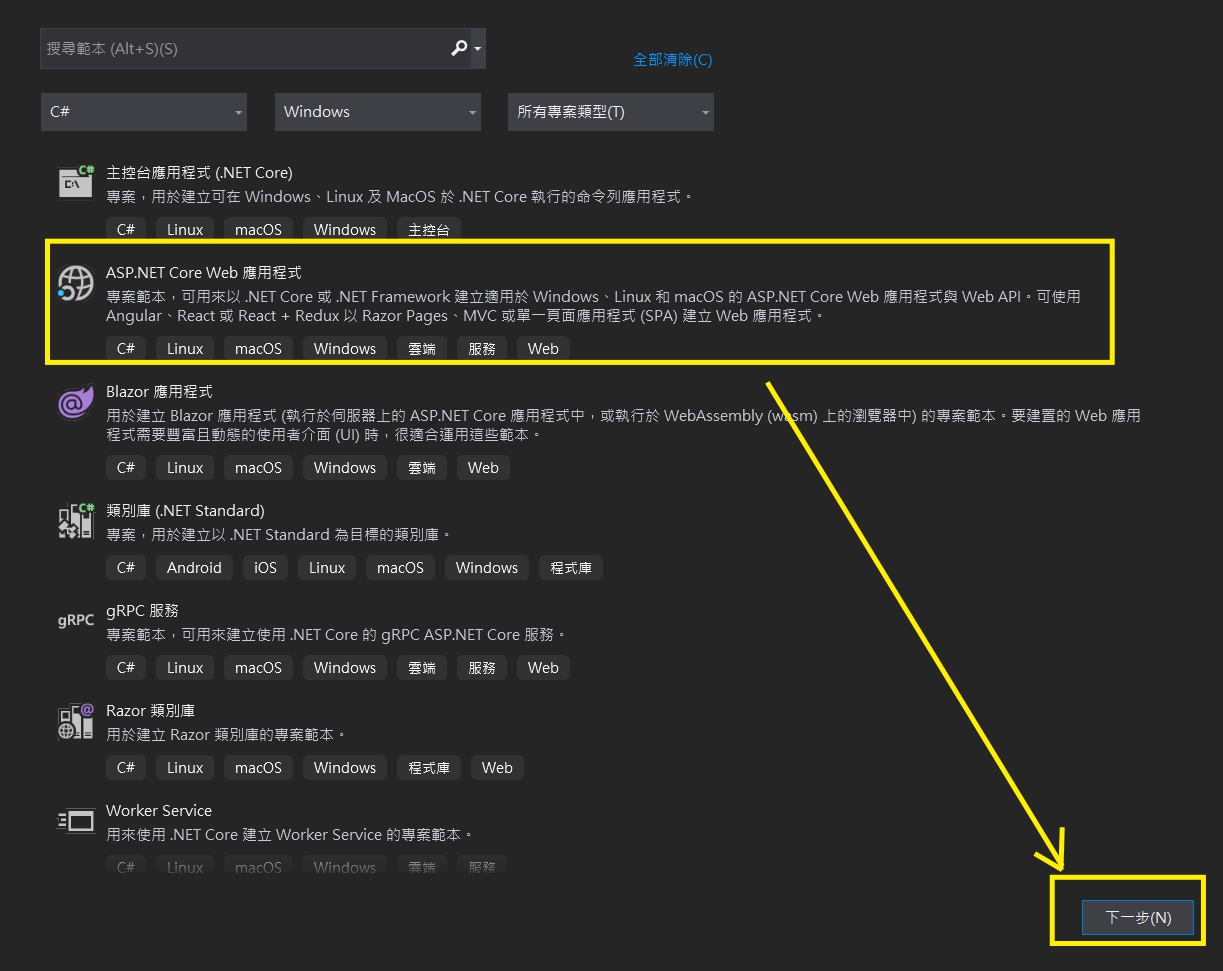
– 設定專案名稱LINEBOT,建立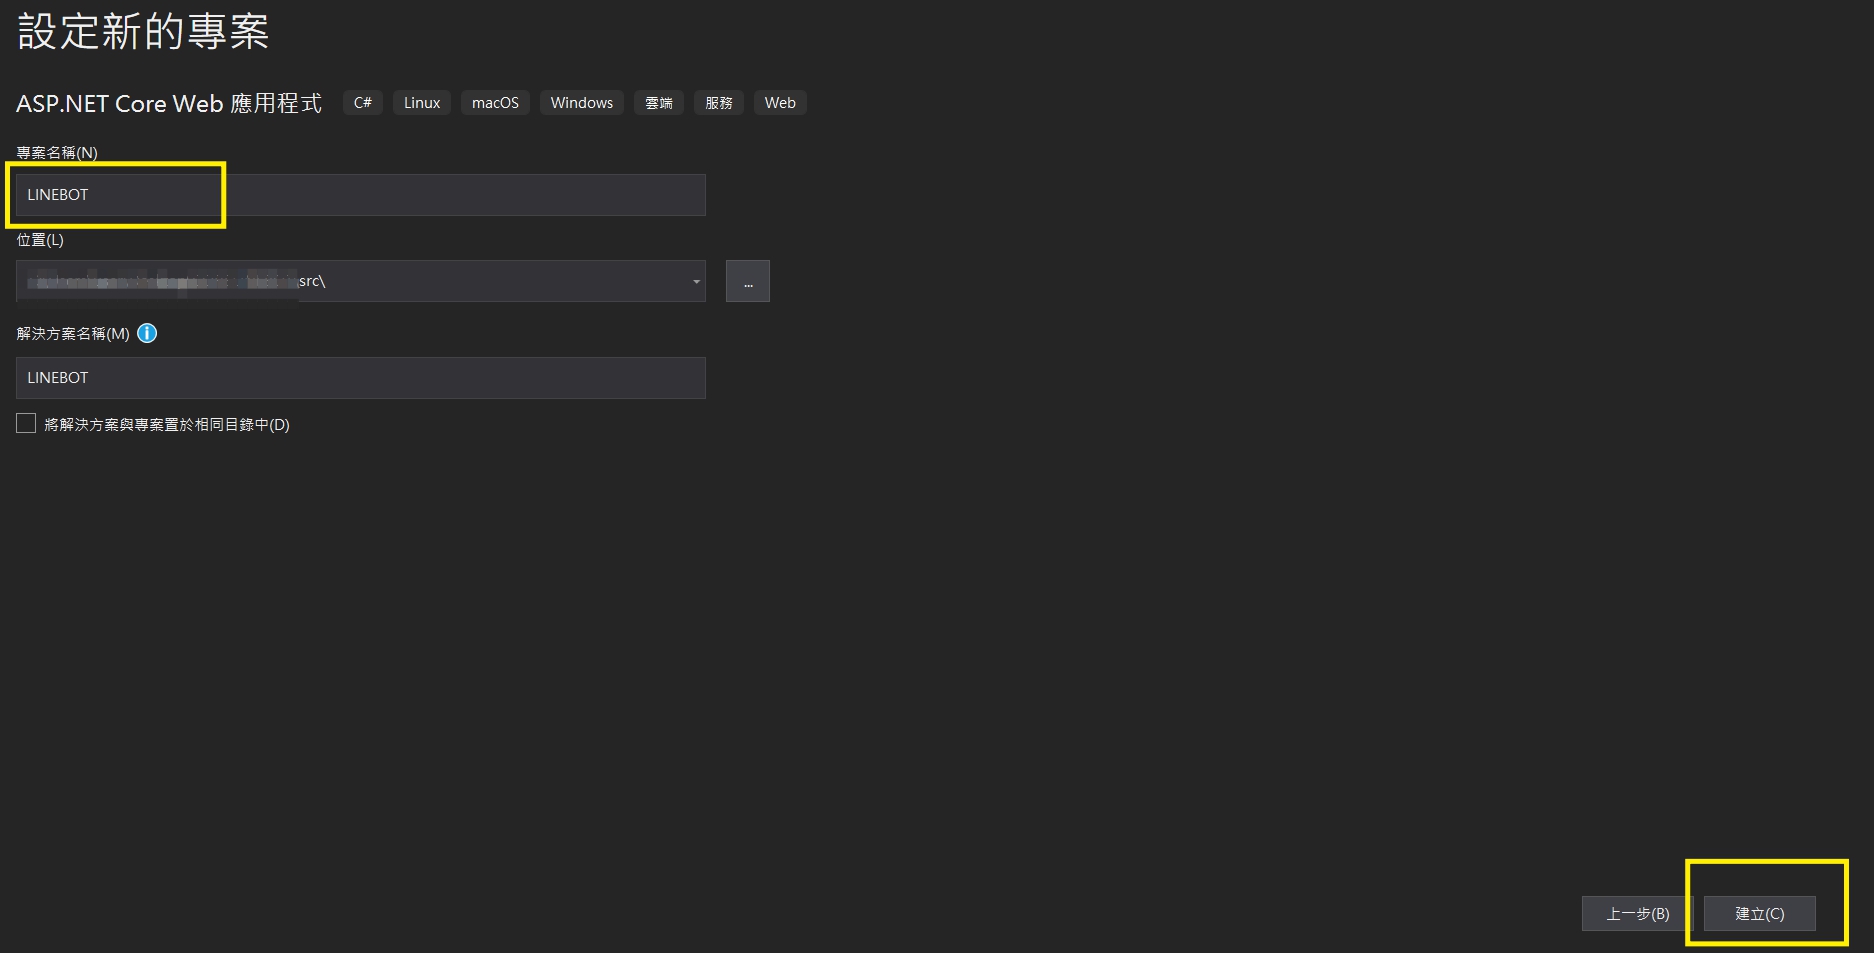
– 選擇.NET Core → ASP.NET Core 3.1 →API→建立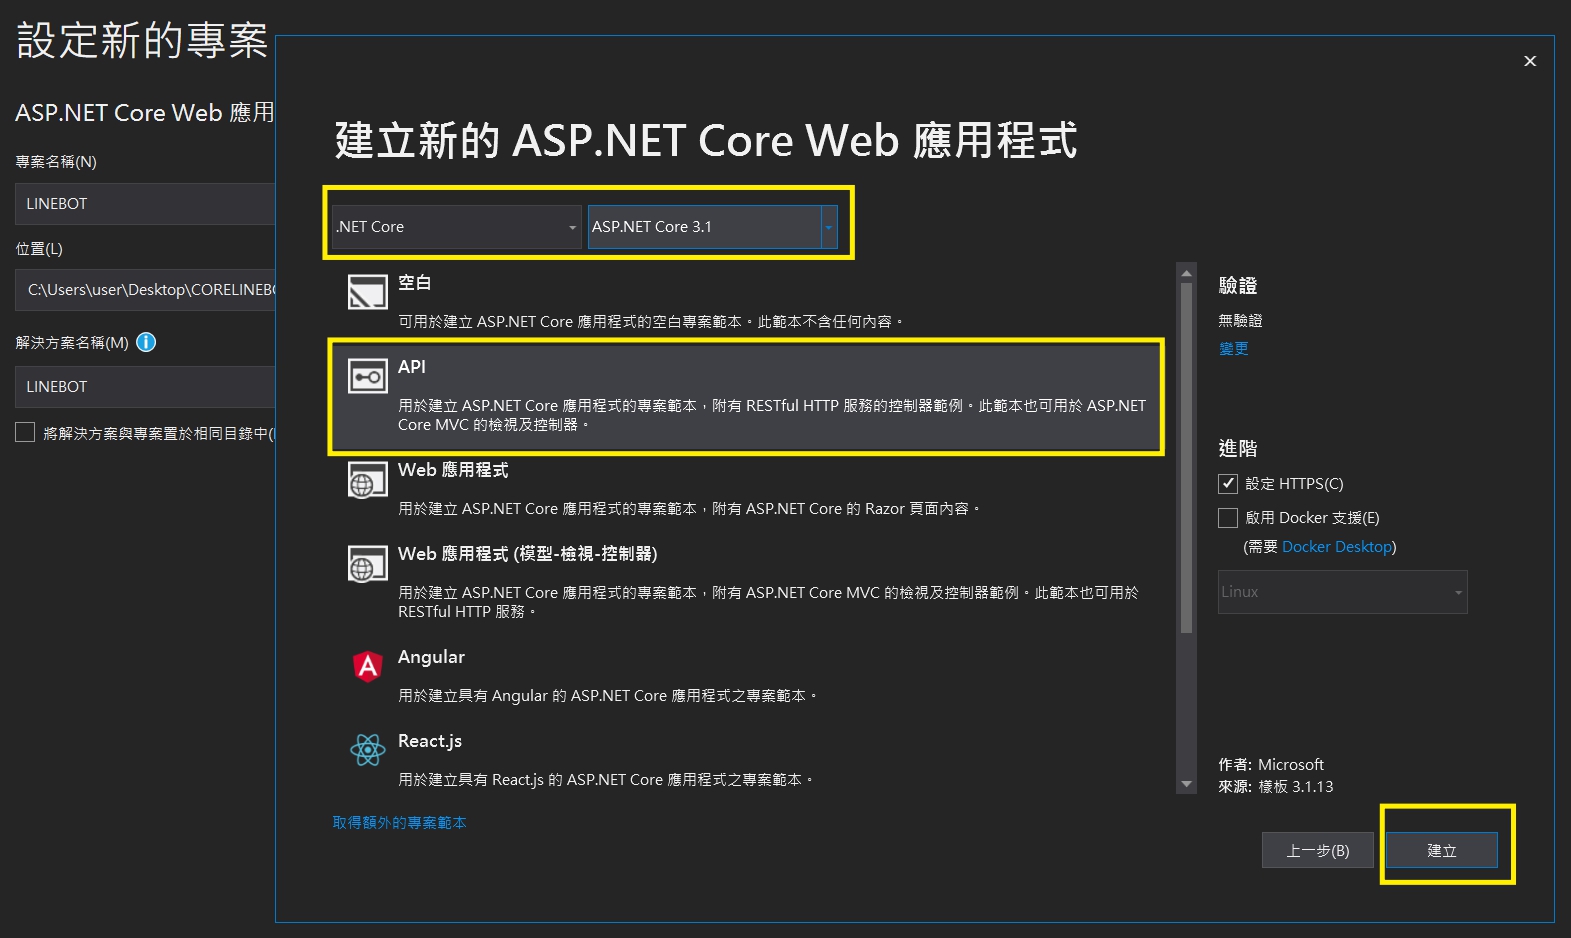
– 首先安裝 *serilog.extensions.logging*
– 在Startup.cs加上 ILoggerFactory ,並設定檔名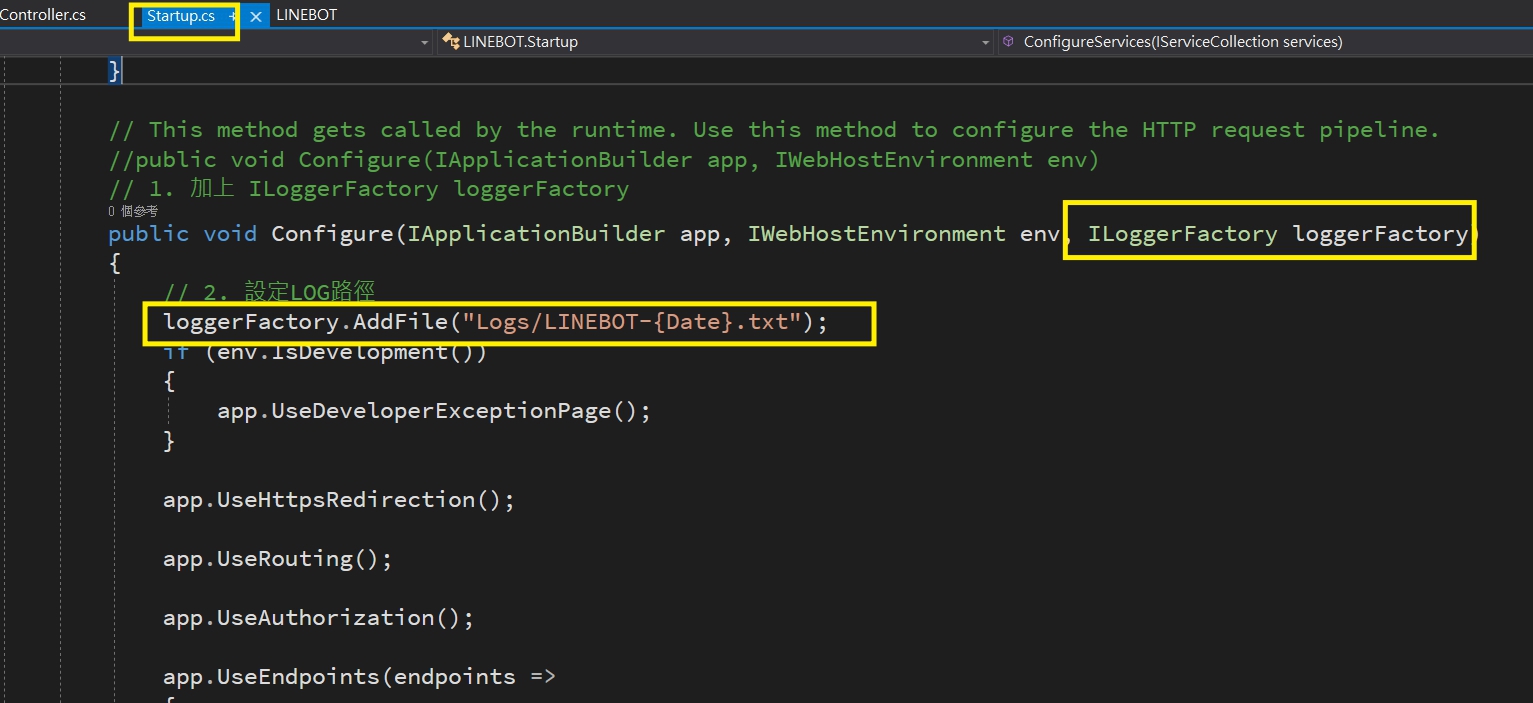
– 在預設的WeatherForecastController.cs試著加上LOG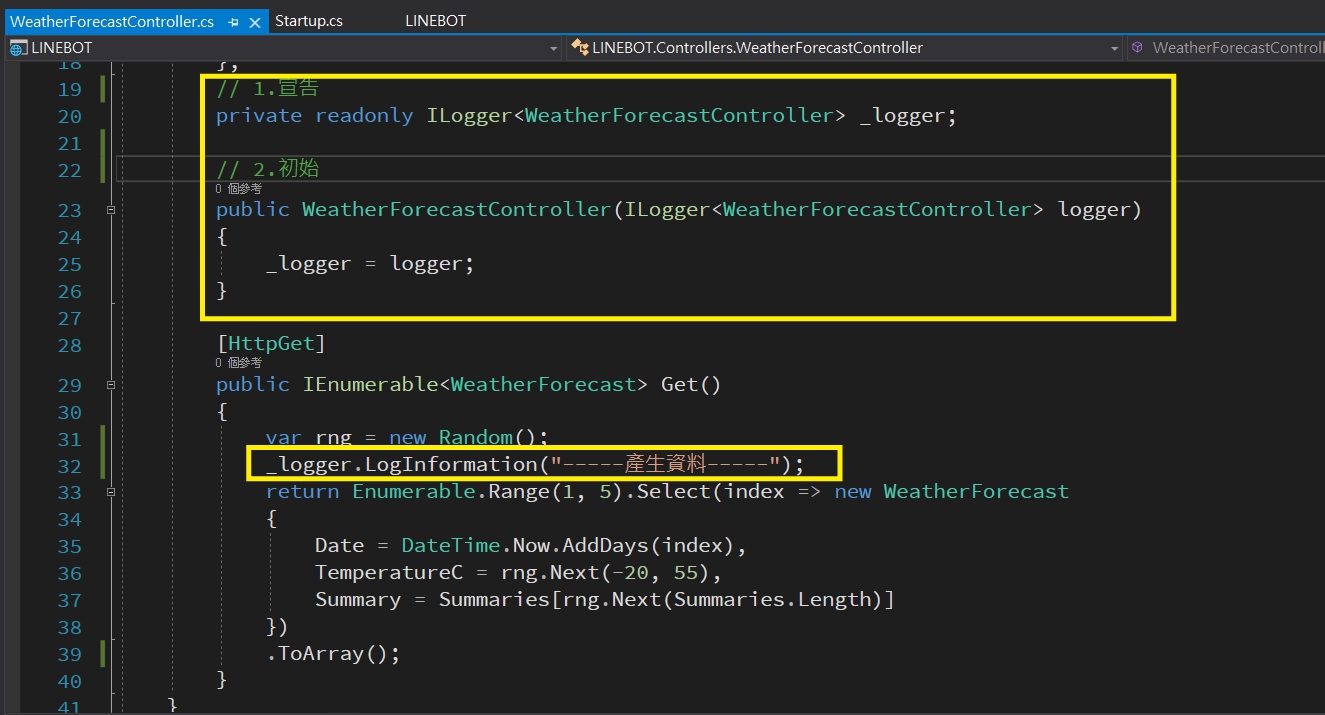
– 開啟程式後,到logs目錄下確定LOG正常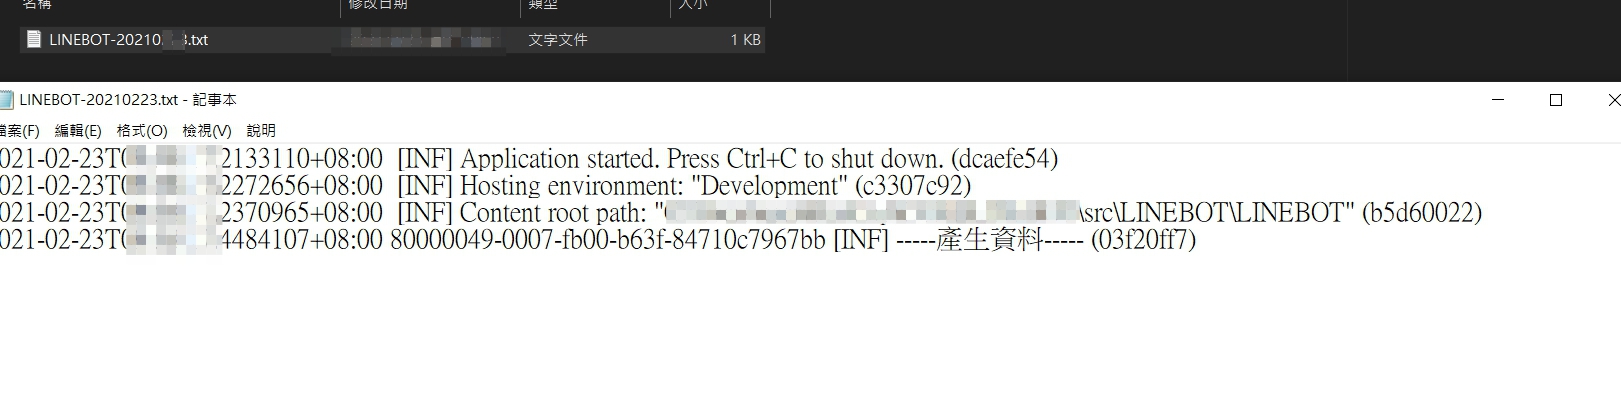
– 新增API控制器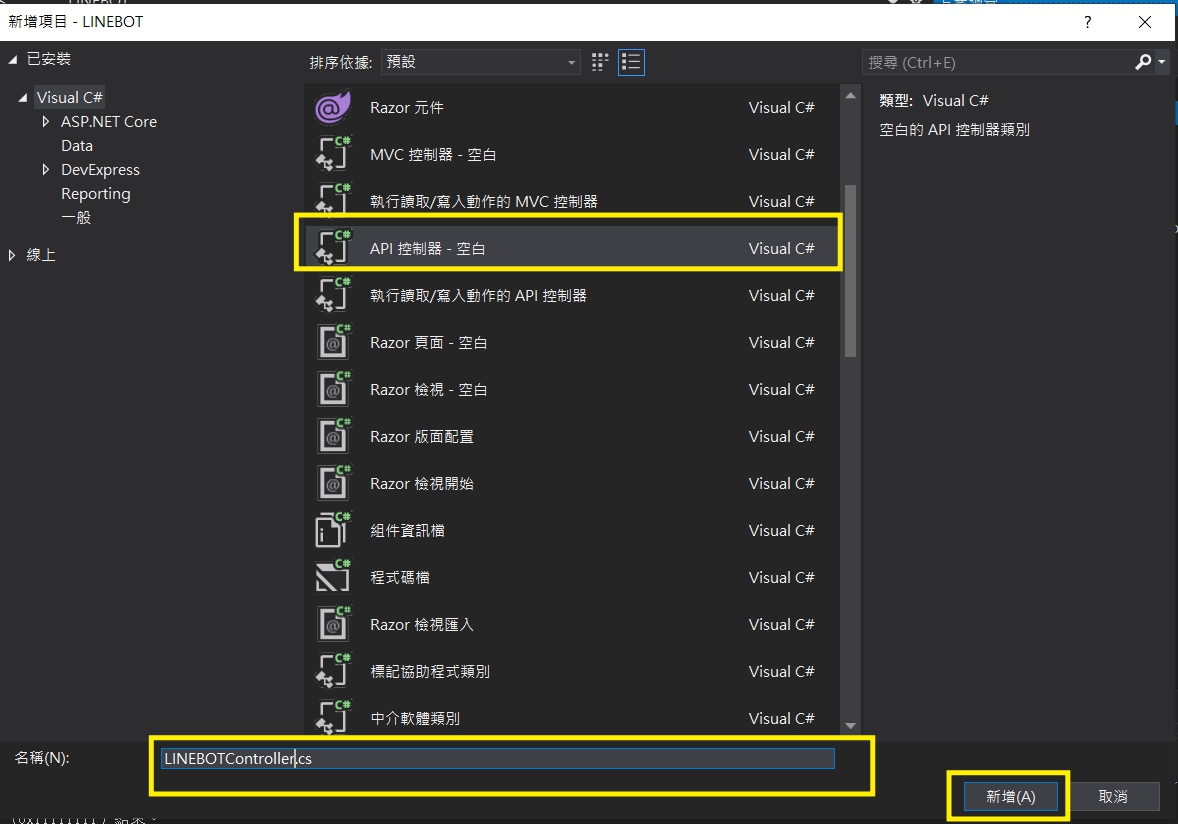
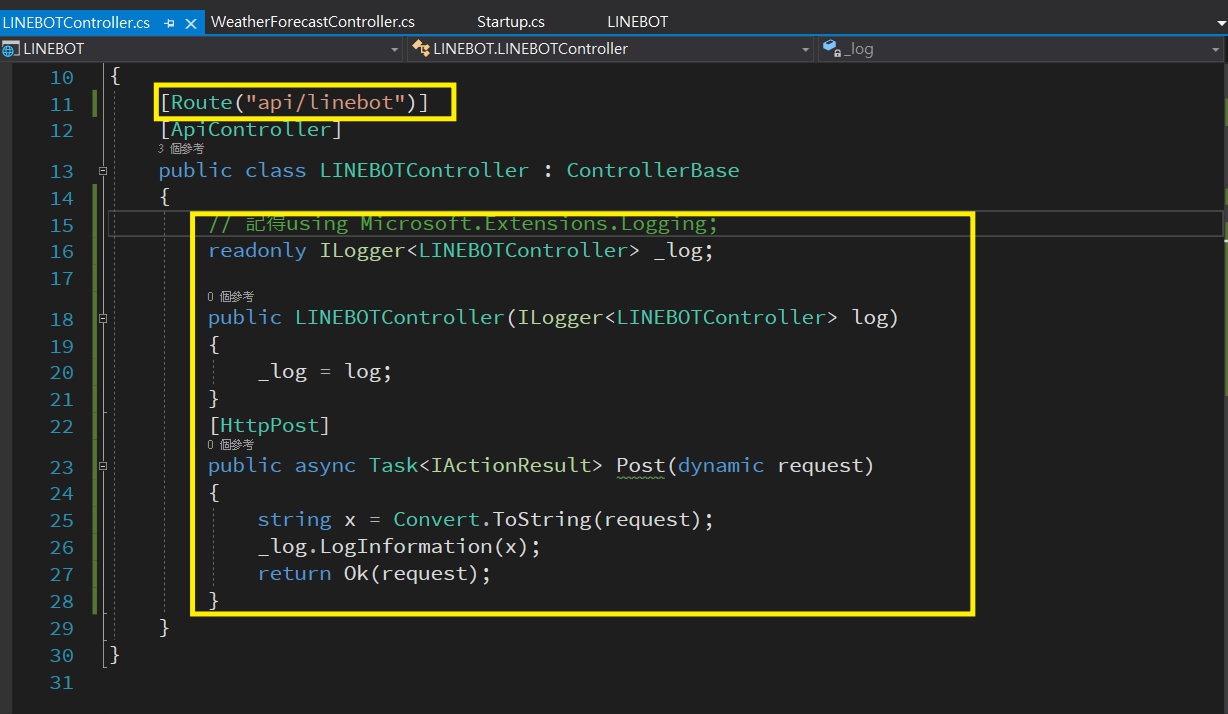
– 修改route為 api/linebot ,程式如下
// 記得using Microsoft.Extensions.Logging;
readonly ILogger<LINEBOTController> _log;
public LINEBOTController(ILogger<LINEBOTController> log)
{
_log = log;
}
[HttpPost]
public async Task<IActionResult> Post(dynamic request
{
string x = Convert.ToString(request);
_log.LogInformation(x);
return Ok(request);
}
– 執行程式後,打開IIS Express,確認PORT號
– 打開命令提示字元,切換到ngrok目錄下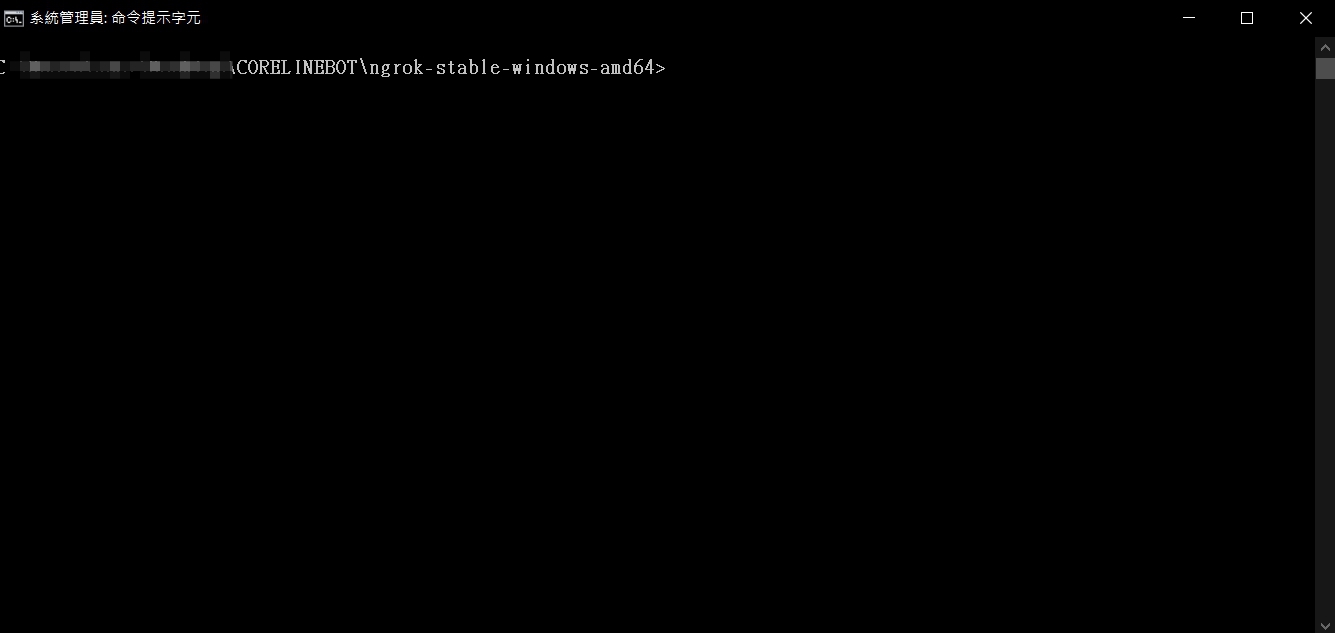
– 執行命令(記得Port號改成自己對應)
`!ngrok http 33766 -host-header=”localhost:33766″`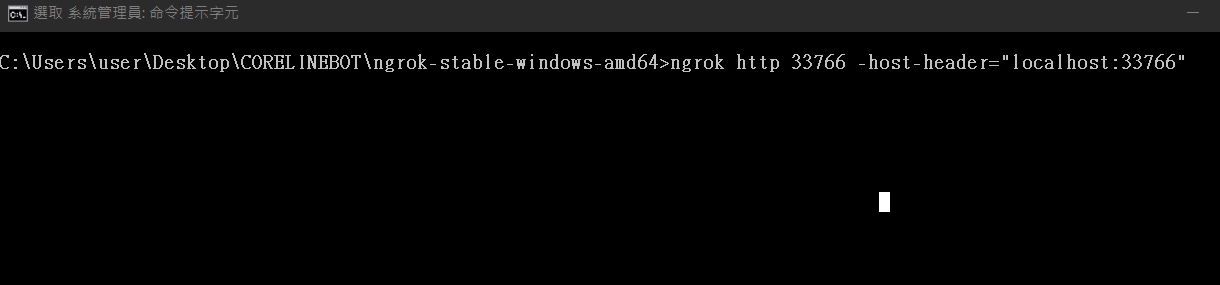
– 執行後,會取到一個https開頭網址,記下來後(不要關閉視窗)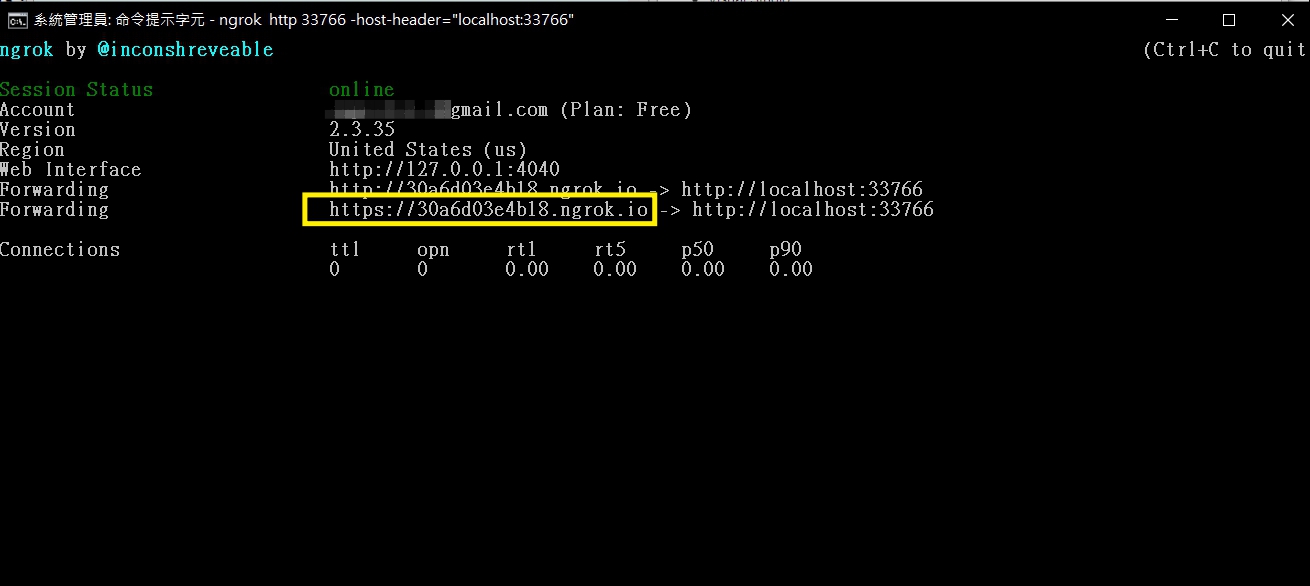
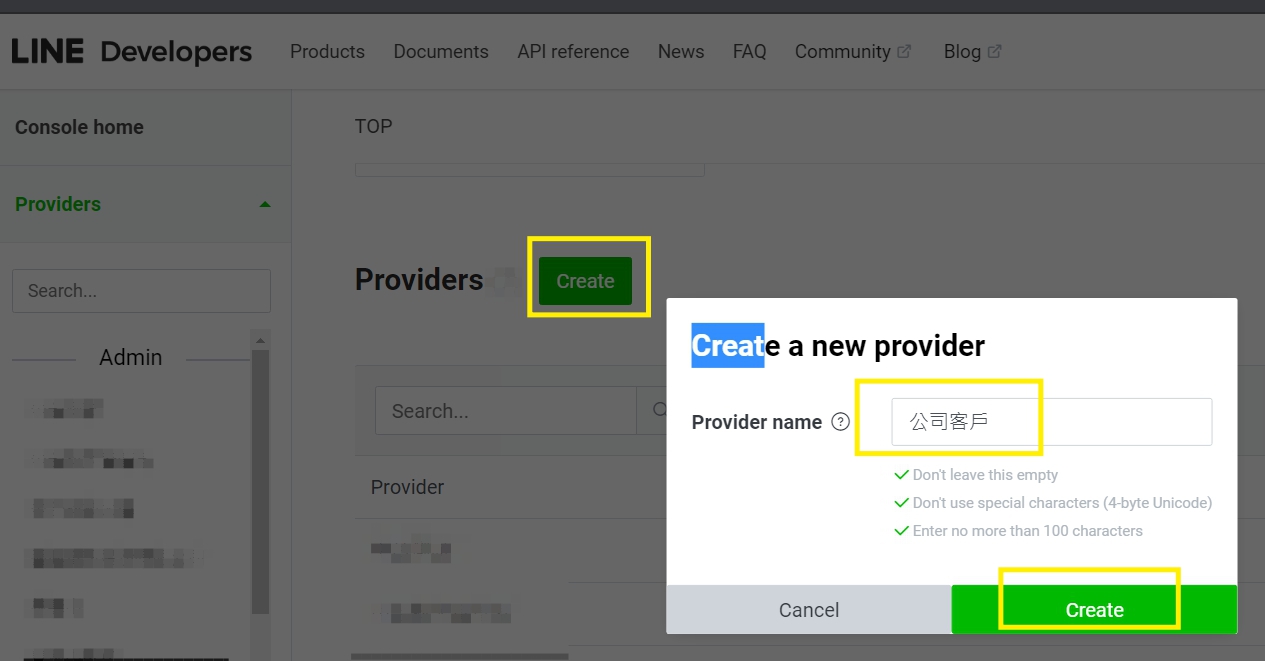
– 進到LINE Developer網址,新增Provi![]
– 新增一個 Messaging API的Channel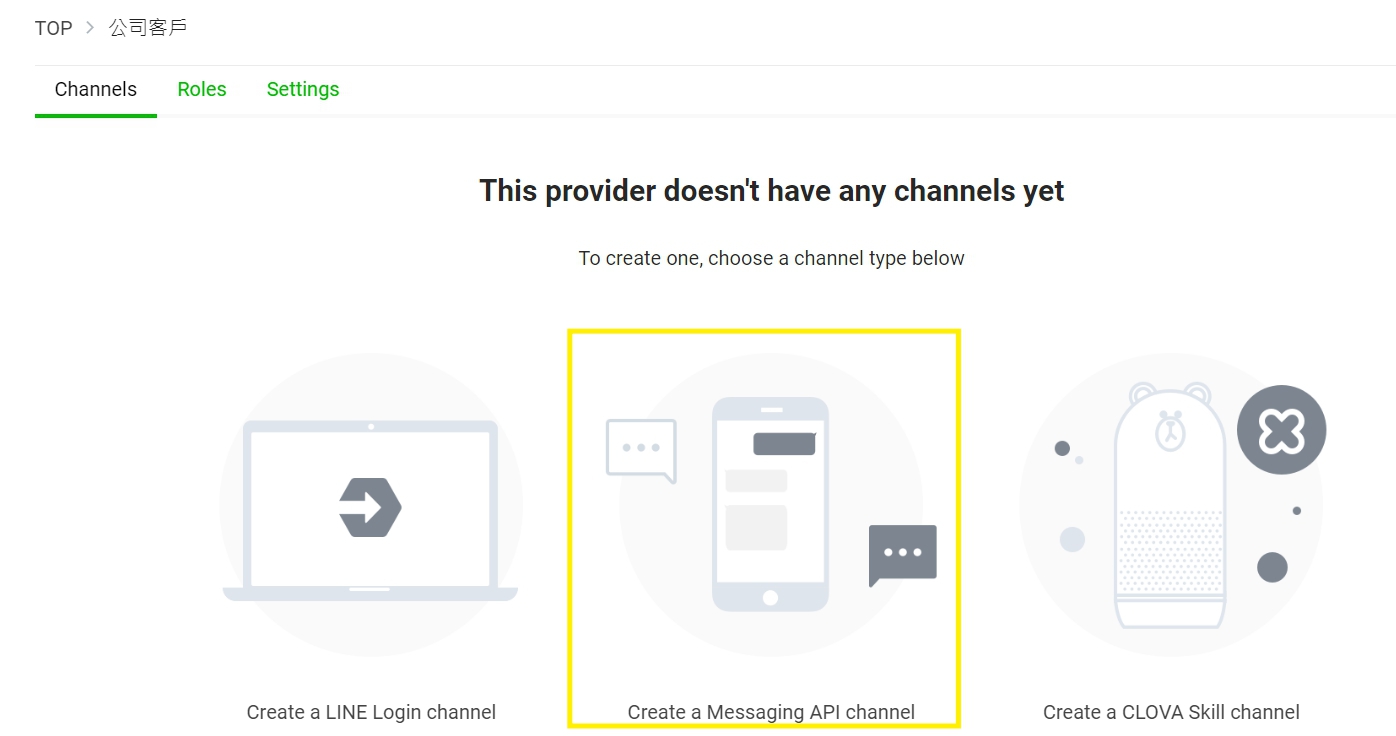
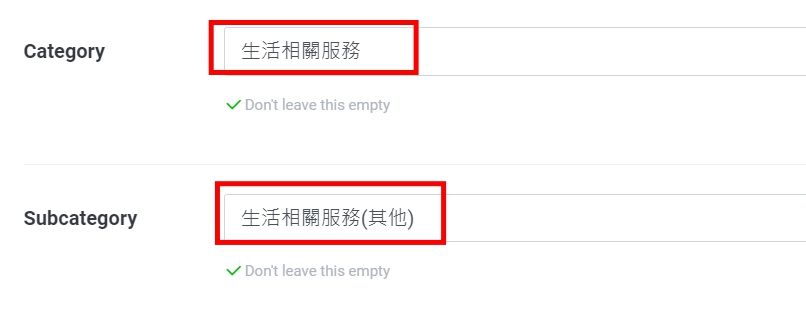
– 設定名稱與描述、目錄、子目錄後勾選允許相關條款後按Create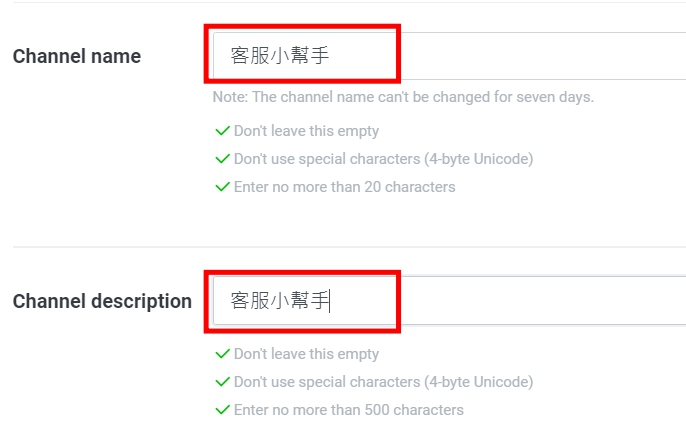
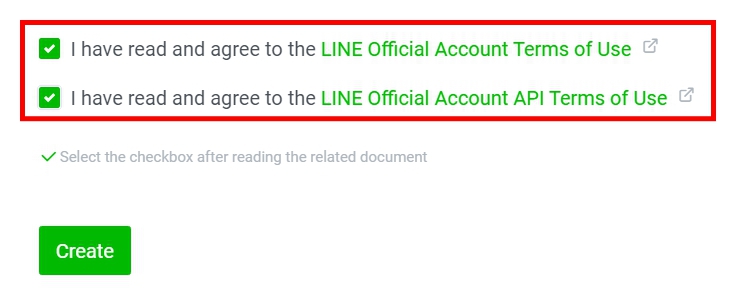
– 最後同意使用資訊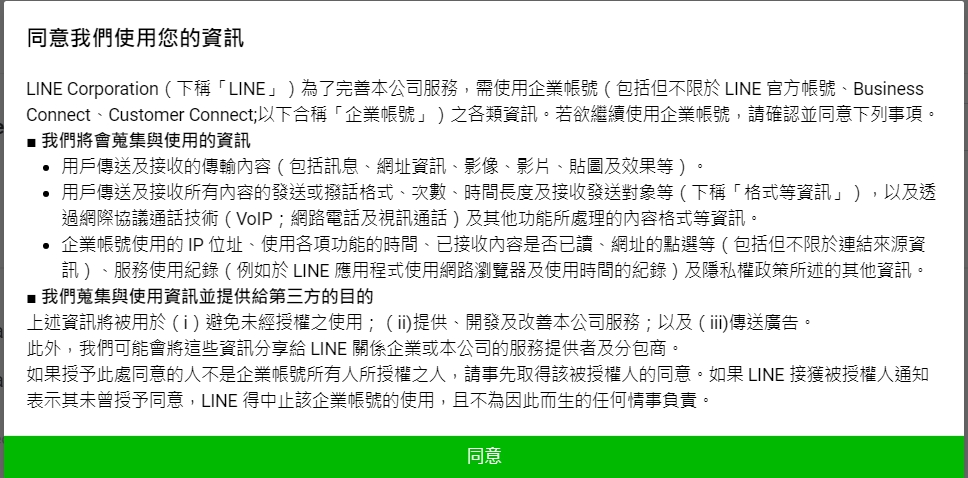
– 建立完成後進到MessagingAPI頁籤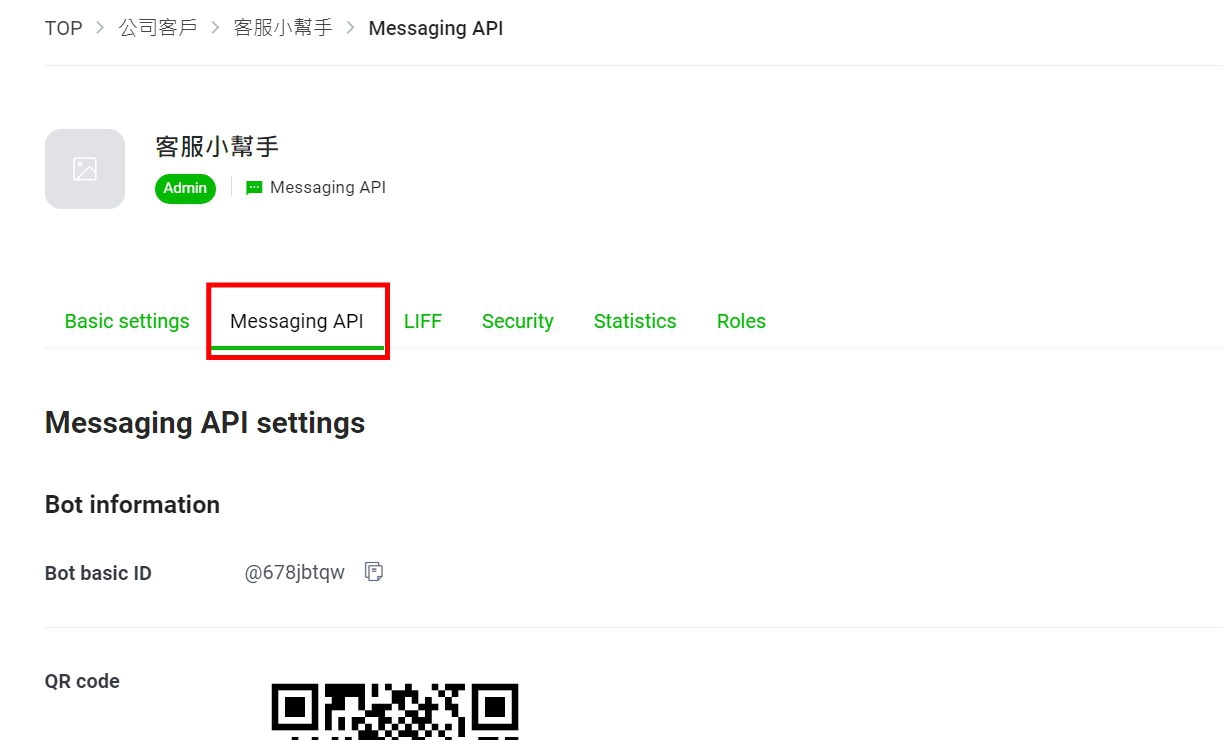
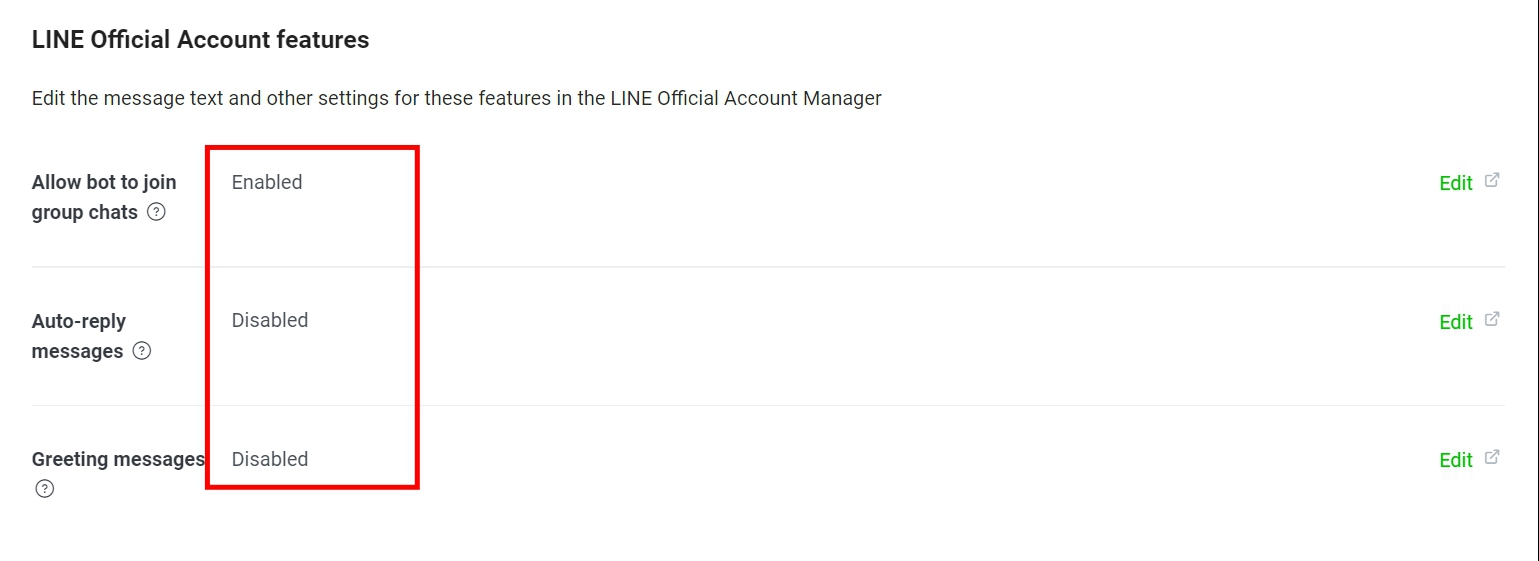
– 修改以下內容
– 允許加入群組或多人聊天室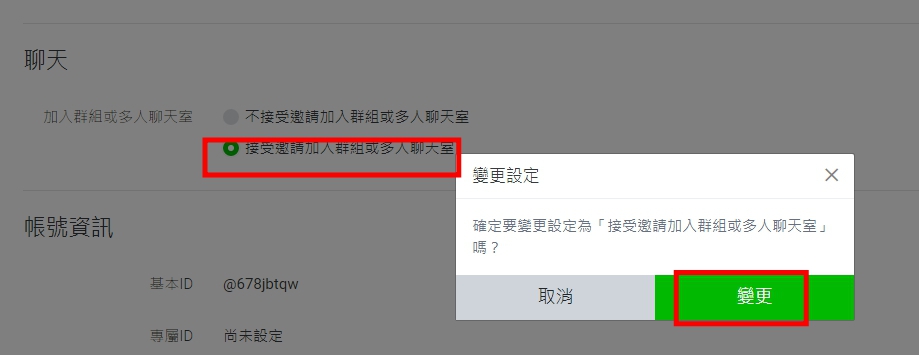
– 停用加入好友訊息以及自動回應訊息,啟用webhook功能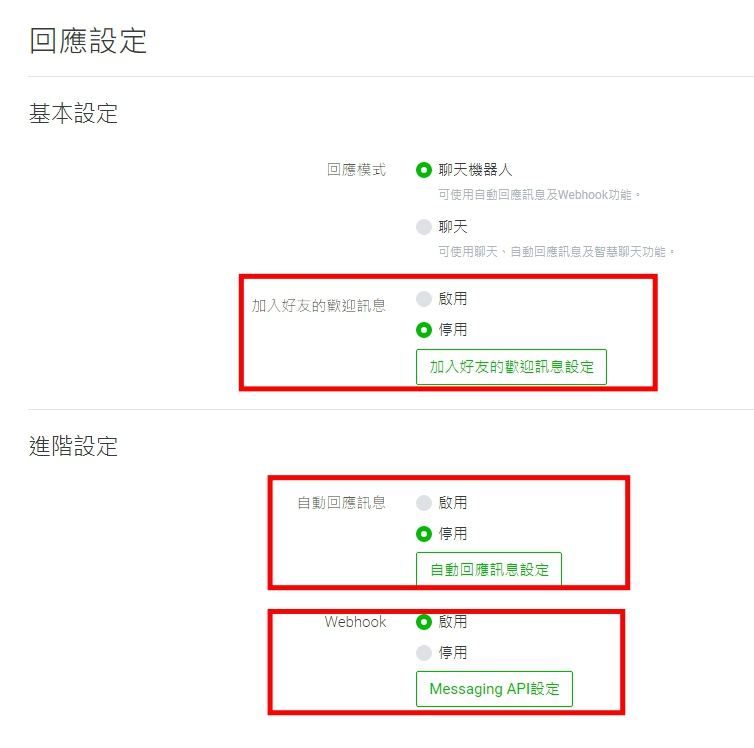
– 加webhook URL輸入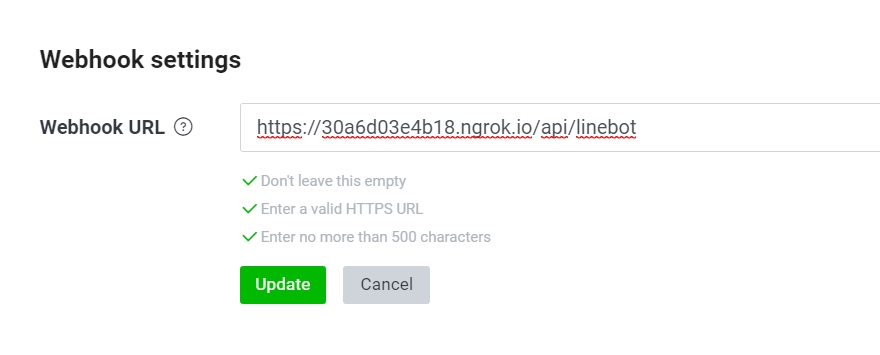
– 輸入確定後按Verify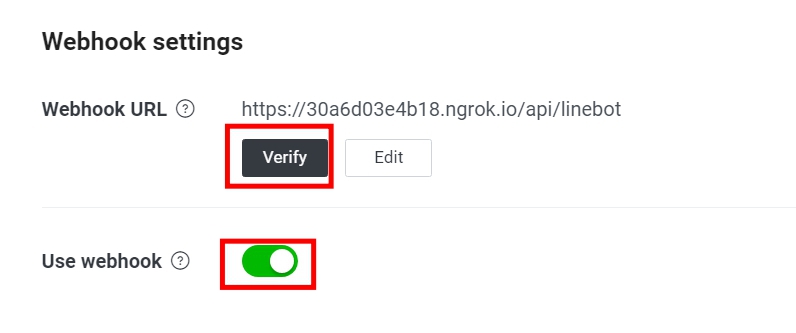
– 出現 307 Temporary Redirect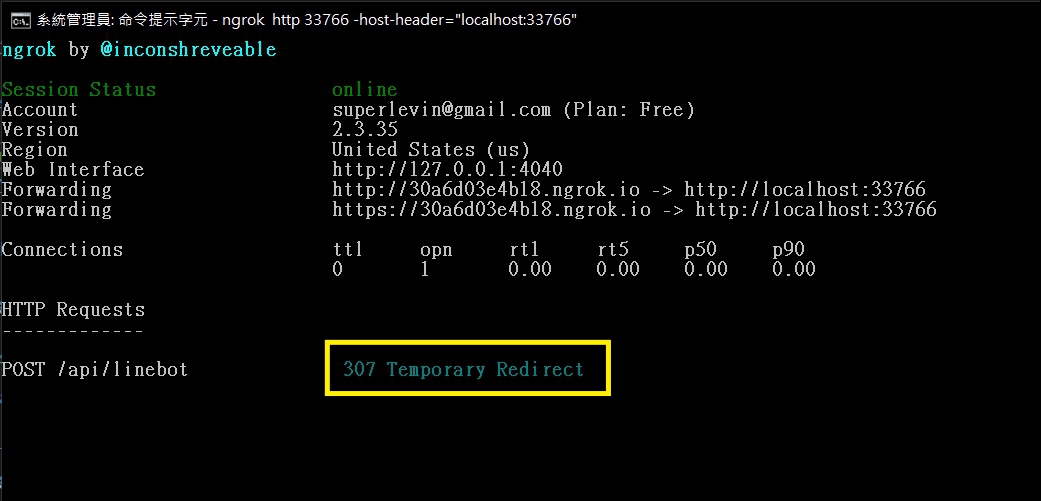
– Startup.cs中的 app.UseHttpsRedirection() 註解,重新開啟程式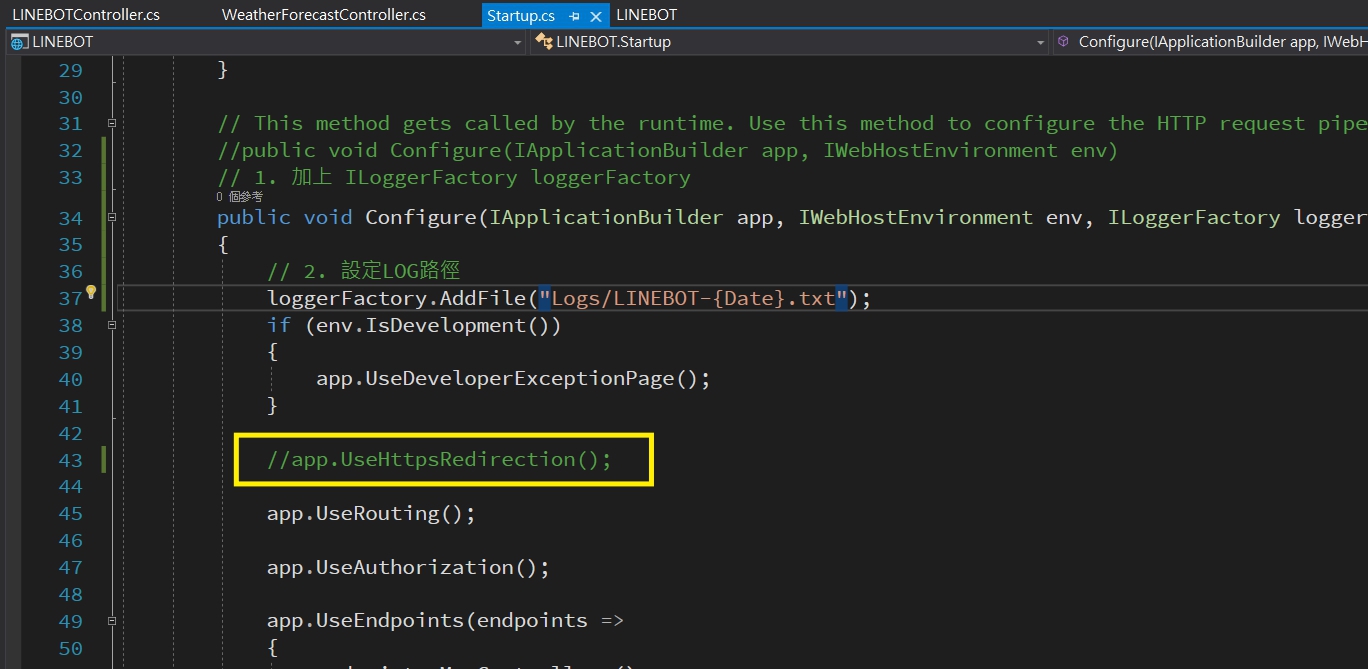
– 重新驗證後成功!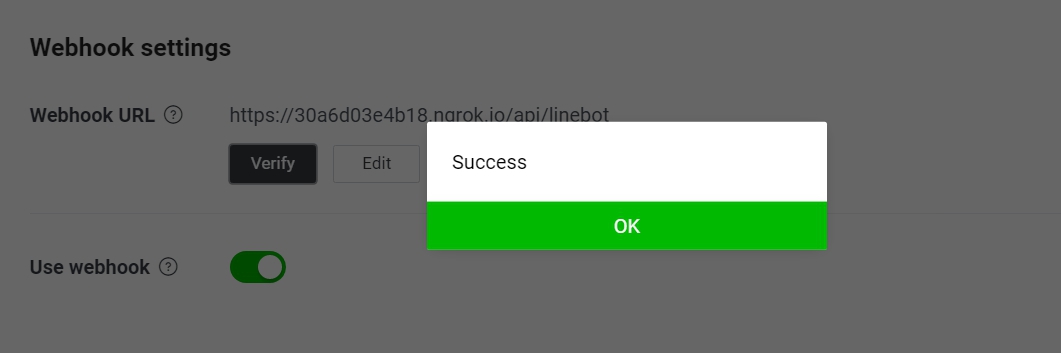
– 從LOG看到LINE傳來的驗證訊息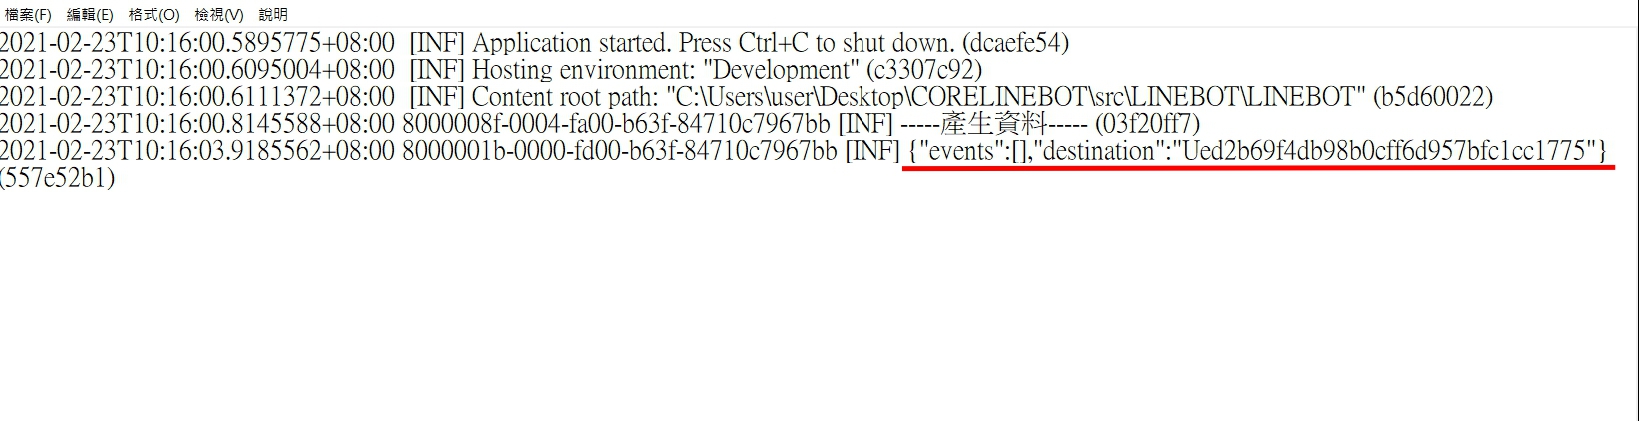
## 回聲蟲
– 從開發者網站中的Messaging API得知如何做[回應reply](https://developers.line.biz/en/docs/messaging-api/sending-messages/#reply-messages)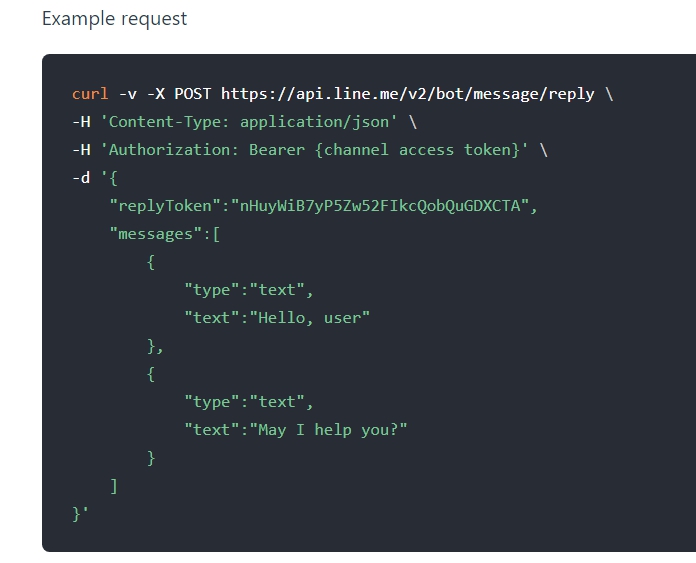
– 安裝 NewtonSoft.Json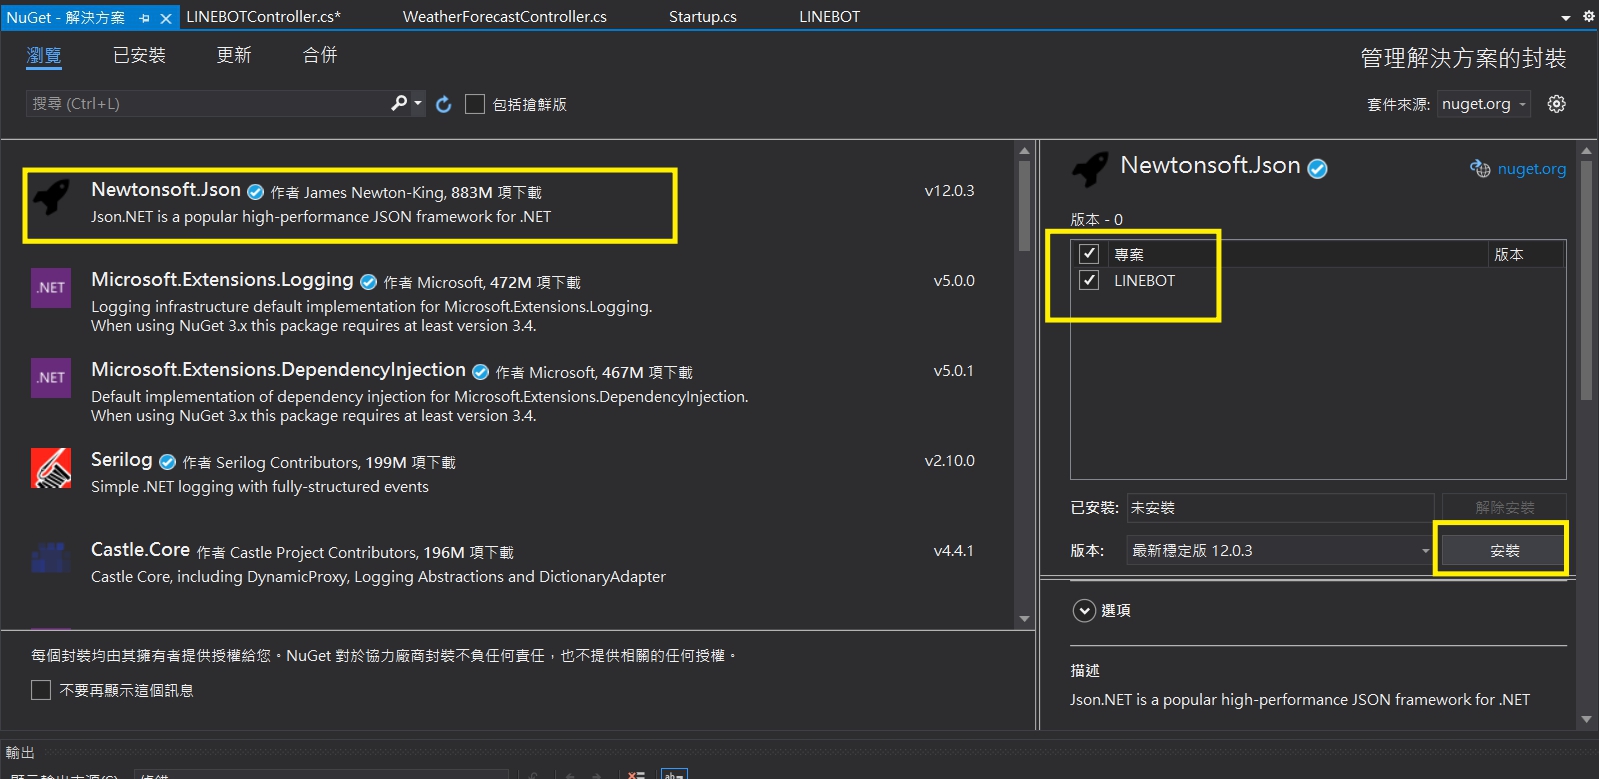
– 到LINE DEVELOPER中取得TOKEN複製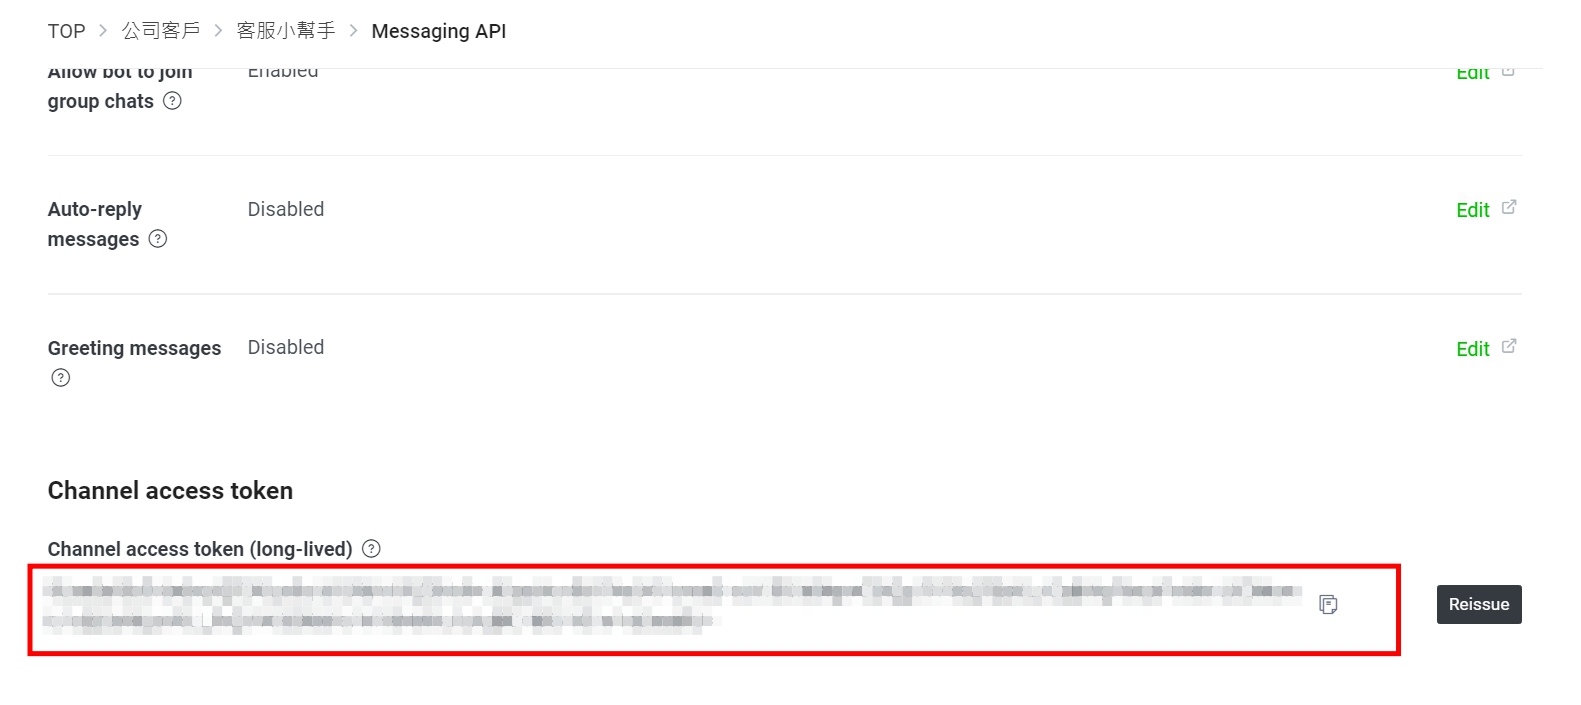
– 加上程式如下
–
public class LineReceivedMessage
{
public List<Event> events;
public LineReceivedMessage()
{
events = new List<Event>();
}
}
public class Event
{
public string type { get; set; }
public Source source { get; set; }
public EventMessage message { get; set; }
public string replyToken { get; set; }
public Event()
{
source = new Source();
message = new EventMessage();
}
}
public class Source
{
public string userId { get; set; }
}
public class EventMessage
{
public string id { get; set; }
public string type { get; set; }
public string text { get; set; }
}
– 修改POST函數如下
public async Task<IActionResult> Post(dynamic request)
{
string x = Convert.ToString(request);
_log.LogInformation(x);
var channelAccessToken = “你的TOKEN”;
var receivedMessage = JsonConvert.DeserializeObject<LineReceivedMessage>(x); // 收到訊息解成物件
string userid = receivedMessage.events[0].source.userId; // 取得使用者ID
string message = receivedMessage.events[0].message.text; // 取得文字訊息
var replyToken = receivedMessage.events[0].replyToken; // 取得回應TOKEN
var replyMessage = new
{
replyToken = replyToken,
messages = new object[] { new {
type = “text”,
text = message
}
}
};
string s = JsonConvert.SerializeObject(replyMessage); // 轉為JSON字串
byte[] bytes = Encoding.UTF8.GetBytes(s);
WebClient webClient = new WebClient();
webClient.Headers.Clear();
webClient.Headers.Add(“Content-Type”, “application/json”);
webClient.Headers.Add(“Authorization”, “Bearer ” + channelAccessToken);
webClient.UploadData(“https://api.line.me/v2/bot/message/reply”, bytes);
return Ok(request);
}
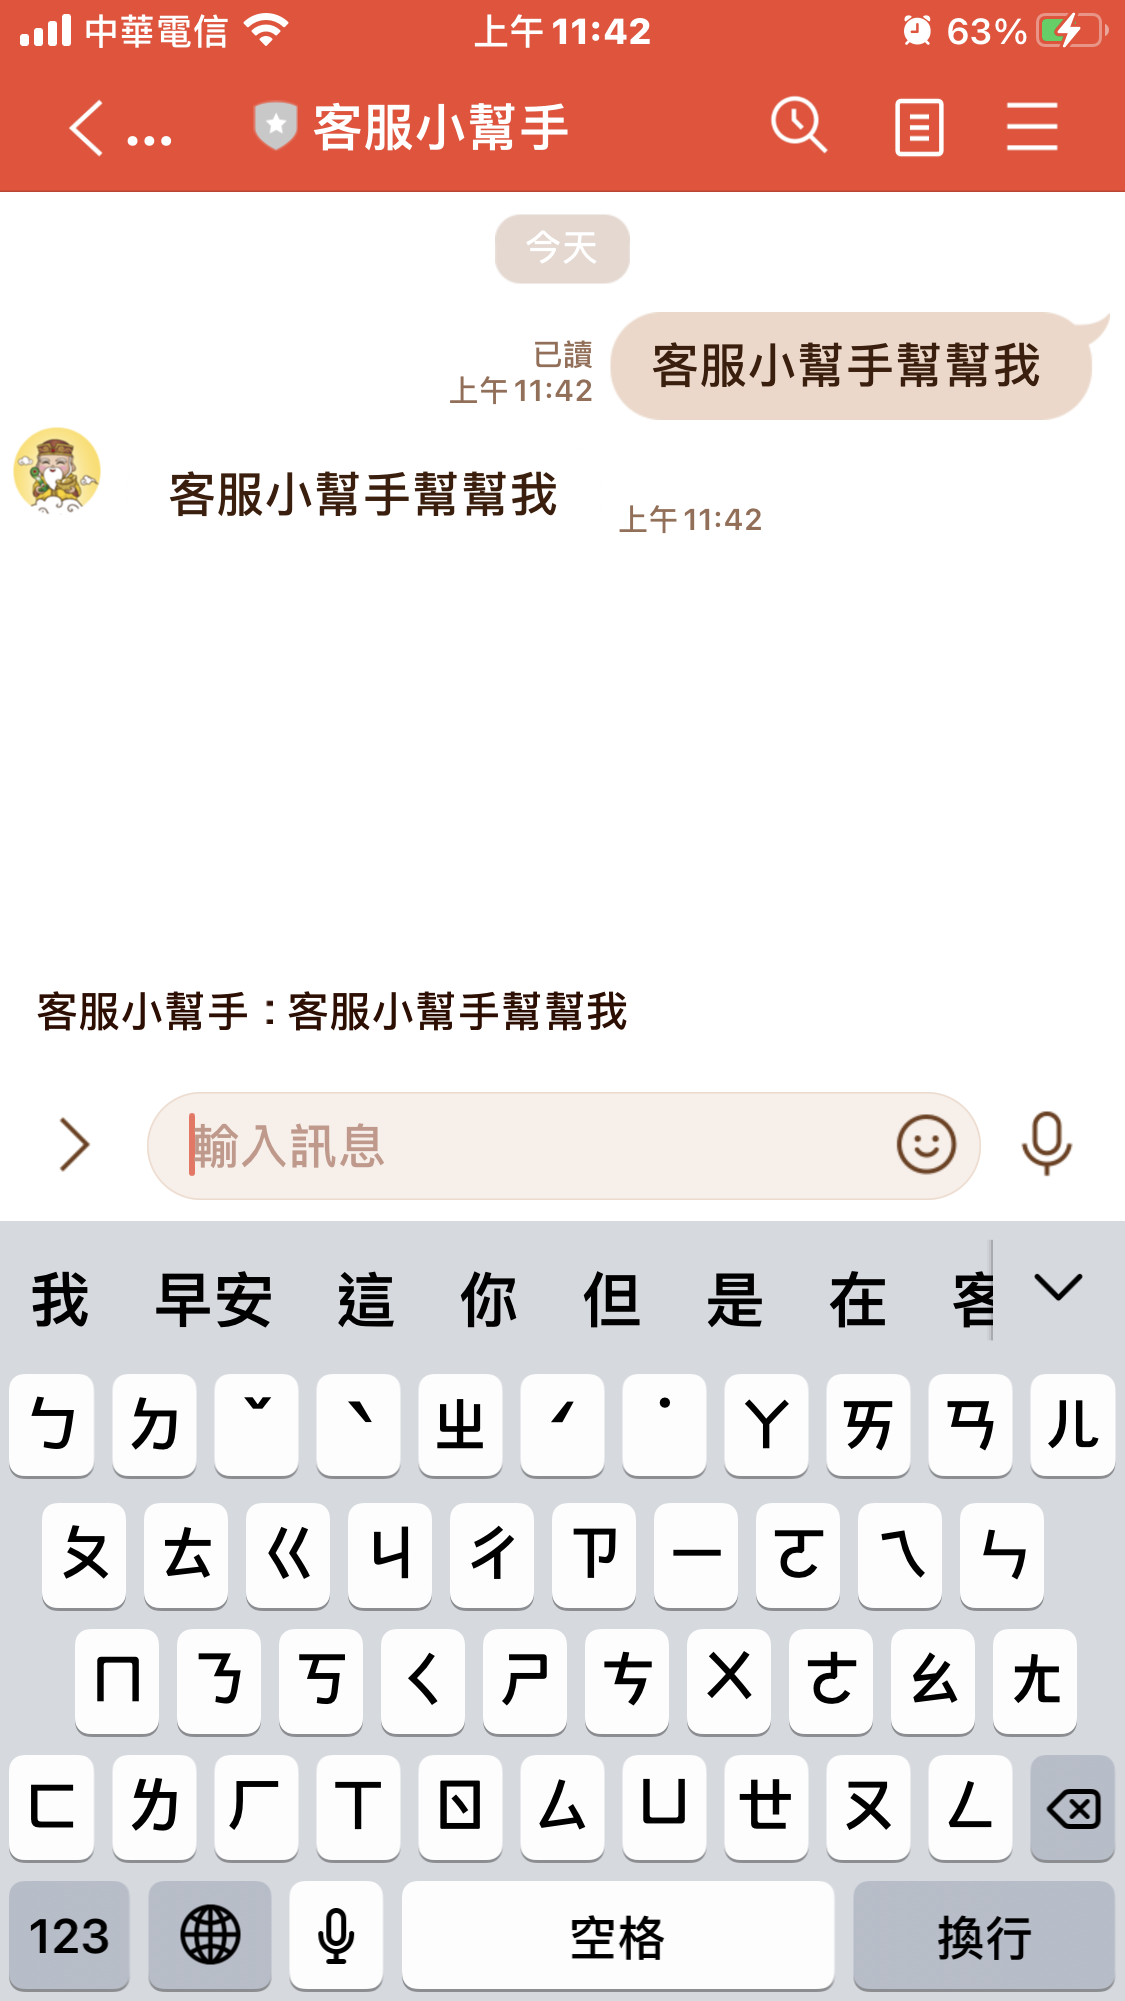
– 結果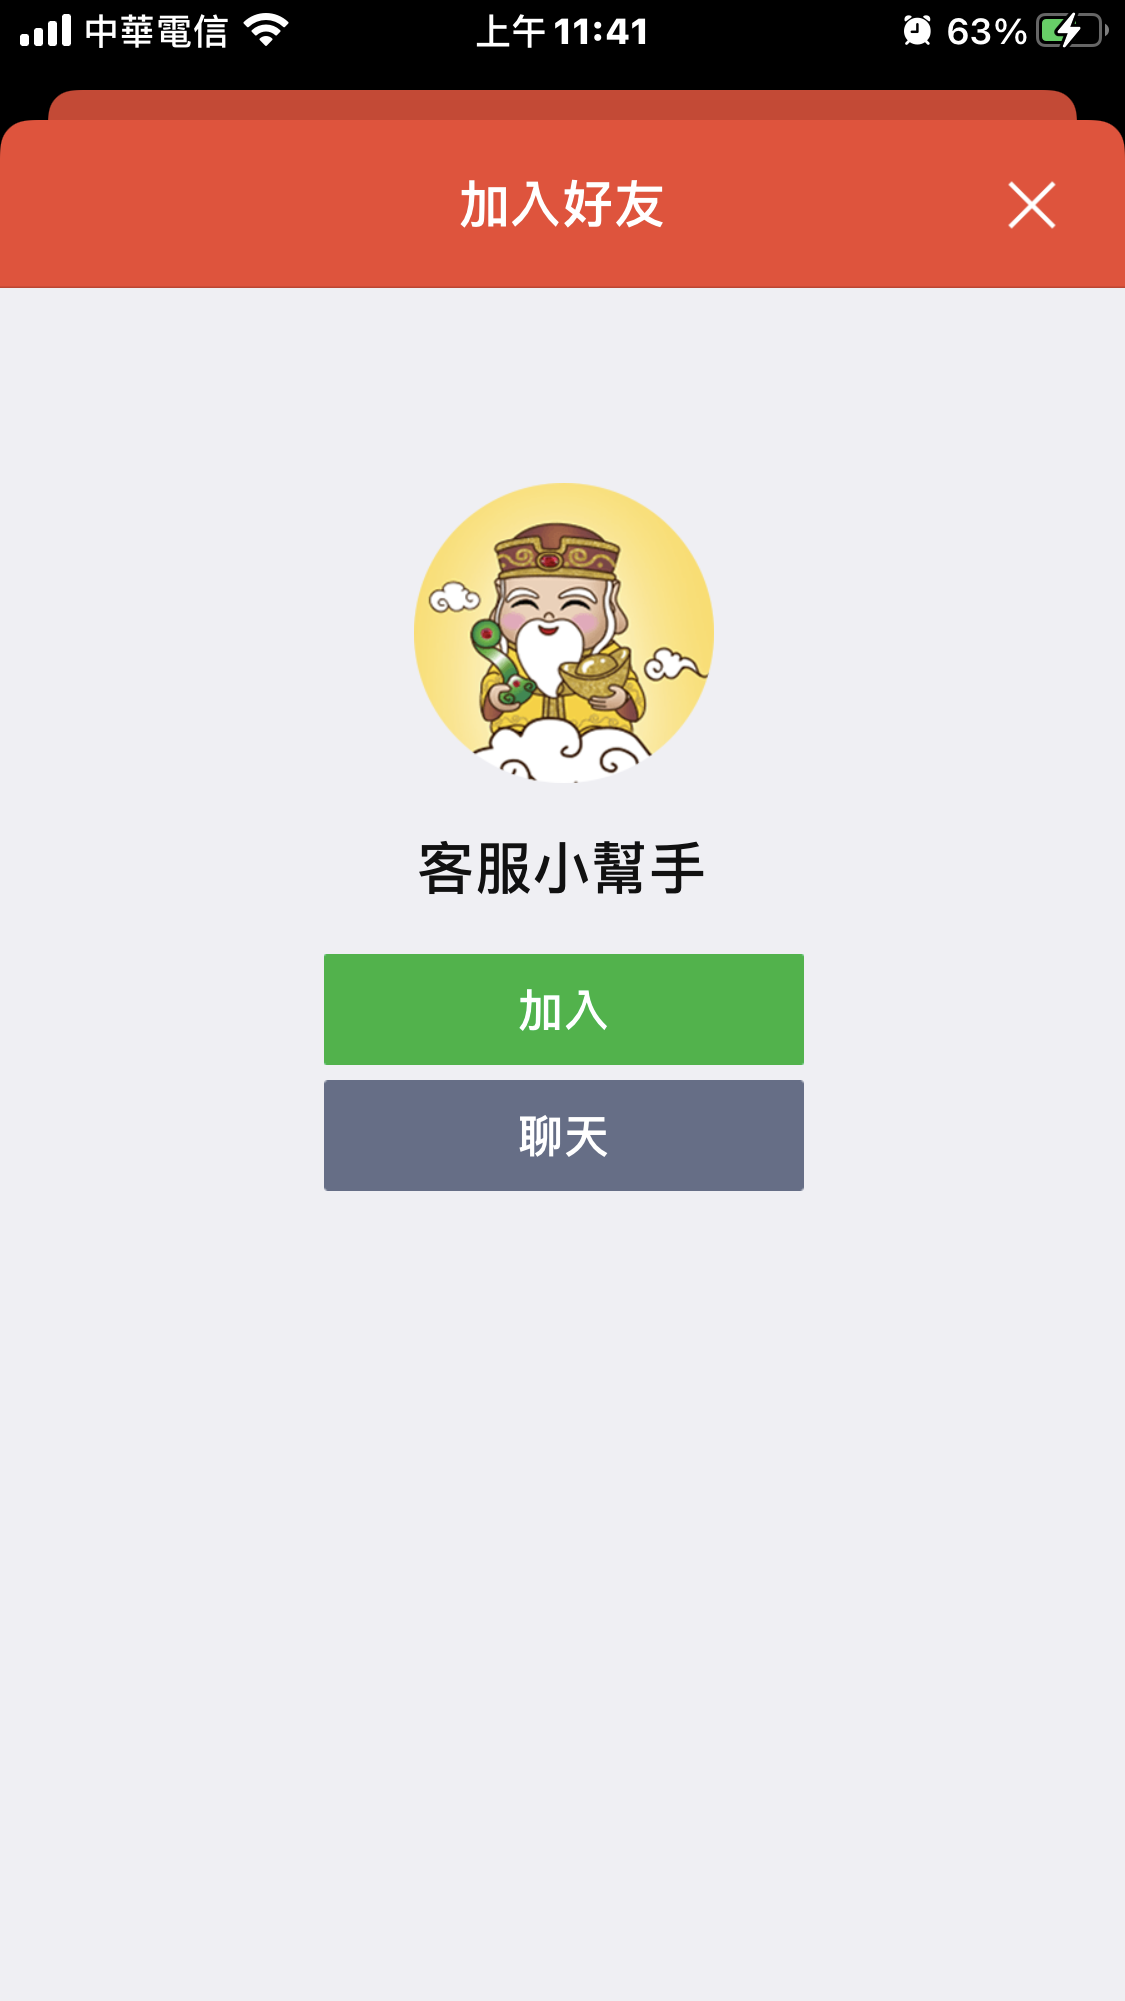
##參考資料:
LINE DEVELOPER API文件
[https://developers.line.biz/zh-hant/docs/messaging-api/](https://developers.line.biz/zh-hant/docs/messaging-api/ “https://developers.line.biz/zh-hant/docs/messaging-api/”)