

在Sourceforge上的RAD Studio Demo Code專案已經在branches悄悄的放上RADStudio_Tokyo這個目錄了!也意味著開發代碼Godzilla準備要以Tokyo這個正式版本號發佈了!
雖然還看不到支援Linux部份的sourcecode發佈出來,但仍然讓人很期待!
大型網站架構..net 架構師.rabbitMQ.redis.行動開發.APP開發教學.PHP Laravel開發..net core C# 開發.架構師之路.Delphi開發.資料庫程式.進銷存.餐飲POS系統
在Sourceforge上的RAD Studio Demo Code專案已經在branches悄悄的放上RADStudio_Tokyo這個目錄了!也意味著開發代碼Godzilla準備要以Tokyo這個正式版本號發佈了!
雖然還看不到支援Linux部份的sourcecode發佈出來,但仍然讓人很期待!
一、如果欄位1=0的話顯示欄位2,如果欄位1>1的話顯示欄位3,其他顯示欄位4
IIF([欄位1]=”0”,[欄位2],IIF([欄位1]>”1”, [欄位3], [欄位4])) AS TBL1
二、二個字串格式的時間計算時數(人事薪資系統用計算工時)
DATEDIFF(”h”, CDATE([上班時間]), CDATE([下班時間])) AS WORK_HOUR
composer create-project laravel/laravel blog
use Illuminate\Support\Facades\Schema;  //這一行新增

public function boot()
{
   Schema::defaultStringLength(191); //這一行新增
}
'timezone' => 'Asia/Taipei',
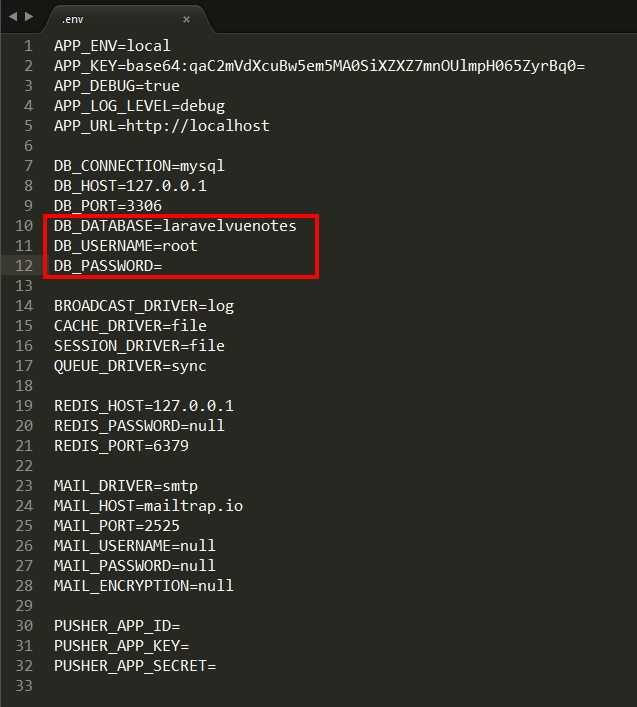
DB_CONNECTION=mysql
DB_HOST=127.0.0.1
DB_PORT=3306
DB_DATABASE=blog
DB_USERNAME=root
DB_PASSWORD=
php artisan migrate
php artisan make:auth
php artisan make:model –migration Post
    Schema::create('posts', function (Blueprint $table) {
        $table->increments('id');
        $table->string('title');
        $table->text('body')->nullable();
        $table->integer('user_id');
        $table->timestamps();
    });
php artisan migrate
php artisan make:seeder PostSeeder
public function run()
{
    DB::table('posts')->delete();

    for ($i=0; $i < 10; $i++) {
        \App\Post::create([
            'title'   => 'Title '.$i,
            'body'    => 'Body '.$i,
            'user_id' => 1,
        ]);
    }
}
public function run()
{
    // $this->call(UsersTableSeeder::class);
    $this->call(PostSeeder::class);
}
composer dump-autoload

php artisan db:seed
public function index()
{
    //return view('home');
    return view('home')->withPosts(\App\Post::all());
}
1 將Blog Home模板解壓縮
2 css、font、js目錄移至public資料夾
3 home.blade.php修改如下
<!DOCTYPE html>
<html lang="en">
<head>
<meta charset="utf-8">
<meta http-equiv="X-UA-Compatible" content="IE=edge">
<meta name="viewport" content="width=device-width, initial-scale=1">
<meta name="description" content="">
<meta name="author" content="">
<title>部落格</title>
<!-- Bootstrap Core CSS -->
<link href="css/bootstrap.min.css" rel="stylesheet">
<!-- Custom CSS -->
<link href="css/blog-home.css" rel="stylesheet">
<!-- HTML5 Shim and Respond.js IE8 support of HTML5 elements and media queries -->
<!-- WARNING: Respond.js doesn't work if you view the page via file:// -->
<!--[if lt IE 9]>
<script src="https://oss.maxcdn.com/libs/html5shiv/3.7.0/html5shiv.js"></script>
<script src="https://oss.maxcdn.com/libs/respond.js/1.4.2/respond.min.js"></script>
<![endif]-->
</head>
<body>
<!-- Navigation -->
<nav class="navbar navbar-inverse navbar-fixed-top" role="navigation">
<div class="container">
<!-- Brand and toggle get grouped for better mobile display -->
<div class="navbar-header">
<button type="button" class="navbar-toggle" data-toggle="collapse" data-target="#bs-example-navbar-collapse-1">
<span class="sr-only">Toggle navigation</span>
<span class="icon-bar"></span>
<span class="icon-bar"></span>
<span class="icon-bar"></span>
</button>
<a class="navbar-brand" href="#">部落格</a>
</div>
<!-- Collect the nav links, forms, and other content for toggling -->
<div class="collapse navbar-collapse" id="bs-example-navbar-collapse-1">
<ul class="nav navbar-nav">
<!-- Authentication Links -->
@if (Auth::guest())
<li><a href="{{ url('/login') }}">登入</a></li>
<li><a href="{{ url('/register') }}">註冊</a></li>
@else
<li class="dropdown">
<a href="#" class="dropdown-toggle" data-toggle="dropdown" role="button" aria-expanded="false">
{{ Auth::user()->name }} <span class="caret"></span>
</a>
<ul class="dropdown-menu" role="menu">
<li><a href="{{ url('/logout') }}"><i class="fa fa-btn fa-sign-out"></i>登出</a></li>
</ul>
</li>
@endif
</ul>
</div>
<!-- /.navbar-collapse -->
</div>
<!-- /.container -->
</nav>
<!-- Page Content -->
<div class="container">
<div class="row">
<!-- Blog Entries Column -->
<div class="col-md-12">
<h1 class="page-header">
部落格
<small>文章列表</small>
</h1>
<!-- First Blog Post -->
@foreach ($posts as $post)
<h2>
<a href="#">{{ $post->title }}</a>
</h2>
<p class="lead">
作者: <a href="index.php">{{ $post->user_id }}</a>
</p>
<p><span class="glyphicon glyphicon-time"></span> 建立日期: {{ $post->created_at }}</p>
<p>{{ $post->body }}</p>
<a class="btn btn-primary" href="#">讀取更多 <span class="glyphicon glyphicon-chevron-right"></span></a>
<hr>
@endforeach
</div>
</div>
<!-- /.row -->
<hr>
<!-- Footer -->
<footer>
<div class="row">
<div class="col-lg-12">
<p>Copyright © 林壽山 2017</p>
</div>
<!-- /.col-lg-12 -->
</div>
<!-- /.row -->
</footer>
</div>
<!-- /.container -->
<!-- jQuery -->
<script src="js/jquery.js"></script>
<!-- Bootstrap Core JavaScript -->
<script src="js/bootstrap.min.js"></script>
</body>
</html>
Auth::routes();
Route::get('/', 'HomeController@index');
Route::get('/logout', 'Auth\LoginController@logout');
Route::get('/home', 'HomeController@index');
php artisan make:controller PostController
public function show($id)
{
    return view('post/show')->withPosts(\App\Post::find($id));
}
Route::get('post/{id}', 'PostController@show');
<!DOCTYPE html>
<html lang="en">
<head>
<meta charset="utf-8">
<meta http-equiv="X-UA-Compatible" content="IE=edge">
<meta name="viewport" content="width=device-width, initial-scale=1">
<meta name="description" content="">
<meta name="author" content="">
<title>部落格</title>
<!-- Bootstrap Core CSS -->
<link href="/css/bootstrap.min.css" rel="stylesheet">
<!-- Custom CSS -->
<link href="/css/blog-home.css" rel="stylesheet">
<!-- HTML5 Shim and Respond.js IE8 support of HTML5 elements and media queries -->
<!-- WARNING: Respond.js doesn't work if you view the page via file:// -->
<!--[if lt IE 9]>
<script src="https://oss.maxcdn.com/libs/html5shiv/3.7.0/html5shiv.js"></script>
<script src="https://oss.maxcdn.com/libs/respond.js/1.4.2/respond.min.js"></script>
<![endif]-->
</head>
<body>
<!-- Navigation -->
<nav class="navbar navbar-inverse navbar-fixed-top" role="navigation">
<div class="container">
<!-- Brand and toggle get grouped for better mobile display -->
<div class="navbar-header">
<button type="button" class="navbar-toggle" data-toggle="collapse" data-target="#bs-example-navbar-collapse-1">
<span class="sr-only">Toggle navigation</span>
<span class="icon-bar"></span>
<span class="icon-bar"></span>
<span class="icon-bar"></span>
</button>
<a class="navbar-brand" href="{{ url('/') }}">部落格</a>
</div>
<!-- Collect the nav links, forms, and other content for toggling -->
<div class="collapse navbar-collapse" id="bs-example-navbar-collapse-1">
<ul class="nav navbar-nav">
<!-- Authentication Links -->
@if (Auth::guest())
<li><a href="{{ url('/login') }}">登入</a></li>
<li><a href="{{ url('/register') }}">註冊</a></li>
@else
<li class="dropdown">
<a href="#" class="dropdown-toggle" data-toggle="dropdown" role="button" aria-expanded="false">
{{ Auth::user()->name }} <span class="caret"></span>
</a>
<ul class="dropdown-menu" role="menu">
<li><a href="{{ url('/logout') }}"><i class="fa fa-btn fa-sign-out"></i>登出</a></li>
</ul>
</li>
@endif
</ul>
</div>
<!-- /.navbar-collapse -->
</div>
<!-- /.container -->
</nav>
<!-- Page Content -->
<div class="container">
<div class="row">
<!-- Blog Post Content Column -->
<div class="col-lg-8">
<!-- Blog Post -->
<!-- Title -->
<h1>{{ $posts->title }}</h1>
<!-- Author -->
<p class="lead">
作者: <a href="#"> {{ $posts->user_id }}</a>
</p>
<hr>
<!-- Date/Time -->
<p><span class="glyphicon glyphicon-time"></span> 日期: {{ $posts->updated_at }}</p>
<!-- Post Content -->
<p> {{ $posts->body }}</p>
</div>
</div>
<!-- /.row -->
<hr>
<!-- Footer -->
<footer>
<div class="row">
<div class="col-lg-12">
<p>Copyright © 林壽山 2017</p>
</div>
<!-- /.col-lg-12 -->
</div>
<!-- /.row -->
</footer>
</div>
<!-- /.container -->
<!-- jQuery -->
<script src="/js/jquery.js"></script>
<!-- Bootstrap Core JavaScript -->
<script src="/js/bootstrap.min.js"></script>
</body>
</html>
Delphi 下一個for Linux的版本如火如荼的測試中!官方也發出許多影片來告知如何讓Delphi在Linux上執行~
內容包含:
如何在Linux Server、Apache上設定與Delphi連結
如何連結資料庫
如何透過Delphi發佈以及除錯

一、安裝Apache、MySQL、PHP環境
為了讓讀者能快速的撰寫程式,作者在Github上已經整理出一個適合開發Laravel的XAMPP環境。我們進到 https://github.com/superlevin/xamppforlaravel 點選 Clone or Download 後按 Download ZIP。

下載後,解壓縮到d:\xampp就可以運作了。執行 xampp-control 後,開啟相關服務即可。

 二、安裝 composer,到 https://getcomposer.org/download/ 下載Composer-Setup.exe。

安裝時,將PHP路徑指向D:\xampp\php.exe


三、進入終端機模式(開始→執行 cmd),然後設定php到系統變數
set PATH=%PATH%;d:\xampp\php
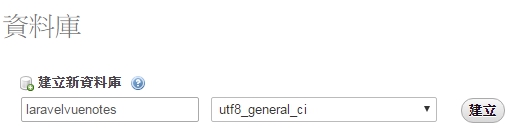
四、phpmyadmin建立資料庫
進入 http://localhost:8899/phpmyadmin 網頁
建立新資料庫 laravelvuenotes
五、透過composer 建立 laravel專案
dos指定切換 d:\xampp\htdocs\ 輸入
composer create-project laravel/laravel laravelvuenote

六、建立完成後,進入laravel專案修改.env設定
八、刪除migration中其他沒用的檔案(二個都刪除)

八、dos模式下建立 migration,切換至 d:\xampp\htdocs\laravelvuenote,輸入
php artisan make:migration create_notes_table
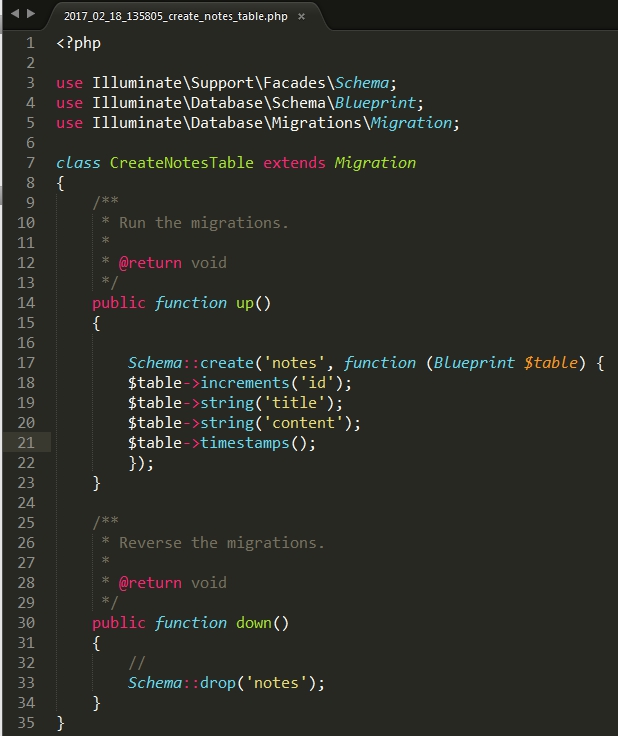
修改laravelvuenote/database/migrations/XXXXX(日期)_xxxx(流水號)_create_notes_table.php
於up函數中加入
Schema::create('notes', function (Blueprint $table) {
$table->increments('id');
$table->string('title');
$table->string('content');
$table->timestamps();
});
於down函數中加入
Schema::drop('notes');
九、建立資料庫
dos模式下
php artisan migrate
十、新增model
dos模式下
php artisan make:model Note
十一、修改app\Note.php
<?php
namespace App;
use Illuminate\Database\Eloquent\Model;
class Note extends Model
{
  //
  protected $table ='notes';
  public $fillable = ['title','content'];
}
十二、建立controller
php artisan make:controller NoteController --resource
十三、修改app\Http\Controllers\NoteController.php
<?php

namespace App\Http\Controllers;

use Illuminate\Http\Request;

use App\Note;
use Validator;
use App\Http\Requests;
use Response;
use Illuminate\Support\Facades\Input;
class NoteController extends Controller
{
    public function api()
    {
      return view('/api');
    }
    /**
     * Display a listing of the resource.
     *
     * @return \Illuminate\Http\Response
     */
    public function index()
    {
        $notes = Note::latest()->paginate(6);  //每頁為6
        $response = [
          'pagination' => [
            'total' => $notes->total(),
            'per_page' => $notes->perPage(),
            'current_page' => $notes->currentPage(),
            'last_page' => $notes->lastPage(),
            'from' => $notes->firstItem(),
            'to' => $notes->lastItem()
          ],
          'data' => $notes
        ];
        return response()->json($response);
    }

    /**
     * Show the form for creating a new resource.
     *
     * @return \Illuminate\Http\Response
     */
    public function create()
    {
        //
    }

    /**
     * Store a newly created resource in storage.
     *
     * @param  \Illuminate\Http\Request  $request
     * @return \Illuminate\Http\Response
     */
    public function store(Request $request)
    {
        $this->validate($request,[
          'title' => 'required',
         'content' => 'required',
       ]);

        $create = Note::create($request->all());
        return response()->json($create);
    }

    /**
     * Display the specified resource.
     *
     * @param  int  $id
     * @return \Illuminate\Http\Response
     */
    public function show($id)
    {
        //
    }

    /**
     * Show the form for editing the specified resource.
     *
     * @param  int  $id
     * @return \Illuminate\Http\Response
     */
    public function edit($id)
    {
        //
    }

    /**
     * Update the specified resource in storage.
     *
     * @param  \Illuminate\Http\Request  $request
     * @param  int  $id
     * @return \Illuminate\Http\Response
     */
    public function update(Request $request, $id)
    {
      $this->validate($request,[
        'title' => 'required',
        'content' => 'required',
      ]);
      $edit = Note::find($id)->update($request->all());
      return response()->json($edit);
    }

    /**
     * Remove the specified resource from storage.
     *
     * @param  int  $id
     * @return \Illuminate\Http\Response
     */
    public function destroy($id)
    {
        Note::find($id)->delete();
        return response()->json(['done']);
    }
}
十四、修改routes\web.php
<?php
/*
|--------------------------------------------------------------------------
| Web Routes
|--------------------------------------------------------------------------
|
| Here is where you can register web routes for your application. These
| routes are loaded by the RouteServiceProvider within a group which
| contains the "web" middleware group. Now create something great!
|
*/
//Route::get('/', function () {
//    return view('welcome');
//});
Route::get('/', 'NoteController@api');
Route::get('/api', 'NoteController@index');
Route::resource('vuenotes','NoteController');
十五、建立頁面
在這邊我們使用jQuery、Bootstrap、toastr、Font awesome以及Vue.js 2
在resources/views建立app.blade.php
<!DOCTYPE html>
<html lang="en">
  <head>
    <meta charset="utf-8">
    <meta http-equiv="X-UA-Compatible" content="IE=edge">
    <meta name="viewport" content="width=device-width, initial-scale=1">
    <!-- The above 3 meta tags *must* come first in the head; any other head content must come *after* these tags -->
    <title>Laravel & Vue2 記事本</title>
    <!-- Laravel CSRF-token check -->
    <meta id="token" name="token" value="{{ csrf_token() }}">
    <!-- HTML5 shim and Respond.js for IE8 support of HTML5 elements and media queries -->
    <!-- WARNING: Respond.js doesn't work if you view the page via file:// -->
    <!--[if lt IE 9]>
      <script src="https://oss.maxcdn.com/html5shiv/3.7.3/html5shiv.min.js"></script>
      <script src="https://oss.maxcdn.com/respond/1.4.2/respond.min.js"></script>
    <![endif]-->
  </head>
  <body>
    <div class="container" id="manage-note">
      @yield('content')
    </div>
    <!-- jQuery (necessary for Bootstrap's JavaScript plugins) -->
    <script src="https://ajax.googleapis.com/ajax/libs/jquery/3.1.1/jquery.min.js"></script>
    <!-- Latest compiled and minified CSS -->
    <link rel="stylesheet" href="https://maxcdn.bootstrapcdn.com/bootstrap/3.3.7/css/bootstrap.min.css" integrity="sha384-BVYiiSIFeK1dGmJRAkycuHAHRg32OmUcww7on3RYdg4Va+PmSTsz/K68vbdEjh4u" crossorigin="anonymous">
    <link rel="stylesheet" href="https://maxcdn.bootstrapcdn.com/font-awesome/4.7.0/css/font-awesome.min.css">

    <!-- Latest compiled and minified JavaScript -->
    <script src="https://maxcdn.bootstrapcdn.com/bootstrap/3.3.7/js/bootstrap.min.js" integrity="sha384-Tc5IQib027qvyjSMfHjOMaLkfuWVxZxUPnCJA7l2mCWNIpG9mGCD8wGNIcPD7Txa" crossorigin="anonymous"></script>
    <!-- vue.js -->
    <script type="text/javascript" src="//cdnjs.cloudflare.com/ajax/libs/vue/2.1.10/vue.min.js"></script>
    <script type="text/javascript" src="https://cdnjs.cloudflare.com/ajax/libs/vue-resource/1.0.3/vue-resource.min.js"></script>

    <script type="text/javascript" src="//cdnjs.cloudflare.com/ajax/libs/toastr.js/latest/toastr.min.js"></script>
    <link href="//cdnjs.cloudflare.com/ajax/libs/toastr.js/latest/toastr.min.css" rel="stylesheet">
    <!-- custom.js -->
    <script type="text/javascript" src="./js/note.js?v=zxcvxzcv"></script>
  </body>
</html>
接著新增檔案 api.blade.php
@extends('app')
@section('content')
<div class="form-group row">
<div class="col-md-12">
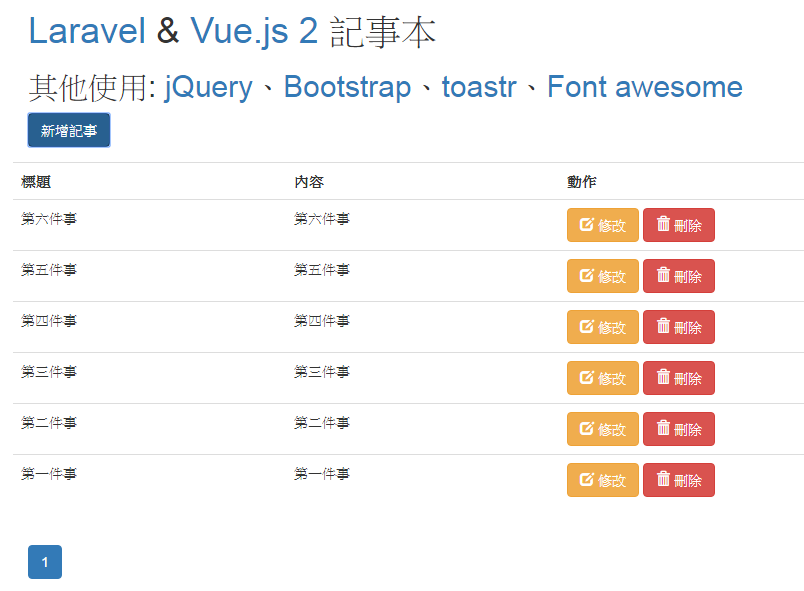
<h1><a href="https://laravel.com/" target="_blank">Laravel</a> & <a href="https://vuejs.org/" target="_blank">Vue.js 2</a> 記事本</h1>
<h2>其他使用: <a href="https://jquery.com/" target="_blank">jQuery</a>、<a href="http://getbootstrap.com/" target="_blank">Bootstrap</a>、<a href="http://codeseven.github.io/toastr/demo.html" target="_blank">toastr</a>、<a href="http://fontawesome.io/" target="_blank">Font awesome</a> </h2>
</div>
<div class="col-md-12">
<button type="button" data-toggle="modal" data-target="#create-note" class="btn btn-primary">
新增記事
</button>
</div>
</div>
<div class="row">
<div class="table-responsive">
<table class="table table-borderless">
<tr>
<th>標題</th>
<th>內容</th>
<th>動作</th>
</tr>
<tr v-for="note in notes">
<td>@{{ note.title }}</td>
<td>@{{ note.content }}</td>
<td>
<button class="edit-modal btn btn-warning" @click.prevent="editnote(note)">
<span class="glyphicon glyphicon-edit"></span> 修改
</button>
<button class="edit-modal btn btn-danger" @click.prevent="deletenote(note)">
<span class="glyphicon glyphicon-trash"></span> 刪除
</button>
</td>
</tr>
</table>
</div>
</div>
<nav>
<ul class="pagination">
<li v-if="pagination.current_page > 1">
<a href="#" aria-label="Previous" @click.prevent="changePage(pagination.current_page - 1)">
<span aria-hidden="true">«</span>
</a>
</li>
<li v-for="page in pagesNumber" v-bind:class="[ page == isActived ? 'active' : '']">
<a href="#" @click.prevent="changePage(page)">
@{{ page }}
</a>
</li>
<li v-if="pagination.current_page < pagination.last_page">
<a href="#" aria-label="Next" @click.prevent="changePage(pagination.current_page + 1)">
<span aria-hidden="true">»</span>
</a>
</li>
</ul>
</nav>
<!-- 新增對話框 -->
<div class="modal fade" id="create-note" tabindex="-1" role="dialog" aria-labelledby="myModalLabel">
<div class="modal-dialog" role="document">
<div class="modal-content">
<div class="modal-header">
<button type="button" class="close" data-dismiss="modal" aria-label="Close">
<span aria-hidden="true">×</span>
</button>
<h4 class="modal-title" id="myModalLabel">新增記事</h4>
</div>
<div class="modal-body">
<form method="post" enctype="multipart/form-data" v-on:submit.prevent="createnote">
<div class="form-group">
<label for="title">標題:</label>
<input type="text" name="title" class="form-control" v-model="newnote.title" />
<span v-if="formErrors['title']" class="error text-danger">
@{{ formErrors['title'] }}
</span>
</div>
<div class="form-group">
<label for="title">內容:</label>
<textarea name="content" class="form-control" v-model="newnote.content">
</textarea>
<span v-if="formErrors['content']" class="error text-danger">
@{{ formErrors['content'] }}
</span>
</div>
<div class="form-group">
<button type="submit" class="btn btn-success">儲存</button>
</div>
</form>
</div>
</div>
</div>
</div>
<!-- 修改對話框 -->
<div class="modal fade" id="edit-note" tabindex="-1" role="dialog" aria-labelledby="myModalLabel">
<div class="modal-dialog" role="document">
<div class="modal-content">
<div class="modal-header">
<button type="button" class="close" data-dismiss="modal" aria-label="Close">
<span aria-hidden="true">×</span>
</button>
<h4 class="modal-title" id="myModalLabel">修改記事</h4>
</div>
<div class="modal-body">
<form method="post" enctype="multipart/form-data" v-on:submit.prevent="updatenote(fillnote.id)">
<div class="form-group">
<label for="title">標題:</label>
<input type="text" name="title" class="form-control" v-model="fillnote.title" />
<span v-if="formErrorsUpdate['title']" class="error text-danger">
@{{ formErrorsUpdate['title'] }}
</span>
</div>
<div class="form-group">
<label for="title">內容:</label>
<textarea name="content" class="form-control" v-model="fillnote.content">
</textarea>
<span v-if="formErrorsUpdate['content']" class="error text-danger">
@{{ formErrorsUpdate['content'] }}
</span>
</div>
<div class="form-group">
<button type="submit" class="btn btn-success">儲存</button>
</div>
</form>
</div>
</div>
</div>
</div>
@stop
最後在public/js/下新增note.js
Vue.http.headers.common['X-CSRF-TOKEN'] = $("#token").attr("value");
new Vue({
  el :'#manage-note',
  data :{
    notes: [],
    pagination: {
      total: 0,
      per_page: 2,
      from: 1,
      to: 0,
      current_page: 1
    },
    offset: 4,
    formErrors:{},
    formErrorsUpdate:{},
    newnote : {'title':'','content':''},
    fillnote : {'title':'','content':'','id':''}
  },
  computed: {
    isActived: function() {
      return this.pagination.current_page;
    },
    pagesNumber: function() {
      if (!this.pagination.to) {
        return [];
      }
      var from = this.pagination.current_page - this.offset;
      if (from < 1) {
        from = 1;
      }
      var to = from + (this.offset * 2);
      if (to >= this.pagination.last_page) {
        to = this.pagination.last_page;
      }
      var pagesArray = [];
      while (from <= to) {
        pagesArray.push(from);
        from++;
      }
      return pagesArray;
    }
  },


         mounted: function () {

             this.getVuenote(this.pagination.current_page);
         },
  methods: {
    getVuenote: function(page) {
      this.$http.get('/vuenotes?page='+page).then((response) => {

        this.$set(this,'notes', response.data.data.data);
        this.$set(this,'pagination', response.data.pagination);
      });
    },
    createnote: function() {
      var input = this.newnote;
      this.$http.post('/vuenotes',input).then((response) => {
        this.changePage(this.pagination.current_page);
        this.newnote = {'title':'','content':''};
        $("#create-note").modal('hide');
        toastr.success('新增成功', '成功訊息', {timeOut: 5000});
      }, (response) => {
        this.formErrors = response.data;
      });
    },
    deletenote: function(note) {
      this.$http.delete('/vuenotes/'+note.id).then((response) => {
        this.changePage(this.pagination.current_page);
        toastr.success('刪除成功', '成功訊息', {timeOut: 5000});
      });
    },
    editnote: function(note) {
      this.fillnote.title = note.title;
      this.fillnote.id = note.id;
      this.fillnote.content = note.content;
      $("#edit-note").modal('show');
    },
    updatenote: function(id) {
      var input = this.fillnote;
      this.$http.put('/vuenotes/'+id,input).then((response) => {
        this.changePage(this.pagination.current_page);
        this.newnote = {'title':'','content':'','id':''};
        $("#edit-note").modal('hide');
        toastr.success('更新成功', '成功訊息', {timeOut: 5000});
      }, (response) => {
        this.formErrors = response.data;
      });
    },
    changePage: function(page) {
      this.pagination.current_page = page;
      this.getVuenote(page);
    }
  }
});
十六、開啟主機
php artisan serve
十七、完工
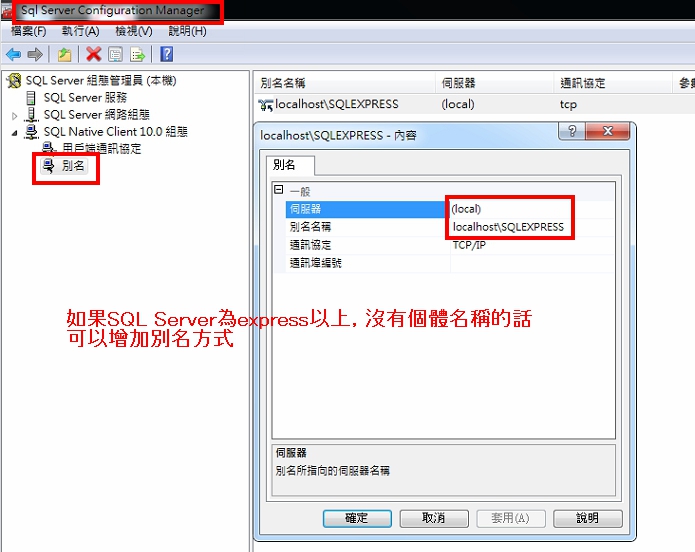
有許多單機版的進銷存系統、餐飲POS系統或是會計系統,會使用SQL SERVER EXPRESS的版本,然後連線字串變成了 LOCALHOST\SQLEXPRESS。
在安裝後預設是會多了一個\SQLEXPRESS
那如果是安裝正式版本的話,怎麼辦呢?
到SQL SERVER的組態管理員裡面
新增別名,伺服器指到本機 (local),然後別名名稱設為 localhost\sqlexpress 就可以了!
在Laravel設定排程的方式很簡單,只要先做好
* * * * * php /path/to/artisan schedule:run >> /dev/null 2>&1
* * * * * /usr/bin/php-cli /path/to/artisan schedule:run 1>> /dev/null 2>&1
if (empty($_GET) === false) {
    foreach ($_GET as $key => $value) {
        $_SERVER['argv'][] = $key;
    }
}
然後每分鐘都會去執行 app/Console/Kernel@schedule的內容
在後續的版本,還可以指定每小時跑之外,也可以指定每小時的幾分執行!
$schedule->command('task1')->hourlyAt(30);
$schedule->command('task1')
    ->weekdays()
    ->hourlyAt(30);
https://pascalbaljetmedia.com/en/blog/a-brief-overview-of-the-laravel-ecosystem
A brief overview of the Laravel Ecosystem 這篇文章是由國外Pascal Baljet所寫的文章,文章介紹了Laravel的框架、元件、開發環境、其他用途的套件以及官方的相關平台,很值得想深入理解框架的朋友。
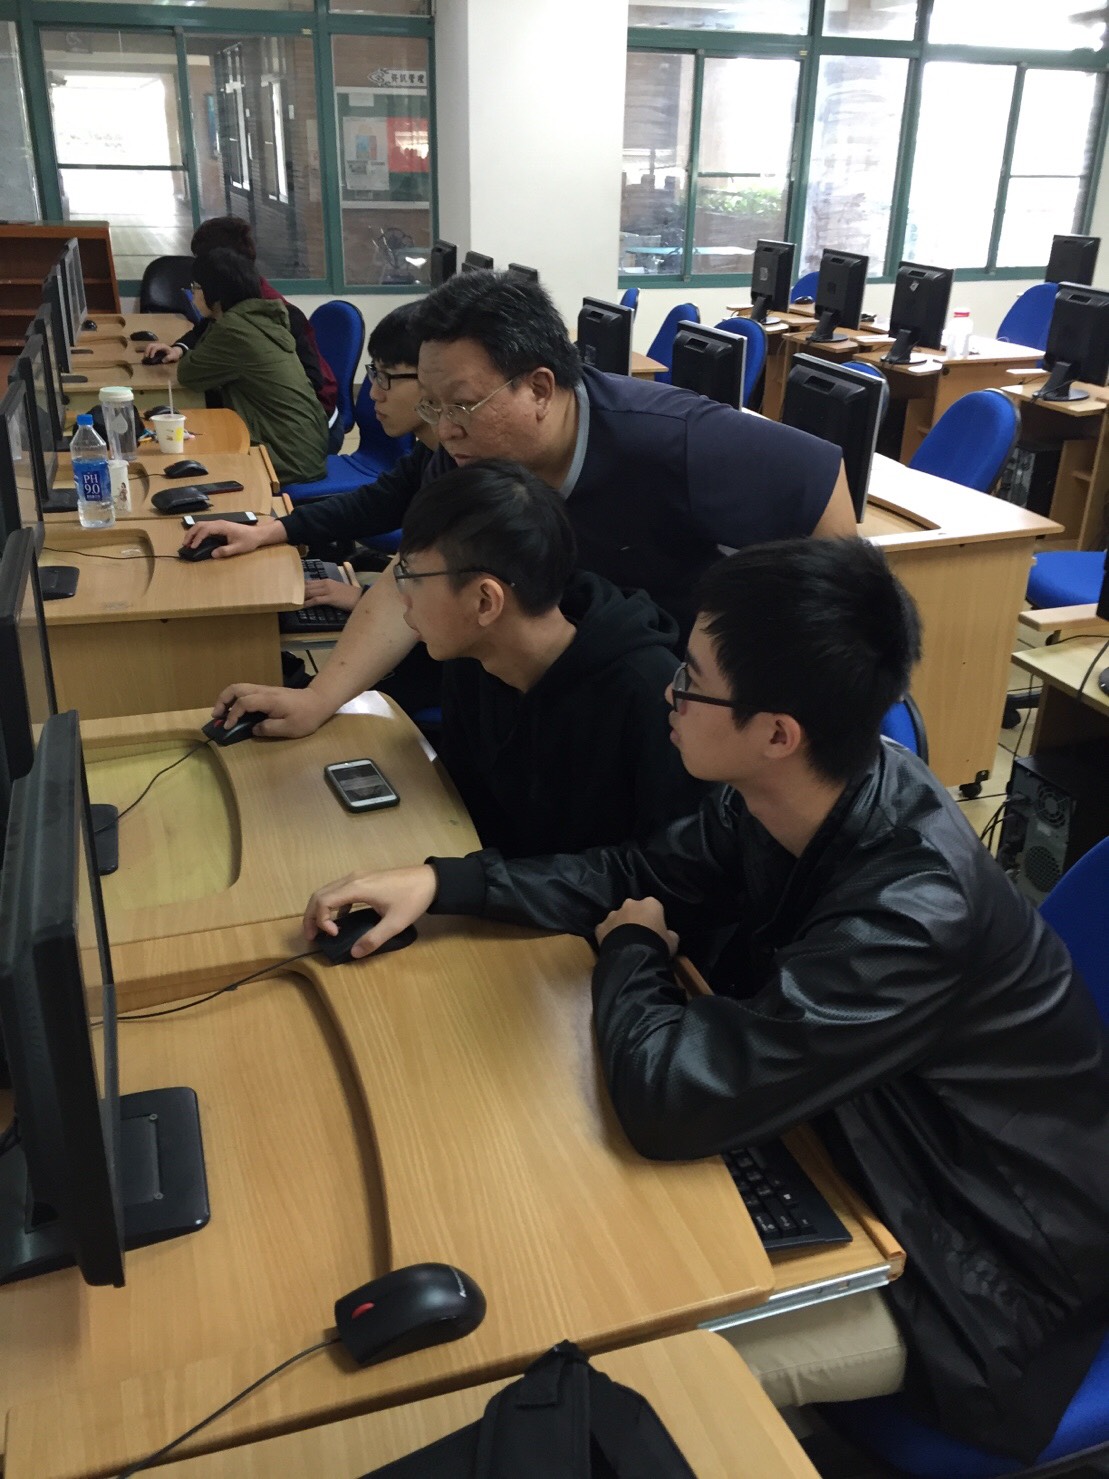
這學期的產業學院PHP課程,由之前的CodeIgniter改為Laravel課程,在上半學期主要以Route、MVC、Controller、DB…..為主軸,也就是以Laravel的基礎為主。同學在課程結束時,可以做基本的小範例。
在下學期則會更進階,並加上WebAPI的課程,讓同學可以結合手機程式一起做開發。
遠振主機中設定php上傳檔案限制的方式,
一、Cpanel選Select PHP Version
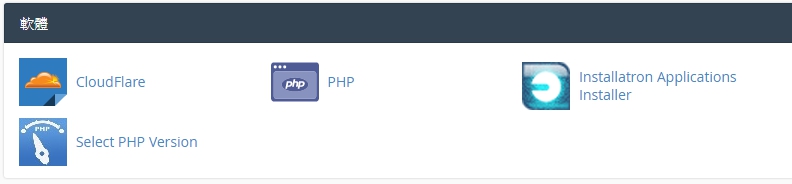
二、點選Switch to PHP Options
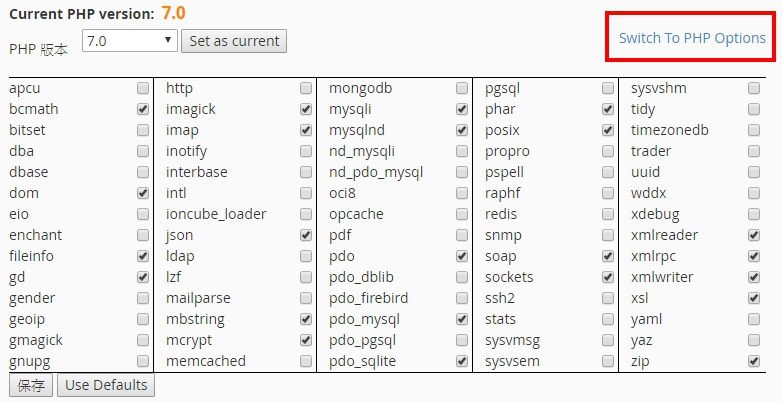
三、頁面可以設定PHP.ini的相關參數,設定完後按儲存即可


