Delphi 10.3 RIO 使用 Google Firebase(FCM)推播

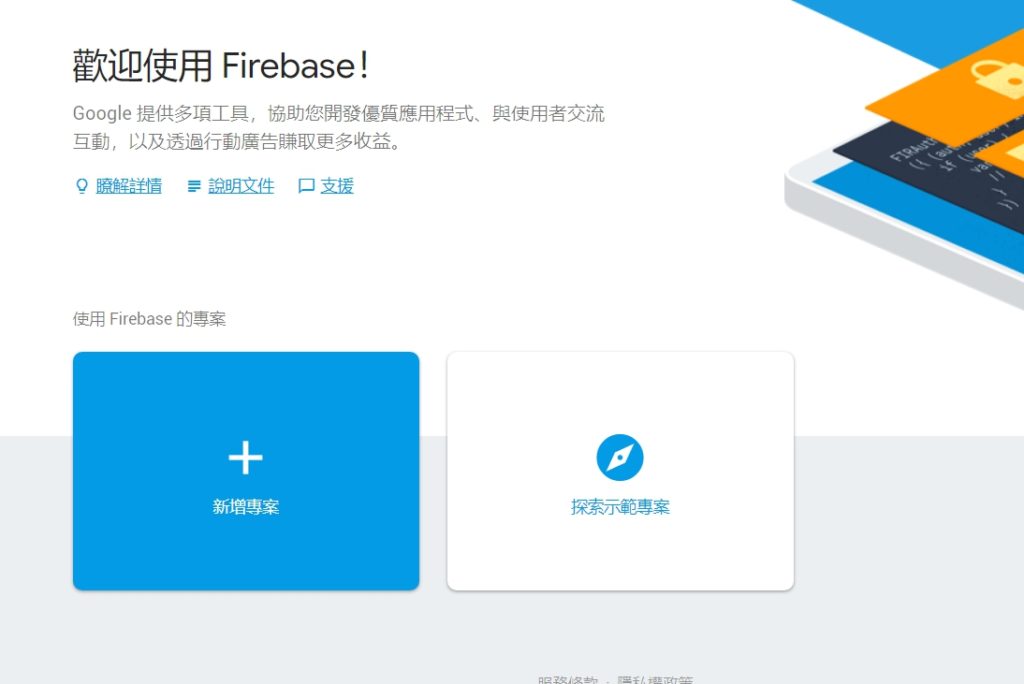
一、Firebase新增專案(網址: https://console.firebase.google.com )

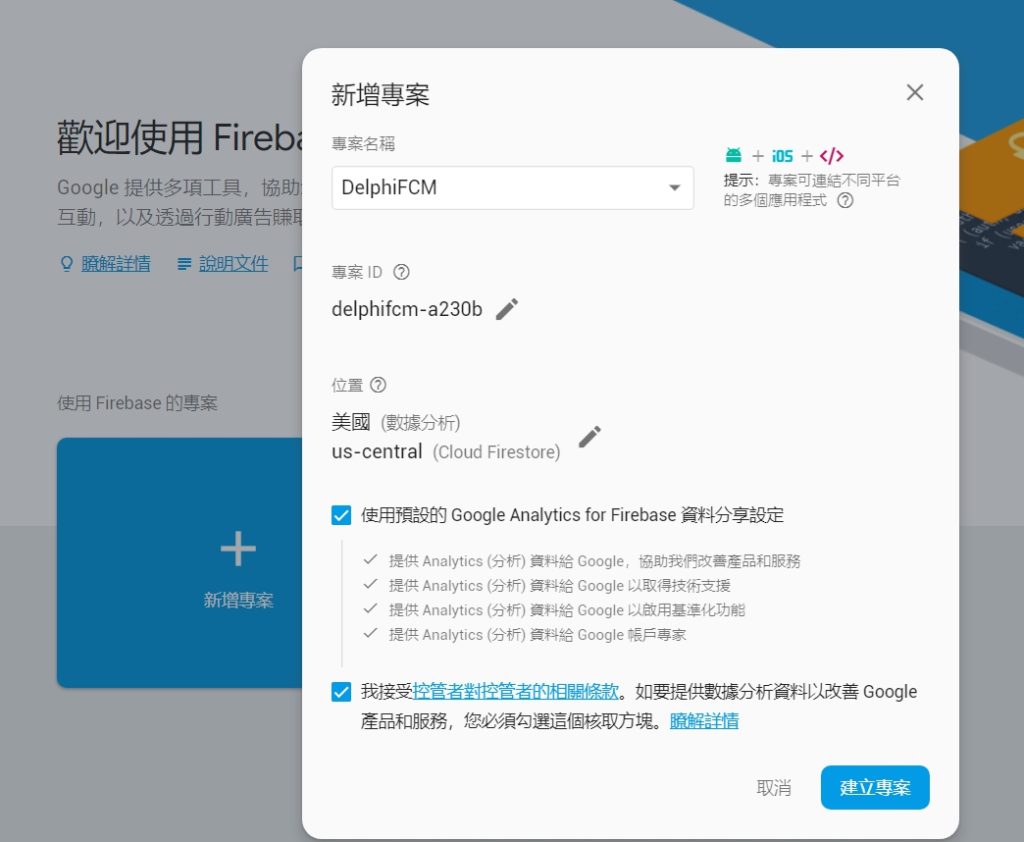
二、專案名稱可自訂,訂定後按建立專案

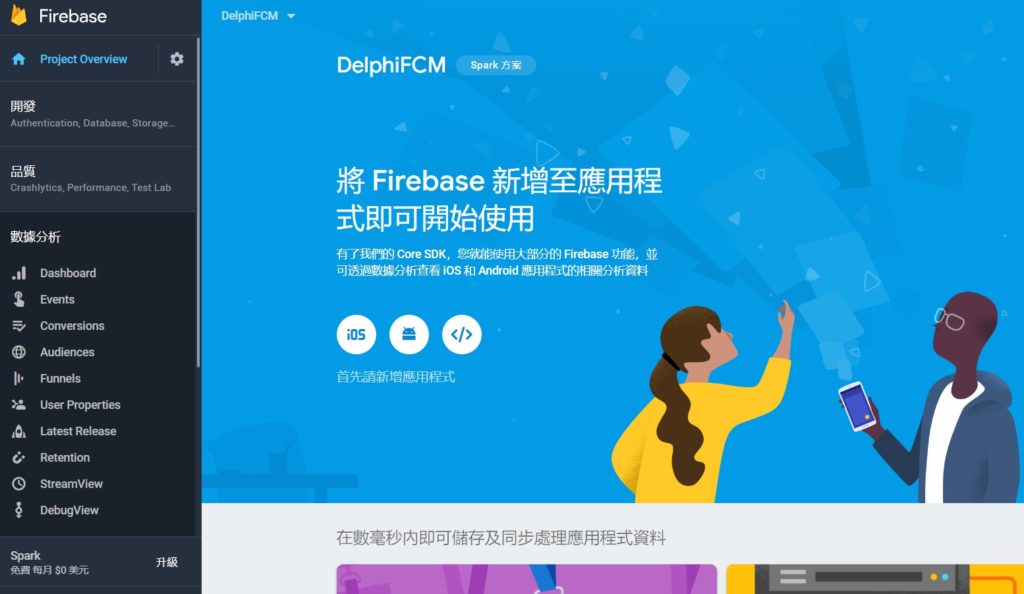
三、建立完專案後,點選中間android的連結

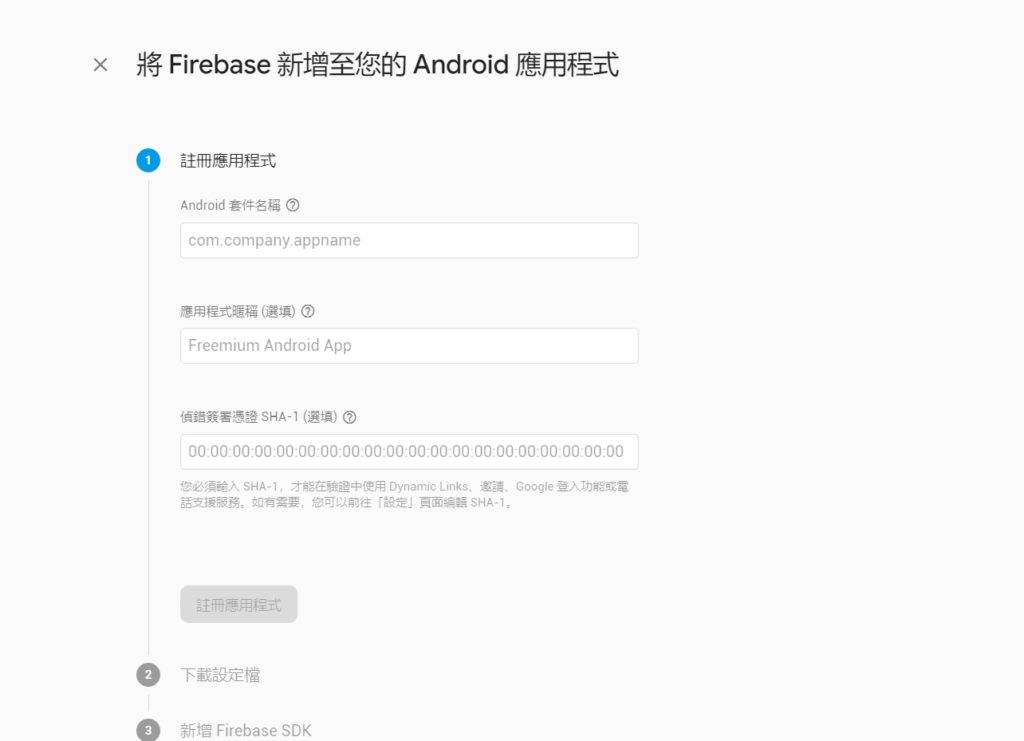
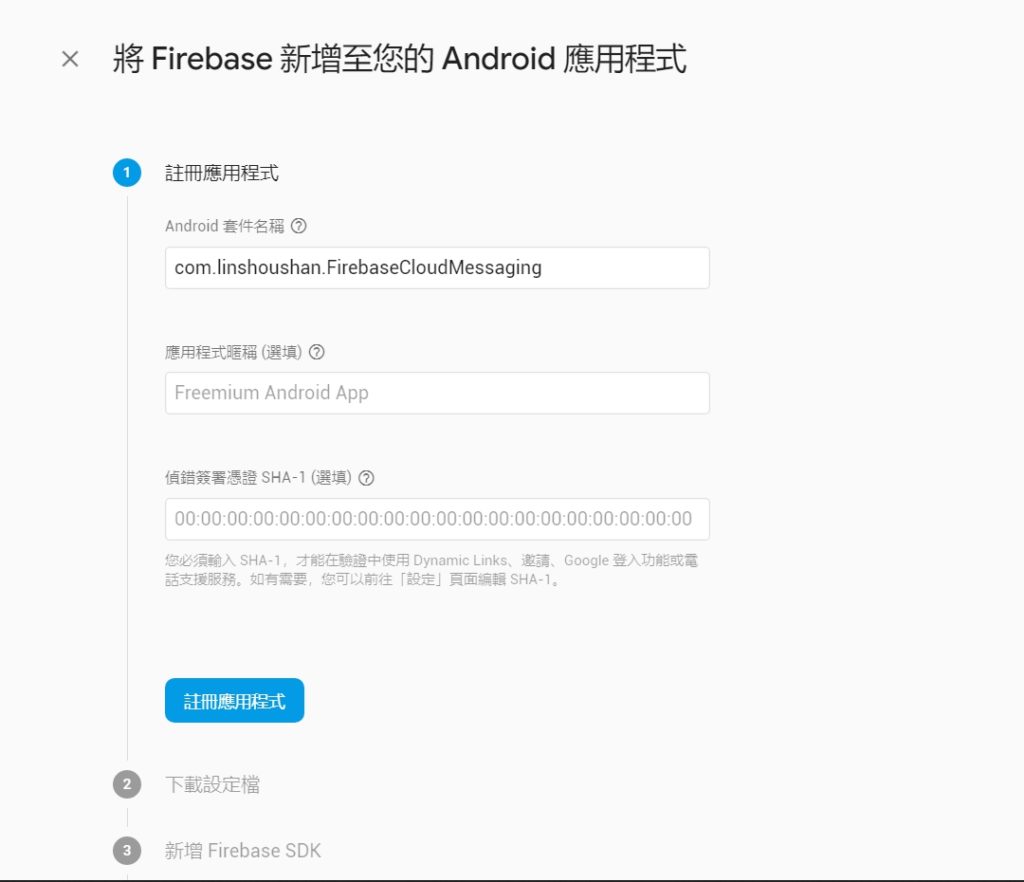
四、這邊很重要! Android的套件名稱要跟你要開發的名稱一致,這邊我輸入 com.linshoushan.FirebaseCloudMessaging,按註冊應用程式

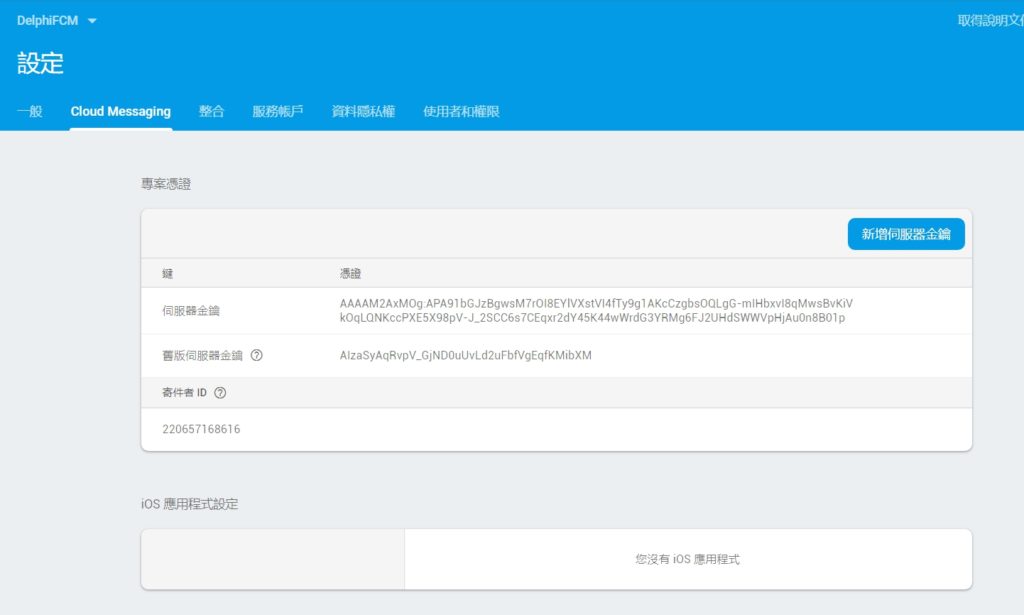
五、設定完後,進入Cloud Messagin頁面中,把寄件者ID記下來。就完成了Firebase基本的設定了

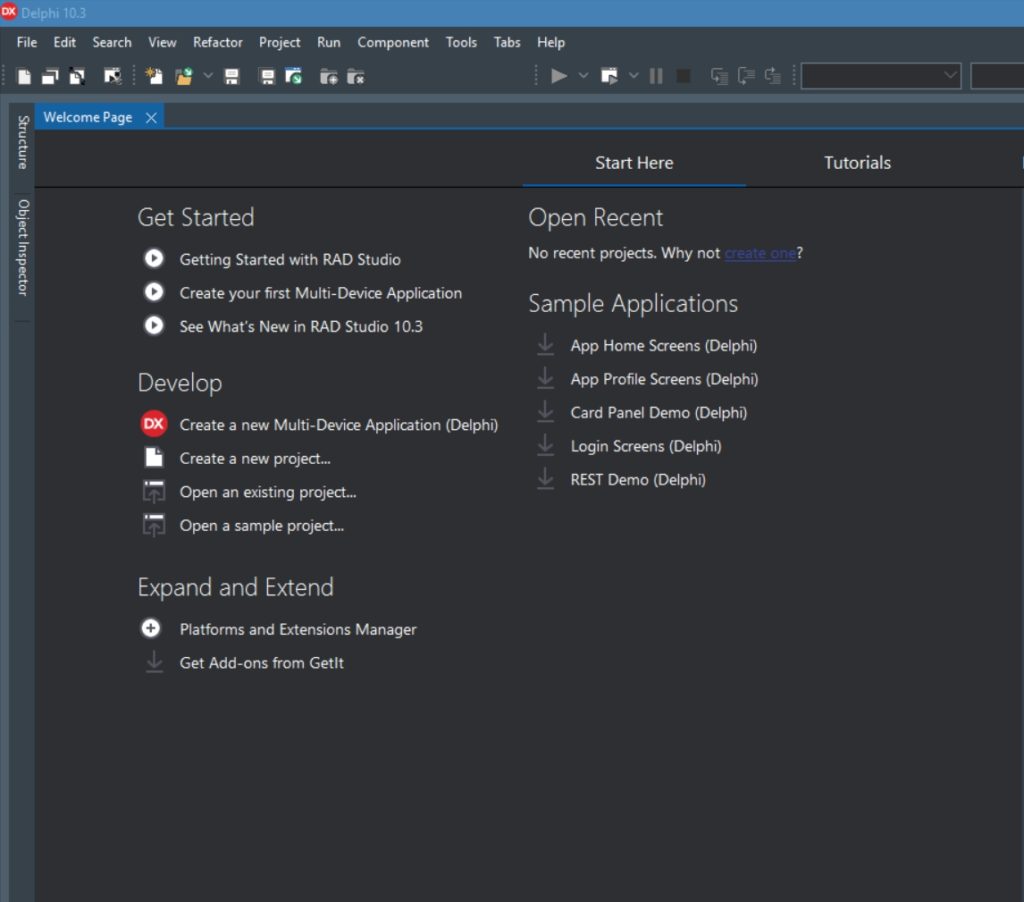
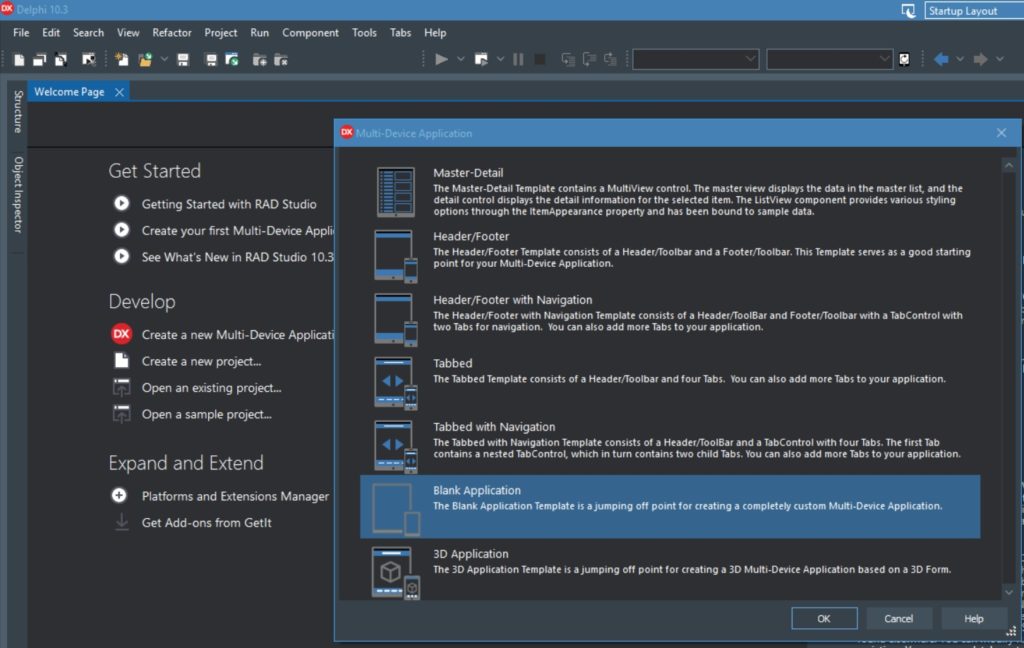
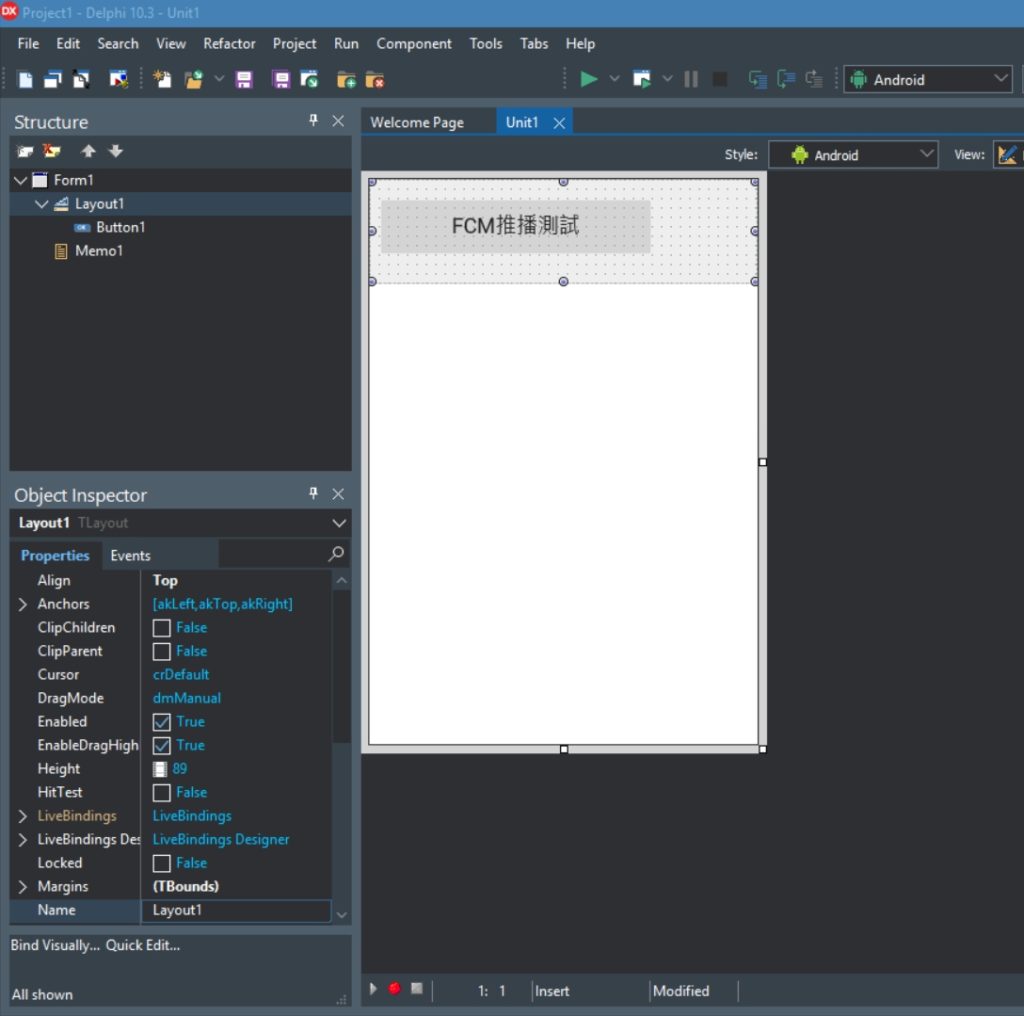
六、開啟Delphi 10.3 RIO,建立一個新的Multi-Device Application

七、在畫面上拖拉出Layout、Button、Memo

八、將Target Platforms切換成Android

九、專案的Options中,在 Entitlement List中,把Receive push notifications 設為true

十、Version Info中,package的名稱記得改成在firebase中的設定

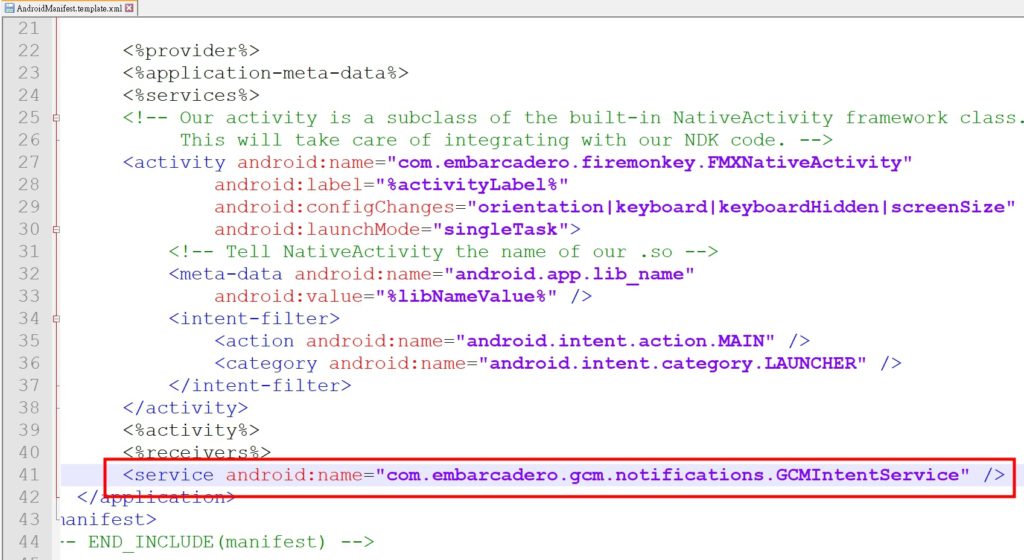
十一、修改AndroidManifest.template.xml,最後一行加上

(一開始會找不到這個檔案,壽山是先把專案存檔後,先做一次的build,然後檔案就出現了)

十二、加上相關程式碼

unit Unit1;

interface

// 1 新增use
// System.Notification, System.PushNotification, FMX.PushNotification.Android
uses
  System.SysUtils, System.Types, System.UITypes, System.Classes, System.Variants,
  FMX.Types, FMX.Controls, FMX.Forms, FMX.Graphics, FMX.Dialogs, FMX.StdCtrls,
  FMX.Controls.Presentation, FMX.ScrollBox, FMX.Memo, FMX.Layouts,
  System.Notification, System.PushNotification, FMX.PushNotification.Android;

type
  TForm1 = class(TForm)
    Layout1: TLayout;
    Memo1: TMemo;
    Button1: TButton;
    procedure FormCreate(Sender: TObject);
    procedure Button1Click(Sender: TObject);
  private
    { Private declarations }
  public
    { Public declarations }
    // 2 宣告相關的變數以及事件
    PushService: TPushService;
    ServiceConnection: TPushServiceConnection;
    DeviceId: string;
    DeviceToken: string;
    procedure DoServiceConnectionChange(Sender: TObject; PushChanges: TPushService.TChanges);
    procedure DoReceiveNotificationEvent(Sender: TObject; const ServiceNotification: TPushServiceNotification);
  end;

var
  Form1: TForm1;

implementation

{$R *.fmx}

procedure TForm1.Button1Click(Sender: TObject);
begin
  // 按下按鈕時打開 ServiceConnection
  ServiceConnection.Active := True;
end;

procedure TForm1.DoReceiveNotificationEvent(Sender: TObject;
  const ServiceNotification: TPushServiceNotification);
var
  MessageText: string;
  NotificationCenter: TNotificationCenter;
  Notification: TNotification;
begin
  // 取得通知的內容
  // 全部內容可以透過  ServiceNotification.DataObject.ToString看到
  MessageText := ServiceNotification.DataObject.GetValue('gcm.notification.body').Value;
  NotificationCenter := TNotificationCenter.Create(nil);
  try
    Notification := NotificationCenter.CreateNotification;
    try
      Notification.Name := MessageText;
      Notification.AlertBody := MessageText;
      Notification.Title := MessageText;
      Notification.EnableSound := False;
      NotificationCenter.PresentNotification(Notification);
    finally
      Notification.DisposeOf;
    end;
  finally
    NotificationCenter.DisposeOf;
  end;
end;

procedure TForm1.DoServiceConnectionChange(Sender: TObject;
  PushChanges: TPushService.TChanges);
begin
  // 取得裝置的ID跟TOKEN
  if TPushService.TChange.DeviceToken in PushChanges then
  begin
    DeviceId := PushService.DeviceIDValue[TPushService.TDeviceIDNames.DeviceId];
    DeviceToken := PushService.DeviceTokenValue[TPushService.TDeviceTokenNames.DeviceToken];
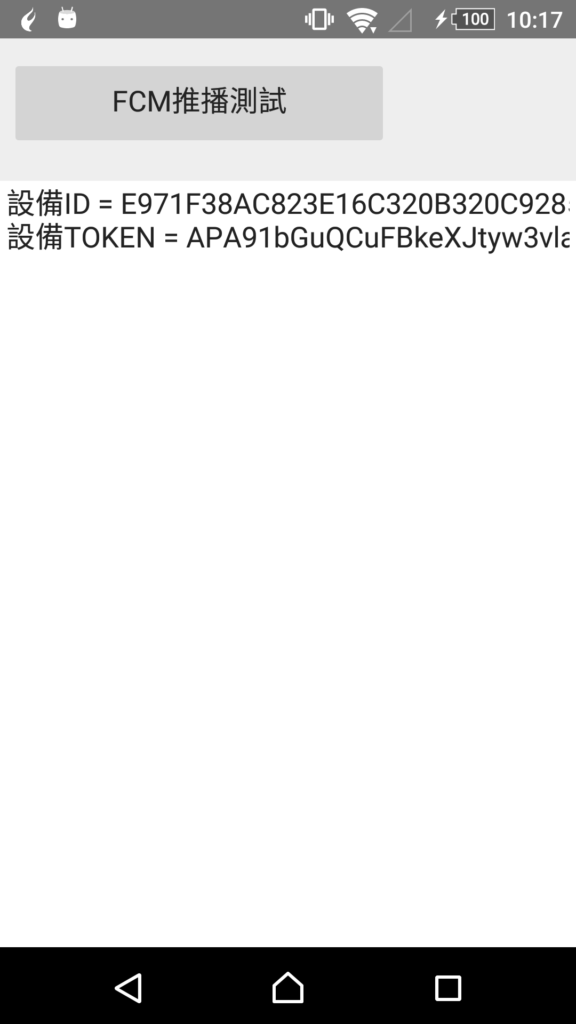
    Memo1.Lines.Add('設備ID = ' + DeviceId);
    Memo1.Lines.Add('設備TOKEN = ' + DeviceToken);
  end;
end;

procedure TForm1.FormCreate(Sender: TObject);
begin
  // 注意要把GCMAppID改成自己的
  PushService := TPushServiceManager.Instance.GetServiceByName(TPushService.TServiceNames.GCM);
  PushService.AppProps[TPushService.TAppPropNames.GCMAppID] := '220657168616';
  ServiceConnection := TPushServiceConnection.Create(PushService);
  ServiceConnection.OnChange := DoServiceConnectionChange;
  ServiceConnection.OnReceiveNotification := DoReceiveNotificationEvent;
end;

end.

十三、執行

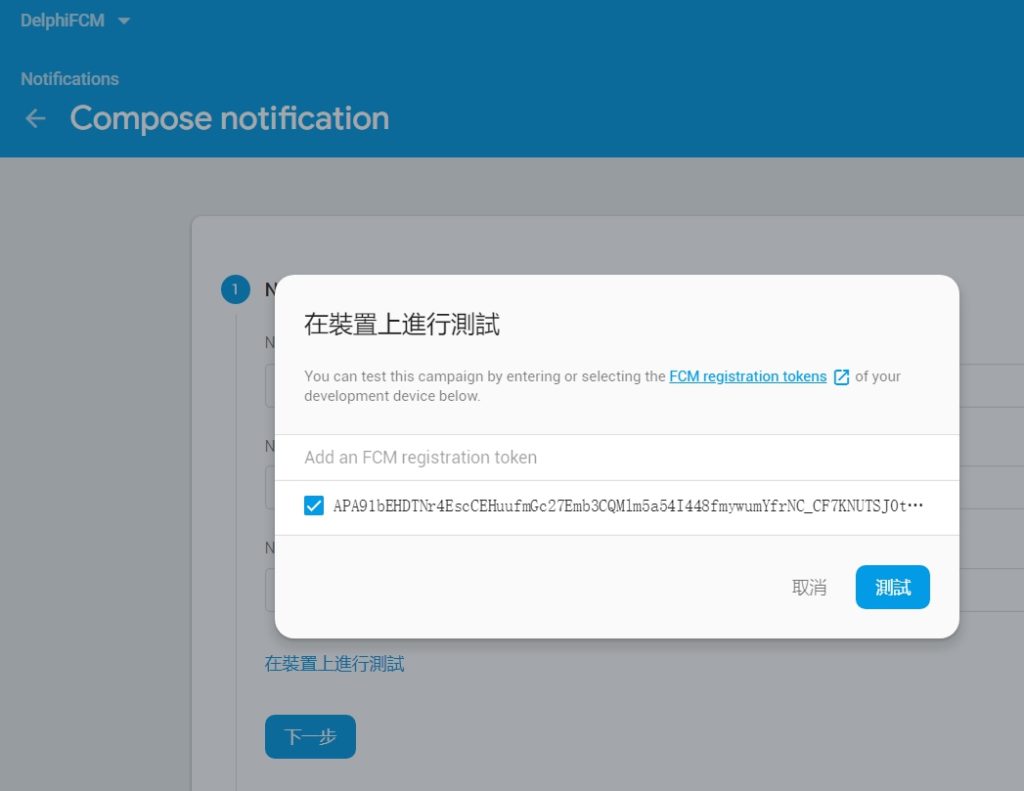
十四、記下TOKEN,回到Firebase中,選擇左邊功能列的Cloud Messageing,然後新增一筆測試訊息,將TOKEN值加入後按測試,就會收到推播訊息了。


Delphi XE6 GCM+Kinvey推播

詳盡原文刊登於 Codedata

當APP不在前景執行時,能夠用自己的平台或伺服器發送通知給行動的一項技術。在iOS平台上有APNS(Apple Push Notification Service),而Android平台上則叫做GCM(Google Cloud Messaging),在今天我們先以Android的GCM搭配BaaS服務Kinvey為例子。
Google Cloud Messaging

1.進入網站 https://console.developers.google.com
07
2.輸入專案名稱跟專案ID
08
3.完成後,記得專案編號(等等在其他設定會用到)
09
4.接著點選API 找到 Google Cloud Messageing for Anroid 後按關閉按鈕打開

1112

五、點選建立新的金鑰

13

六、點選伺服器金鑰

14

七、如果沒有特別允許使用IP可以略過後按建立就行了


15

八、一樣要記得API金鑰
17

kinvey申請

在行動裝置的開發領域目前有個BaaS(後端即服務:Backend as a Service)的技術概念。BaaS是指為行動裝置開發者提供整合雲端的基礎服務,像是資料/文件的儲存或是帳號管理、訊息推送、社群網路整合等….
而在Delphi XE6中支援二個熱門的服務為Kinvey及Parse,在這邊我們以Kinvey做為例子。
1.進入Kinvey網站(http://www.kinvey.com/)按下Sign Up註冊
01

2.註冊帳號只要電子郵件跟密碼就行了

02

3.點選Individual 個人帳戶的Get Started即可


03

4.接著建立一個新的專案,平台的話選擇Other(其他)的REST API即可
04
5.建立完成後,右下角的API Keys要記下來06

6.接著我們要建立可以存取服務的使用者,點選上面的Addons,在Core內有Users點入22

7.接著點選Add User新增使用者23

8.只要輸入帳號密碼就可以,我們建立一個test使用者24

9. 建立完成後可以看見使用者列表

25

10.接著建立待會使用的 Push Notification,一樣在Addons的目錄下有一個Messaging,裡面有一個Push

18

11.接著我們將剛才在Google控制台的專案編號填入Project ID、API金鑰填入API Key,接著按下Save GCM Configuration。右上角會由inactive轉為active。這樣就完成了相關的申請跟設定,不過先別關掉它。等等會再使用到!19 20 21

程式開發

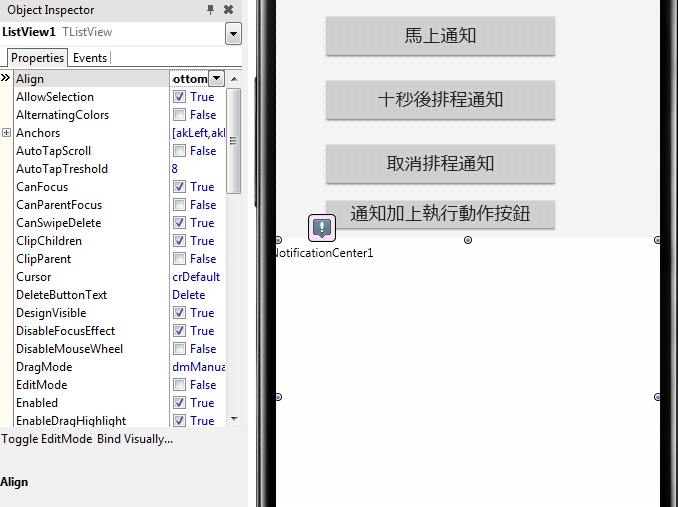
1.我們延續剛才的通知範例,在畫面加上ListView元件,將Align設為Bottom

螢幕快照 2014-06-17 下午3.40.05

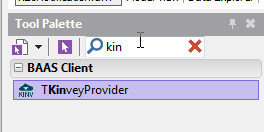
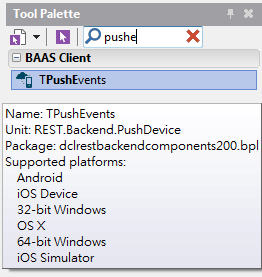
2.接著在畫面上放上二個元件,一個是TKinveyProvider以及TPushEvents

螢幕快照 2014-06-17 下午3.40.38

螢幕快照 2014-06-17 下午3.41.01

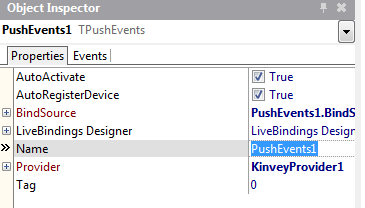
3.PushEvents1中的AutoActivate、AutoRegisterDevice設為True以及Provider指定KinveyProvider1

螢幕快照 2014-06-17 下午3.41.33

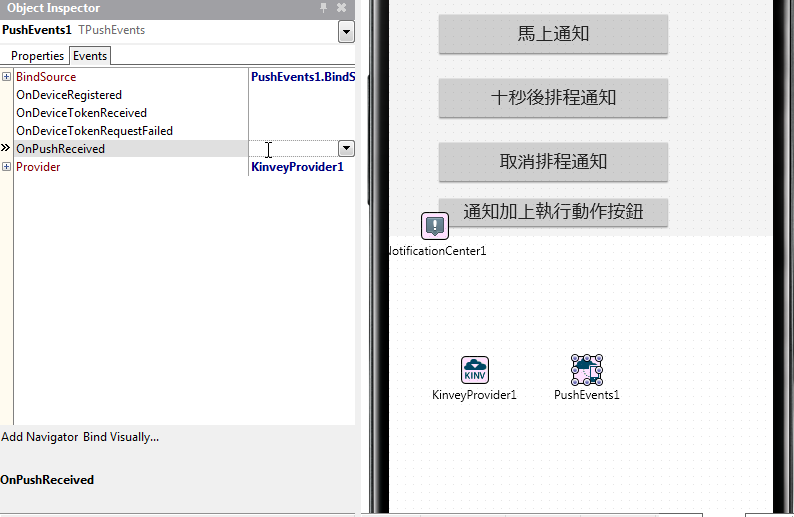
4.設定 OnPushReceived事件,在裡面的程式寫上

螢幕快照 2014-06-17 下午3.42.21

1
2
3
4
5
procedure TForm1.PushEvents1PushReceived(Sender: TObject;
  const AData: TPushData);
begin
  ListView1.Items.Add.Text := AData.Message;
end;

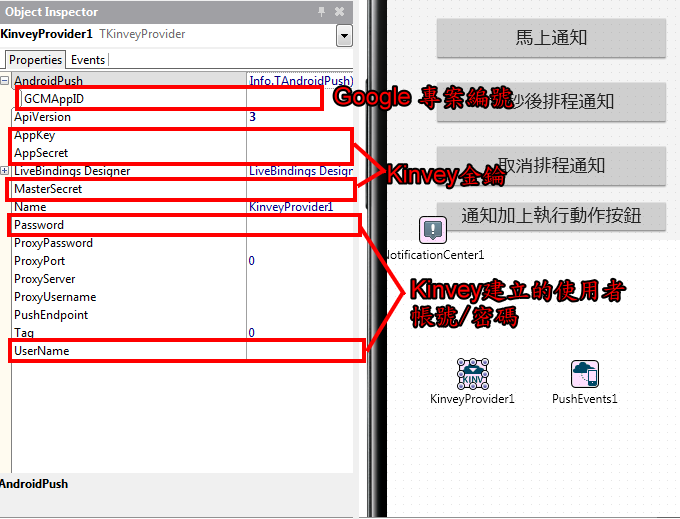
5.接著在KinveyProvider1設定相關參數
螢幕快照 2014-06-17 下午3.43.31

6.最後開啟專案目錄下的AndroidManifest.template.xml(這個檔案是Delphi編譯過程中產生AndroidManifest.xml的範本檔。

在幾個位置加入設定
.<%uses-permisson%>後面加上

1
2
3
4
5
6
7
8
9
10
11
12
13
14
15
16
17
18
19
20
21
22
<!-- GCM connects to Google Services. -->
    <uses-permission android:name="android.permission.INTERNET" />
    <!-- GCM requires a Google account. -->
    <uses-permission android:name="android.permission.GET_ACCOUNTS" />
    <!-- Keeps the processor from sleeping when a message is received. -->
    <uses-permission android:name="android.permission.WAKE_LOCK" />
    <!--
     Creates a custom permission so only this app can receive its messages.
     NOTE: the permission *must* be called PACKAGE.permission.C2D_MESSAGE,
     where PACKAGE is the application's package name.
    -->
    <permission android:name="%package%.permission.C2D_MESSAGE"
    android:protectionLevel="signature" />
    <uses-permission android:name="%package%.permission.C2D_MESSAGE" />
    <!-- This app has permission to register and receive data message. -->
    <uses-permission
    android:name="com.google.android.c2dm.permission.RECEIVE" />

.</intent-filter></activity> 後面加上

1
2
3
4
5
6
7
8
<receiver
android:name="com.embarcadero.gcm.notifications.GCMNotification" android:exported="true"
android:permission="com.google.android.c2dm.permission.SEND"
  <intent-filter>
    <action android:name="com.google.android.c2dm.intent.RECEIVE" />
    <category android:name="%package%" />
  </intent-filter>
</receiver>

接著就可以執行程式了!
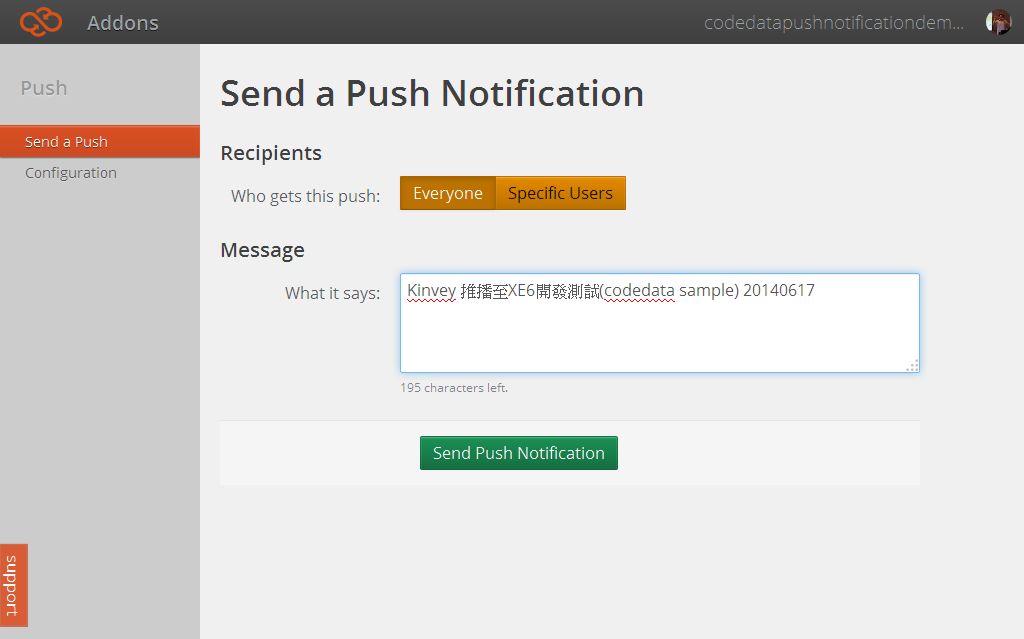
程式執行後,我們回到Kinvey網站,輸入要推播的訊息後按 Send Push Notification
pushmessage

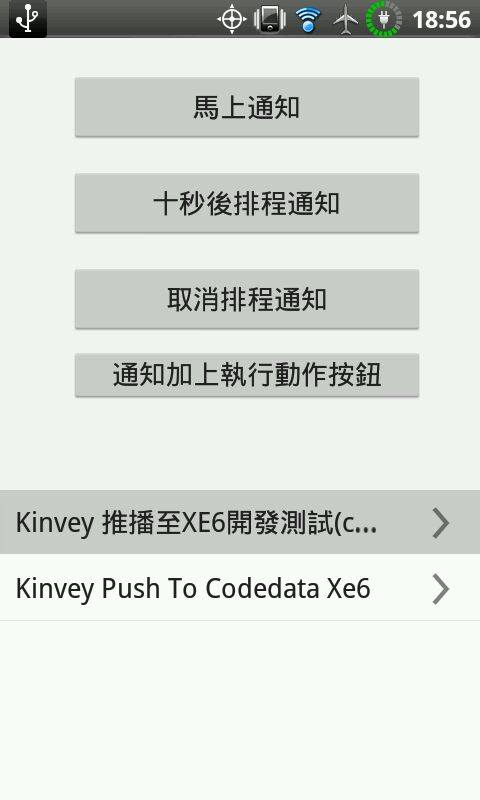
可以看到程式的Listview會出現推播的訊息。

1907712_10152077090231541_3460962835102390423_n

最後附上原始碼

https://github.com/superlevin/xe6notification